thinking outside the box
Photo Editing Basics, Part 2 – Creating the Perfect Photo


XARA TUTORIAL

© Xara Group Limited


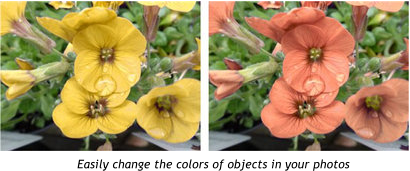
Color Select & Erase
You can easily adjust the brightness of the blue sky in your photo or remove it completely, or change the color of a flower, without affecting other parts
of the picture. The Color Select/Erase tool serves two purposes; to erase (make transparent) parts of photos based on colors, and secondly, to allow
only those color-selected areas to be adjusted using the Photo tool Enhance operations (such as Brightness, Blur, Hue etc).
For more information on Color Select & Erase see our demo movie.
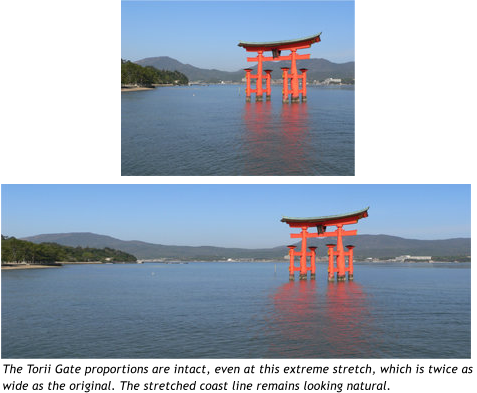
Content-Aware Photo Resize
This Photo tool includes innovative intelligent image scaling technology that allows 'content aware scaling and zoom'. Scaling enables images to be
stretched or squashed while retaining the proportions of important parts of the picture, like this image of the Torri Gate.
With content aware zoom the photo remains the same size and the content is intelligently zoomed inside it.
You can find our more about the content aware scaling in our demo movies for Content Aware Zoom and Content Aware Scale movies, and we will also
cover this tool in more detail in an upcoming Outsider tutorial (added December 2013).
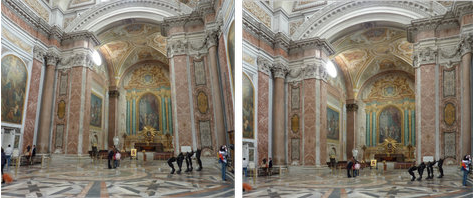
Perspective Correction
Xara Photo & Graphic Designer / Designer Pro have a simple one-click way to automatically correct common perspective effects. The image on the left,
taken inside a very large Basilica building in Rome, shows the common perspective effects of photos taken with a camera close to the ground. To get a
'straight on' photo would require it to be taken from a height of probably 30 feet. The Perspective Correction tool can create a similar effect
automatically (right example). Simply select the photo, and then the Perspective Correction tool and the process will start (it can take some time,
depending on the resolution of the image). See more in our demo movie.
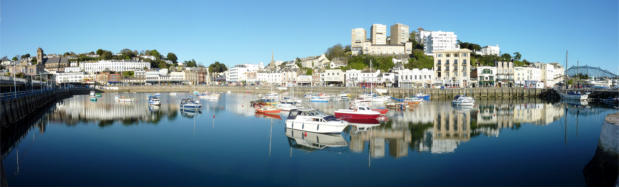
Panoramas
Users of Xara Photo & Graphic Designer / Designer Pro can create stunning panoramas by stitching photos together so that none of the joins show. Just
take your photos with an overlap, drag them into Designer, select them all, press a button and watch it join them together with seamless blended edges
to give you the perfect panorama! It's so quick and easy. For more information on using the Panorama tool see our tutorial Creating Stunning Panoramic
Photos.
So that’s a brief into to Xara photo tools. Remember also that Xara's photo and bitmap handling is faster and more powerful than you'll find in other
photo and document editing programs! Xara's non-destructive editing techniques mean losslessly edited files can be up to 10 times smaller than
alternative solutions, providing enormous benefits for speed and usability. In addition, the unique non-destructive nature maintains the high quality of
your original photo regardless of how many times you open-edit-save it. As a result many people use Xara Photo and Graphic Designer or Designer Pro as
their primary, general purpose image and document composition tool.
See Photo Editing Basics Part 1 - Formats and Sizing, an intro to the basics of terminology, editing and processing photos.
Next month: Learn about levels, brightness curves and color balance in Photo Editing Basics, Part 3.
Check out our Resource index, which offers a searchable and browsable list of movies and tutorials created by Xara and third parties.