

thinking outside the box
Photo Editing Basics, Part 2 – Creating the Perfect Photo


XARA TUTORIAL

© Xara Group Limited

An Introduction to The Photo Tools
Select the Photo tool to see the full set of photo options. Notice that the InfoBar at the top of the page will change as you select the different options
to show the controls that are relevant to that particular option. TIP: a quick way to select the Photo tool is to type the letter P (unless you're in the
Text tool of course!) or Ctrl + F6.
Enhance
Select the Enhance tool and you’ll see options on the InfoBar to manually adjust the brightness, contrast, color saturation, temperature, hue and
sharpness/blur individually. However, the auto-enhance option is a really quick and effective one-click way to enhance the photo, simply click the
Enhance button on the InfoBar. Compare allows you to compare before and after. For more information on using the Enhance tool, see our Enhancing
Your Photos Tutorial.
Next / Previous
With a photo document open i.e. a photo with no background page, Xara Photo & Graphic Designer /Designer Pro enable you to view the photos on your
computer using the next and previous buttons on the Photo Enhance tool InfoBar, just as you would in your Windows Photo Viewer.
Extra Photo Tip: Rotating Photos
You’ll also notice a handy rotate right and rotate left arrow on the InfoBar in the Enhance tool, which is a quick way of achieving a 90 degree
rotate. For more control over the rotation you can rotate a photo like any other object, in the Selector tool, by moving the mouse pointer just
inside a corner handle and dragging it around. TIP: If you hold the Ctrl key down whilst you do this, it will rotate in 45 degree increments. Or
you can enter the number of degrees in the 'angle of selection' field on the Selector tool InfoBar.
You might also want to rotate (or resize) a photo inside its frame, for instance to straighten its horizon, in which case select the Fill tool, select
the photo and drag on the end of the arrow to adjust the photo.
Crop / Clip
To crop your photo simply select the Clip tool then click and drag over your photo to define the crop area, which can be subsequently repositioned or
resized. If you don't like it you can adjust the crop later - even after it's been saved! For more information on cropping your photos, see our Cropping
Photos Tutorial.
TIP: The Clip tool provides lots of cropping options, but it's actually possible to do a really quick simple crop without going into the Clip tool. Simply
select the Photo tool and then just drag the mouse pointer over your image.
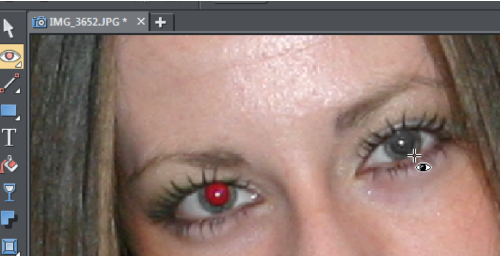
Red Eye Removal
Red eye removal is a common requirement for photos that have been taken in darker conditions or with a flash. Simply select the Red Eye tool, place
the 'cross' in the center of the red eye and drag it out to the edge of the eye pupil until all the red is removed. You can find out more about the Red eye
tool in our demo movie.
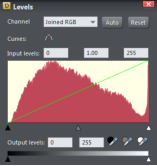
Brightness Levels
White Balance is an aspect of photography that many digital camera owners don't understand and it is frequently the cause
of bad photos.
Having the correct white balance will result in the colors in your images being as accurate as possible.
Brightness Levels are a topic in their own right so next month we’ll publish a full tutorial on levels, brightness curves and
color balance.
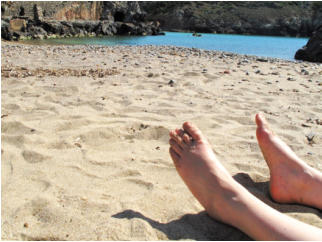
Magic Erase
Xara's Magic Erase feature makes it quick and easy to seamlessly erase an object from your photo. In the Clone / Magic Erase tool simply draw a
freehand line around the area you want to erase, then one click on the 'magic erase' button in the InfoBar, and the object is automatically erased and
replaced with a section sampled from other parts of the photo. If you don't like this replacement, just click the ‘magic erase’ button again to see
another replacement. You can then 'feather' the edges so that it blends in more seamlessly.
For more information on Magic Erase see our Magic Erase Tutorial and Removing Unwanted Objects from your Photo Tutorial.


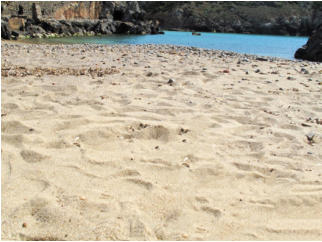
Before
After


