

thinking outside the box


XARA TUTORIAL
Text here...


Shadows
Applying a soft shadow to your rectangle can give the impression of the object being lifted off the page. With the photo or rectangle selected, click on the Shadow Tool . Now drag from the center of the photo and the shadow will be in
sight; position it slightly to the right and downward to create more distance between the photo and the imaginary wall. Alternatively, for a
different shadow effect you can select the Shadow Tool and then select the Wall, Floor, or Glow button on the Shadow Too Info Bar. To
take the sharpness off the shadow, add more blur using the Blur slider - I set mine to 0.40cm.
. Now drag from the center of the photo and the shadow will be in
sight; position it slightly to the right and downward to create more distance between the photo and the imaginary wall. Alternatively, for a
different shadow effect you can select the Shadow Tool and then select the Wall, Floor, or Glow button on the Shadow Too Info Bar. To
take the sharpness off the shadow, add more blur using the Blur slider - I set mine to 0.40cm.
 A section of the Shadow InfoBar showing the Shadow type options and the Blur slider.
 The photo in a rectangle with an outline and drop shadow
The black outline is too harsh so I shall now introduce you to the basics of the Color Editor so we can change the color of the outline.
The photo in a rectangle with an outline and drop shadow
The black outline is too harsh so I shall now introduce you to the basics of the Color Editor so we can change the color of the outline.
Colors
With the rectangle selected hold down the shift key and then click on one of the colors on the color line to change the outline color. Alternatively, you can drag a color from the color line onto the photo outline (be careful that it replaces the color of the outline and not the photo or the background – see how the mouse pointer changes when you hover over the background, outline and photo). To define your own color tone click on the color editor icon (on the left of the color line) to open the Color Editor and select the ‘Local line color’ from the drop down menu.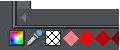 The Color editor is on the left of the Color Line
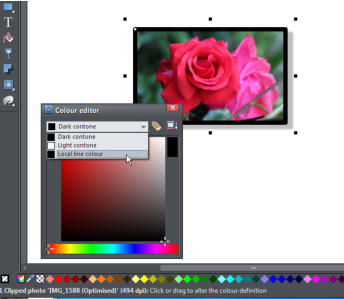 Color editor with the local line color set
You can now move the small ‘cross’ over the color to select your desired shade, or move the ‘cross’ on the hue line to change the hue. To
match a color from one of the elements of your photo select the ‘eye-dropper’ and drag it over the color that you want, then release the
mouse button to select it. (I matched a color from the leaves behind the rose.) Note that you can choose a color from any part of the
document or any part of the computer screen—even from other windows and programs.
Color editor with the local line color set
You can now move the small ‘cross’ over the color to select your desired shade, or move the ‘cross’ on the hue line to change the hue. To
match a color from one of the elements of your photo select the ‘eye-dropper’ and drag it over the color that you want, then release the
mouse button to select it. (I matched a color from the leaves behind the rose.) Note that you can choose a color from any part of the
document or any part of the computer screen—even from other windows and programs.
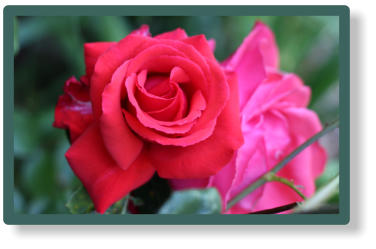 The finished framed photo
The photo within the outline is treated as a Bitmap fill – this is one of the most powerful fill types. It allows any photo to be used as a fill for
any shape and you have direct immediate control over the size, angle and position.
To demonstrate this, make a copy of the framed photo using Ctrl-C and Ctrl-V. Select the copy, drag in a photo from your File Explorer and
drop it on top of the photo. Select to import it in reduced size. The Fill Tool has automatically been selected and you can now drag the fill-
arrow heads to enlarge the photo and rotate it or drag the photo to reposition it.
The finished framed photo
The photo within the outline is treated as a Bitmap fill – this is one of the most powerful fill types. It allows any photo to be used as a fill for
any shape and you have direct immediate control over the size, angle and position.
To demonstrate this, make a copy of the framed photo using Ctrl-C and Ctrl-V. Select the copy, drag in a photo from your File Explorer and
drop it on top of the photo. Select to import it in reduced size. The Fill Tool has automatically been selected and you can now drag the fill-
arrow heads to enlarge the photo and rotate it or drag the photo to reposition it.
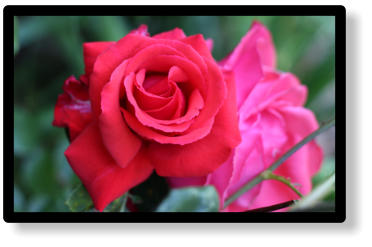
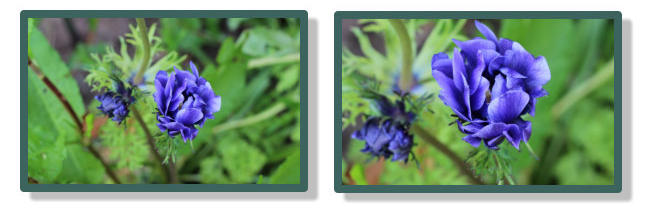 The original photo and the result after enlargement, rotation and repositioning.

