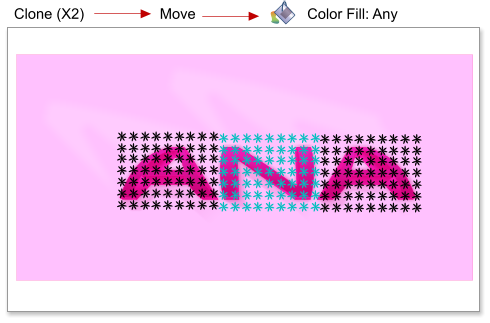
 Step 37: Group the flowers, clone the flower group two times using the shortcut Ctrl+K and place in the flowers over the letters as shown below (one
flower group per letter). Change the color of the middle flower group to some other color.
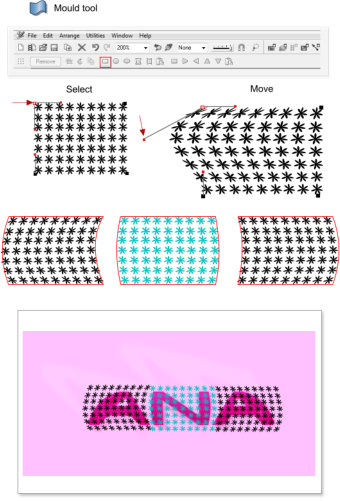
Step 38: We have to change the perspective of the flowers to fit the perspective of the letters. To change the perspective we need to use the Mould
Tool. Select the Mould Tool, set the mould to ‘default envelope’ in the InfoBar. Select one control point to see the handles, then move the handles to
change the perspective.
Step 39: We are going to paste the shapes copied in step 24, choose Edit > Paste in Place, or use the shortcut Shift+Ctrl+V.
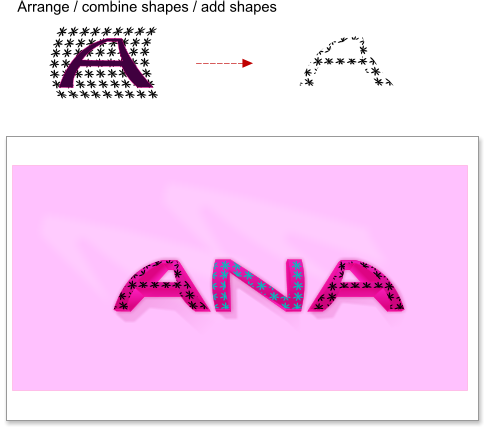
Step 40: We’re going to intersect the flowers and the pasted shapes. The intersection deletes the flower outside the shapes and keep the flowers inside
the shapes. Select the flower group and the shape then choose Arrange > combine shapes > intersect shapes or use the shortcut Ctrl+2. Do the same for
the 3 flower groups.
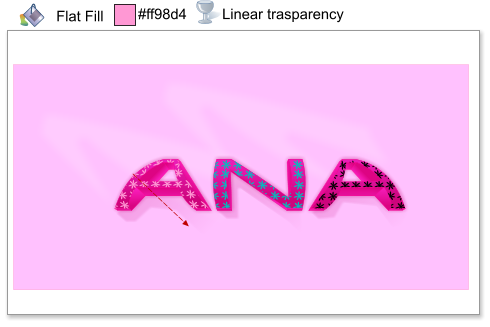
Step 41: Next select one group of flowers and add a flat color fill # ff98d4.
Step 42: With the same group of flowers still selected, apply a linear transparency from 54.5% to 79%.
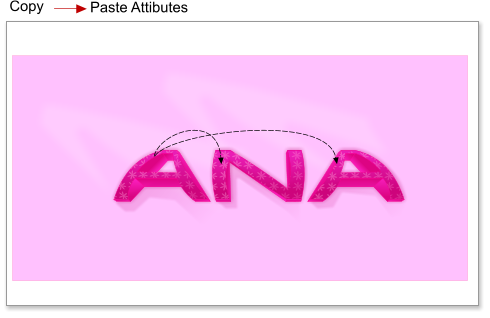
Step 43: Copy the transparent group of flowers and paste the attributes to the other two flower groups. Use the shortcut Ctrl+C to copy, and
Shift+Ctrl+A to paste attributes. Group the text and the shadows, using the shortcut Ctrl+G.
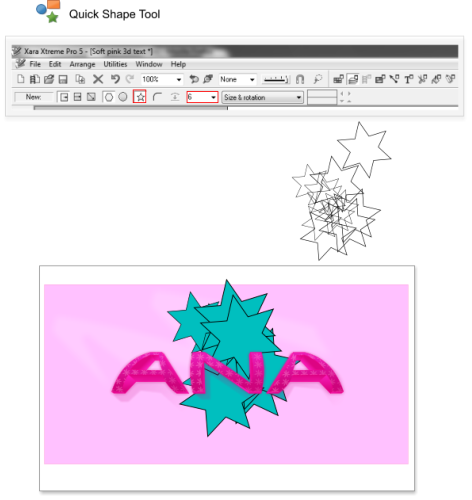
Step 44: Draw some stars using the Quickshape Tool and fill them with a solid color. Select the grouped text and send to front, using the shortcut Ctrl+F.
To create a star select the Quickshape Tool, then select the start shape in the InfoBar - by default the number of sides is 6, which is fine for our
purpose. As you can see I have created more stars to create a simulate lighting effect.
Step 45: Select all the stars and apply a 36.8 pixel feathering to them. Now you can see the intensity of the lighting, so add or remove stars if you want
more or less light.
Conclusion
As you will have noticed, you can use the feathering and the transparency tools to fade the shadows and lights. In some monitors the colors are
different or the contrast is not as good as my screen, if so just change the fill colors to change the contrast. For printing it is necessary to change the
fill colors to create a better contrast, as you should know the printer can’t reproduce as many colors as your screen.
This tutorial was created by José Campoy of Blueberry Design.
Step 37: Group the flowers, clone the flower group two times using the shortcut Ctrl+K and place in the flowers over the letters as shown below (one
flower group per letter). Change the color of the middle flower group to some other color.
Step 38: We have to change the perspective of the flowers to fit the perspective of the letters. To change the perspective we need to use the Mould
Tool. Select the Mould Tool, set the mould to ‘default envelope’ in the InfoBar. Select one control point to see the handles, then move the handles to
change the perspective.
Step 39: We are going to paste the shapes copied in step 24, choose Edit > Paste in Place, or use the shortcut Shift+Ctrl+V.
Step 40: We’re going to intersect the flowers and the pasted shapes. The intersection deletes the flower outside the shapes and keep the flowers inside
the shapes. Select the flower group and the shape then choose Arrange > combine shapes > intersect shapes or use the shortcut Ctrl+2. Do the same for
the 3 flower groups.
Step 41: Next select one group of flowers and add a flat color fill # ff98d4.
Step 42: With the same group of flowers still selected, apply a linear transparency from 54.5% to 79%.
Step 43: Copy the transparent group of flowers and paste the attributes to the other two flower groups. Use the shortcut Ctrl+C to copy, and
Shift+Ctrl+A to paste attributes. Group the text and the shadows, using the shortcut Ctrl+G.
Step 44: Draw some stars using the Quickshape Tool and fill them with a solid color. Select the grouped text and send to front, using the shortcut Ctrl+F.
To create a star select the Quickshape Tool, then select the start shape in the InfoBar - by default the number of sides is 6, which is fine for our
purpose. As you can see I have created more stars to create a simulate lighting effect.
Step 45: Select all the stars and apply a 36.8 pixel feathering to them. Now you can see the intensity of the lighting, so add or remove stars if you want
more or less light.
Conclusion
As you will have noticed, you can use the feathering and the transparency tools to fade the shadows and lights. In some monitors the colors are
different or the contrast is not as good as my screen, if so just change the fill colors to change the contrast. For printing it is necessary to change the
fill colors to create a better contrast, as you should know the printer can’t reproduce as many colors as your screen.
This tutorial was created by José Campoy of Blueberry Design.

 © José Campoy