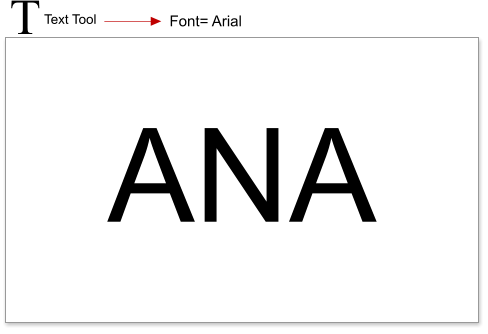


 Step 1: Select the Text tool and enter the text using the Arial font.
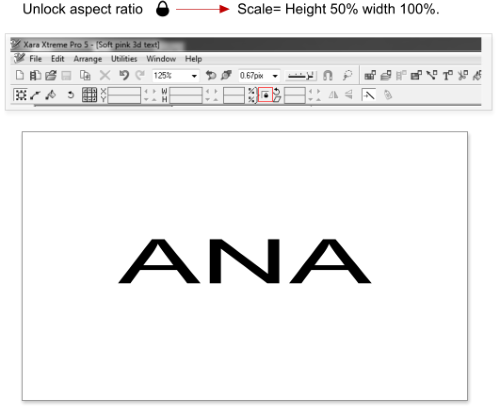
Step 2: We will start with the perspective. Scale the text height to 50%, note to scale just the height de-select the Lock Aspect Ratio button (by default
it is selected).
Step 3: Select the text and skew it. Go to skew-angle of selection in the InfoBar and apply a skew of 12 degrees.
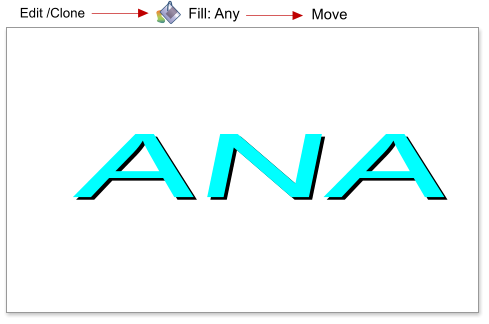
Step 4: Select the text, choose Edit > Clone or use the shortcut Ctrl+K. Change the fill color to any other color, and move it a little to the left and up.
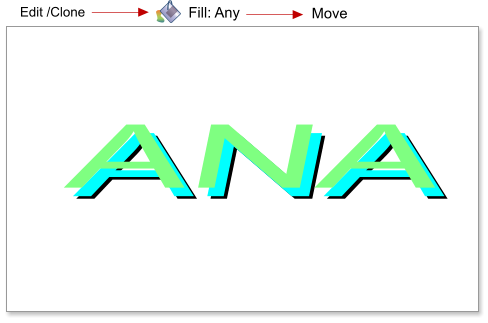
Step 5: Clone the text again (Ctrl+k), and move it but this time not so close - we need this shape as a guide for the final text height. In the rest of
tutorial I am going to call these shapes back, middle and top text.
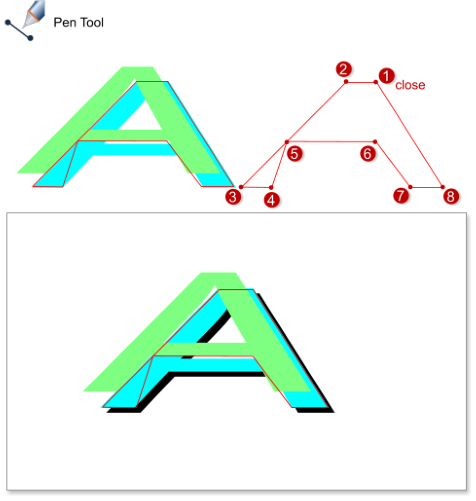
Step 6: Select the Pen Tool (N) and create a new shape. Use the middle text shape as your reference for most of the shape, because our bump effect
starts here, but as you can see in the image below point 5 & 6 use the top text as a reference.
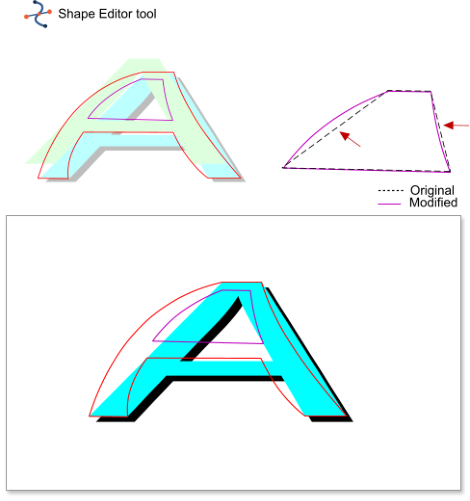
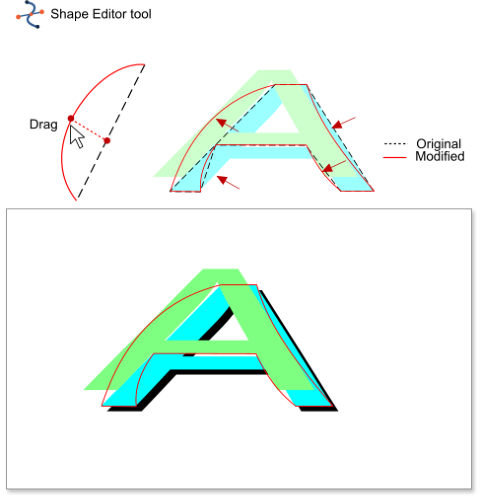
Step 7: Using the Shape Editor Tool or F4, modify the curvature of the lines. We have straight lines, we can drag the line from any point to create a
curved line (note: just use one click, if you double click over the line you will add another handle). Drag the lines and use the top text border as your
reference, now hopefully you can see the perspective.
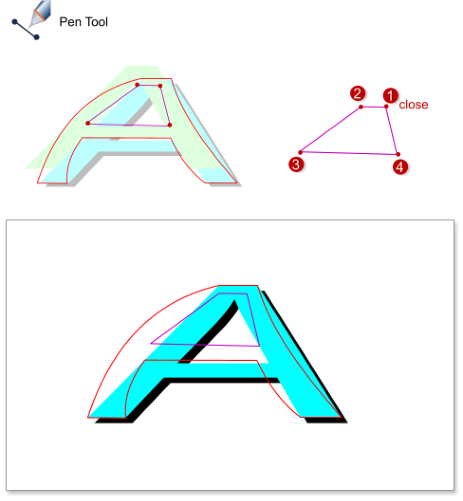
Step 8: Draw in the ‘hole’ in the middle of the A letter. The Arial font has a triangle shape in this area which I don’t much like, so I modified this part.
Step 9: Using the Shape Editor Tool modify the curvature of the shape created in the step 8.
Step 1: Select the Text tool and enter the text using the Arial font.
Step 2: We will start with the perspective. Scale the text height to 50%, note to scale just the height de-select the Lock Aspect Ratio button (by default
it is selected).
Step 3: Select the text and skew it. Go to skew-angle of selection in the InfoBar and apply a skew of 12 degrees.
Step 4: Select the text, choose Edit > Clone or use the shortcut Ctrl+K. Change the fill color to any other color, and move it a little to the left and up.
Step 5: Clone the text again (Ctrl+k), and move it but this time not so close - we need this shape as a guide for the final text height. In the rest of
tutorial I am going to call these shapes back, middle and top text.
Step 6: Select the Pen Tool (N) and create a new shape. Use the middle text shape as your reference for most of the shape, because our bump effect
starts here, but as you can see in the image below point 5 & 6 use the top text as a reference.
Step 7: Using the Shape Editor Tool or F4, modify the curvature of the lines. We have straight lines, we can drag the line from any point to create a
curved line (note: just use one click, if you double click over the line you will add another handle). Drag the lines and use the top text border as your
reference, now hopefully you can see the perspective.
Step 8: Draw in the ‘hole’ in the middle of the A letter. The Arial font has a triangle shape in this area which I don’t much like, so I modified this part.
Step 9: Using the Shape Editor Tool modify the curvature of the shape created in the step 8.

 © José Campoy