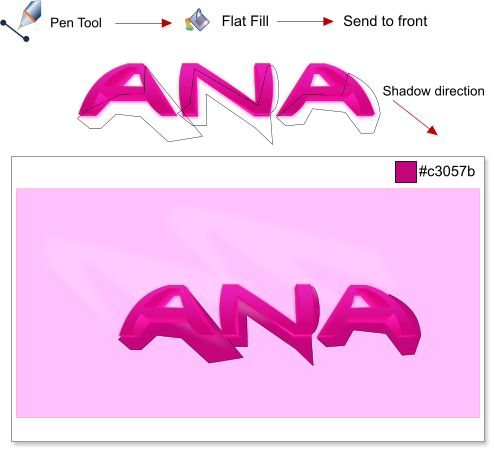
 Step 28: Next, we are going to create the shadows. Using the Pen Tool create 3 shapes, these shapes don’t need to be exactly as shown below. Apply a
flat fill color #c3057b. Select the “ANA” shapes and send it to the front using the shortcut Ctrl+F.
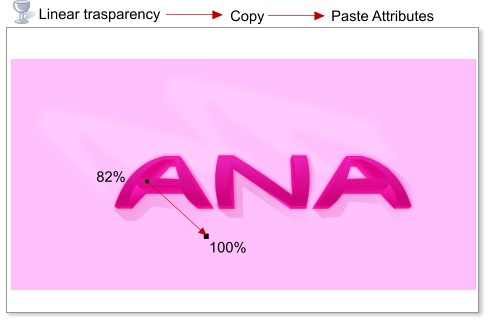
Step 29: We need to fade the shadows. Apply a linear transparency from 82 to 100%, apply the transparency just to the first A shadow shape, then paste
attributes to the N and the second A shadows, using the shortcuts Ctrl+C to copy attributes and Shift+Ctrl+A to paste attributes.
Step 30: Apply a 6.8 pixel feathering to the shadow shapes.
Step 31: Clone and mirror the first A letter, if you didn’t change the linear fill direction for both A letters in step 22. Use the shortcut Ctrl+K to clone
the A letter, then use the flip horizontally tool in the InfoBar. Move the cloned A.
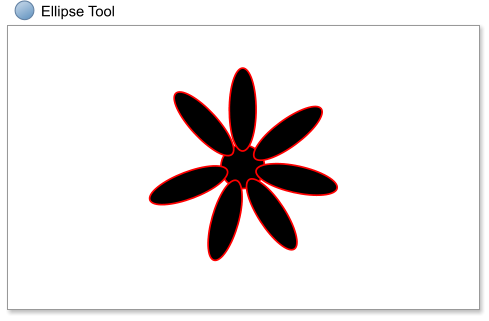
Step 32: Now we are going to create some flowers to add to the front of our text. Create a flower using the Ellipse Tool.
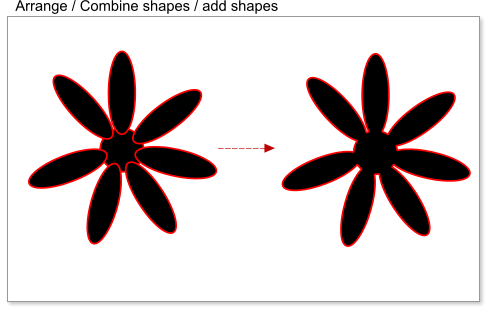
Select the flowers and choose Arrange > Combine Shapes > Add shapes, or use the shortcut Ctrl+1.
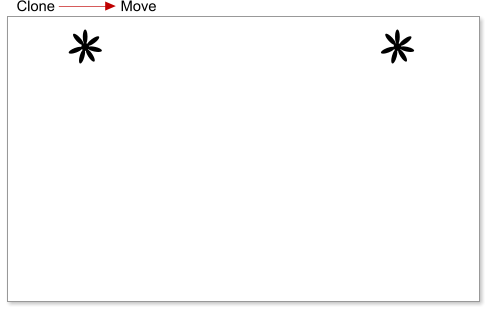
Step 33: Clone the flower and move it to the right or left, not too close.
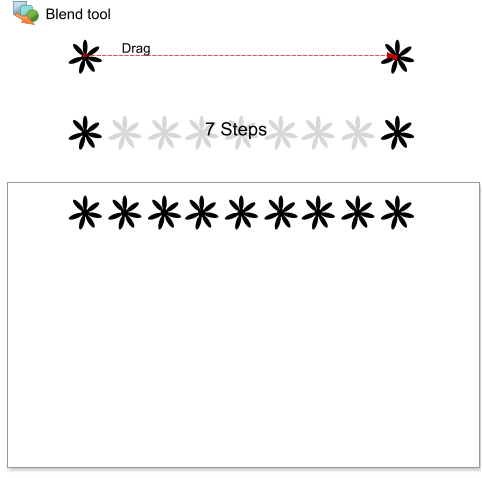
Step 34: We’re going to multiply the flower using the Blend Tool. Drag from one of the flowers to the other using the Blend Tool - you will see an arrow
but you are not moving the shapes, you are just selecting the objects to blend. As you can see the default steps value is 5 but we going to use 7 steps
(maybe the distance between your flowers is bigger than my example, in which case just increase the steps, because we want to see a regular space
between the flowers).
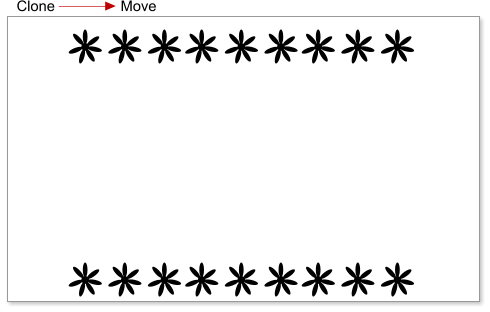
Step 35: Clone and move the blended flowers up or down.
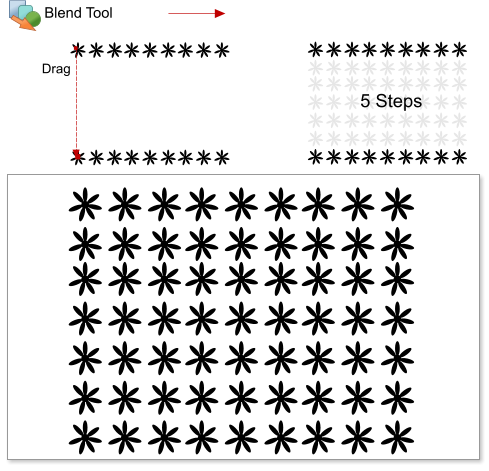
Step 36: Now we are going to reproduce the flowers again, using the Blend Tool. Press the W letter to select the Blend Tool, and drag between the
shapes. Set the steps to have a similar horizontal and vertical space between the flowers, in this example I set the number of steps to 5.
Step 28: Next, we are going to create the shadows. Using the Pen Tool create 3 shapes, these shapes don’t need to be exactly as shown below. Apply a
flat fill color #c3057b. Select the “ANA” shapes and send it to the front using the shortcut Ctrl+F.
Step 29: We need to fade the shadows. Apply a linear transparency from 82 to 100%, apply the transparency just to the first A shadow shape, then paste
attributes to the N and the second A shadows, using the shortcuts Ctrl+C to copy attributes and Shift+Ctrl+A to paste attributes.
Step 30: Apply a 6.8 pixel feathering to the shadow shapes.
Step 31: Clone and mirror the first A letter, if you didn’t change the linear fill direction for both A letters in step 22. Use the shortcut Ctrl+K to clone
the A letter, then use the flip horizontally tool in the InfoBar. Move the cloned A.
Step 32: Now we are going to create some flowers to add to the front of our text. Create a flower using the Ellipse Tool.
Select the flowers and choose Arrange > Combine Shapes > Add shapes, or use the shortcut Ctrl+1.
Step 33: Clone the flower and move it to the right or left, not too close.
Step 34: We’re going to multiply the flower using the Blend Tool. Drag from one of the flowers to the other using the Blend Tool - you will see an arrow
but you are not moving the shapes, you are just selecting the objects to blend. As you can see the default steps value is 5 but we going to use 7 steps
(maybe the distance between your flowers is bigger than my example, in which case just increase the steps, because we want to see a regular space
between the flowers).
Step 35: Clone and move the blended flowers up or down.
Step 36: Now we are going to reproduce the flowers again, using the Blend Tool. Press the W letter to select the Blend Tool, and drag between the
shapes. Set the steps to have a similar horizontal and vertical space between the flowers, in this example I set the number of steps to 5.

 © José Campoy