


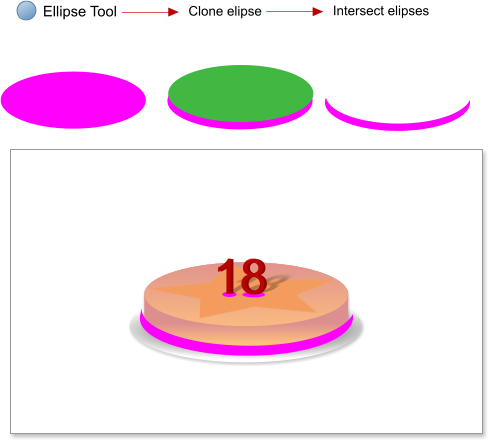
 Step 21: Create two new ellipses about the size of the cake and subtract one ellipse from the other (Arrange > Combine Shapes > Subtract shapes or
Ctrl+2), then place the resulting shape between the plate and the cake. This shape is going to be used to create a shadow.
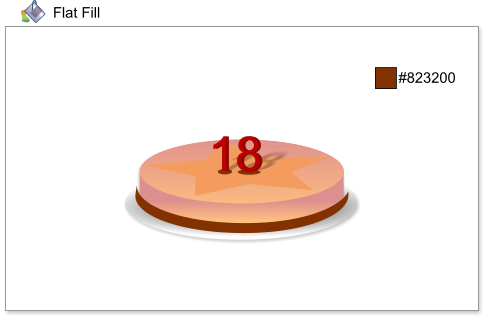
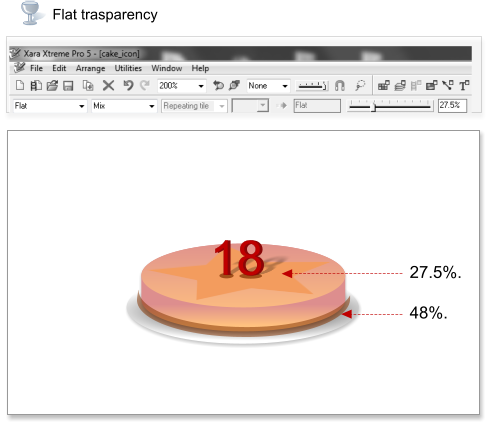
Step 22: Select the two ellipses under the number and the shape between the cake and the plate, and apply a flat fill color #823200.
Step 23: Add a flat transparency of 27.5% to the ellipses under the number, and a 48% transparency to the shape between the plate and the cake.
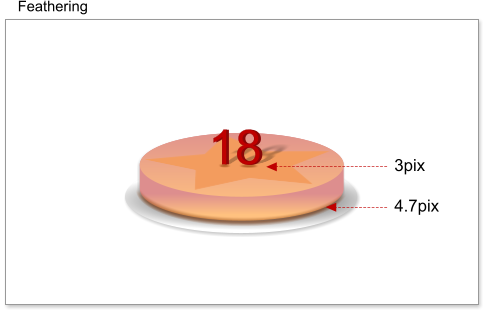
Step 24: Add feathering of 3 pixels to the ellipses under the number and a 4.7 pixel feathering for the shape between the plate and the cake.
Step 25: Now for the icing on the cake! Create a new ellipse.
Step 26: Select the ellipse and add an Elliptical Fill from white to #A8A8A8.
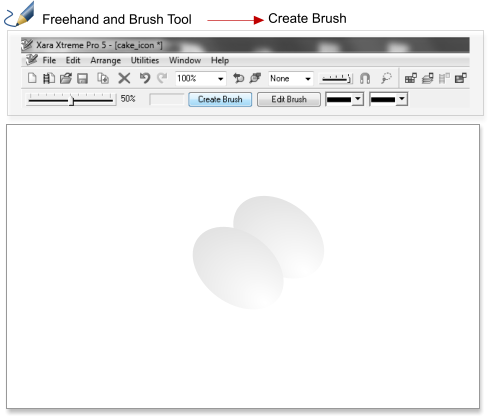
Step 27: Clone the ellipse (Ctrl+K) and move it to a side. Select both ellipses and group them using Arrange > Group or shortcut Ctrl+G.
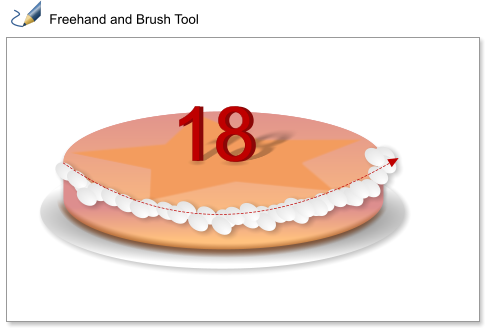
Step 28: With the grouped ellipses still selected, select the Freehand & Brush tool and click the ‘Create Brush’ button in the InfoBar. Now you have a
new brush. Play with this feature some more if you like, you can add more shapes to your brush, and also adjust eg spacing in the ‘Edit Brush’ dialog.
Step 29: Using the new brush draw a line over the cake, and increase the line width. Also add a wall shadow.
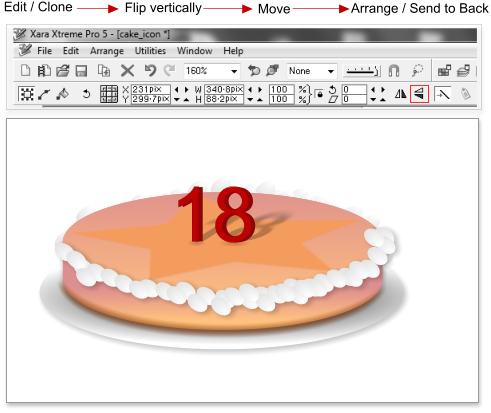
Step 30: Clone the icing on the cake (Ctrl+K) and flip it vertically, move it to the back of the cake and put it to back (Ctrl+B).
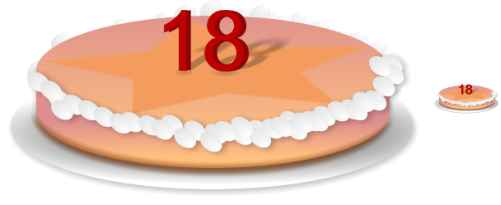
Conclusion
You can scale this icon and see how the small version of the icon still has the same level of detail.
This tutorial was created by José Campoy of Blueberry Design
Step 21: Create two new ellipses about the size of the cake and subtract one ellipse from the other (Arrange > Combine Shapes > Subtract shapes or
Ctrl+2), then place the resulting shape between the plate and the cake. This shape is going to be used to create a shadow.
Step 22: Select the two ellipses under the number and the shape between the cake and the plate, and apply a flat fill color #823200.
Step 23: Add a flat transparency of 27.5% to the ellipses under the number, and a 48% transparency to the shape between the plate and the cake.
Step 24: Add feathering of 3 pixels to the ellipses under the number and a 4.7 pixel feathering for the shape between the plate and the cake.
Step 25: Now for the icing on the cake! Create a new ellipse.
Step 26: Select the ellipse and add an Elliptical Fill from white to #A8A8A8.
Step 27: Clone the ellipse (Ctrl+K) and move it to a side. Select both ellipses and group them using Arrange > Group or shortcut Ctrl+G.
Step 28: With the grouped ellipses still selected, select the Freehand & Brush tool and click the ‘Create Brush’ button in the InfoBar. Now you have a
new brush. Play with this feature some more if you like, you can add more shapes to your brush, and also adjust eg spacing in the ‘Edit Brush’ dialog.
Step 29: Using the new brush draw a line over the cake, and increase the line width. Also add a wall shadow.
Step 30: Clone the icing on the cake (Ctrl+K) and flip it vertically, move it to the back of the cake and put it to back (Ctrl+B).
Conclusion
You can scale this icon and see how the small version of the icon still has the same level of detail.
This tutorial was created by José Campoy of Blueberry Design


 © José Campoy


 Flat transparency
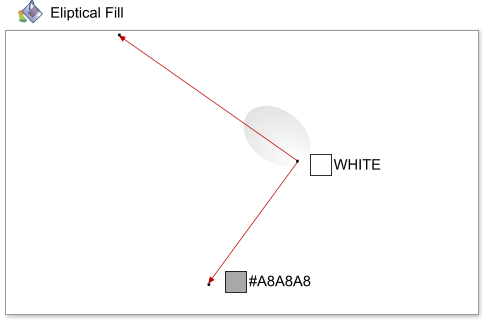
 Elliptical fill


