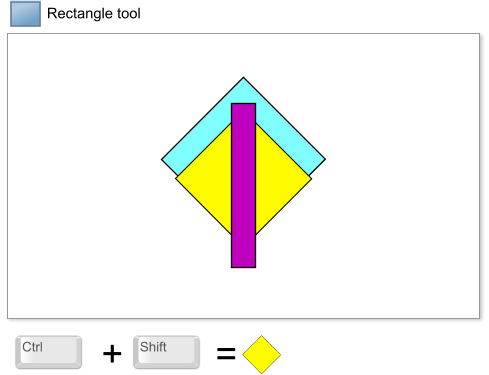
 Step 18: Next we’re going to add two arrows with a “this side up” legend. To make one arrow create two squares and one rectangle using the Rectangle
tool, as shown in the image below. To make the rhomboids hold down the Ctrl+Shift keys. Then align the 3 shapes to the center.
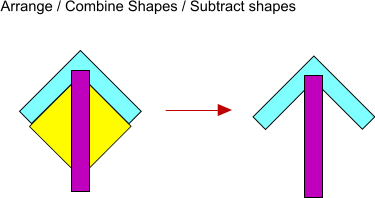
Step 19: Select the two rhomboids and subtract them, using Arrange > Combine shapes > Subtract Shapes, or the shortcut Ctrl+2.
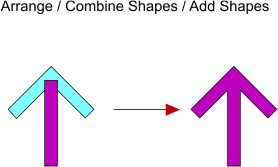
Step 20: Next merge the two shapes to finish the arrow, using Arrange > Combine shapes > Add Shapes, or Ctrl+1.
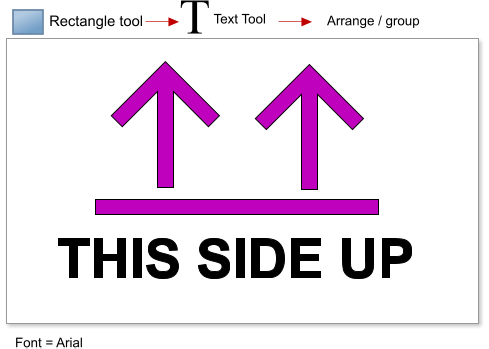
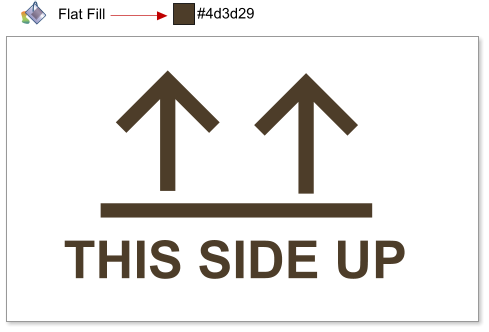
Step 21: Clone the arrow (Ctrl+K), add a new rectangle at the bottom, and add the “This side up” legend. Group the objects (Ctrl+G).
Step 22: Set the fill color to # 4d3d29.
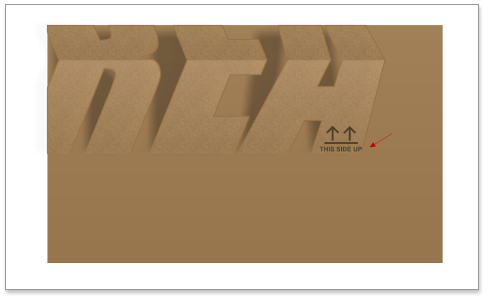
Step 23: Scale and place the arrows group in the carton text.
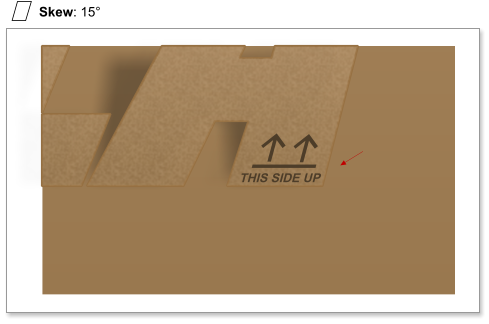
Step 24: Skew the arrows group by 15 degrees (see step 5 if you are unsure how to skew).
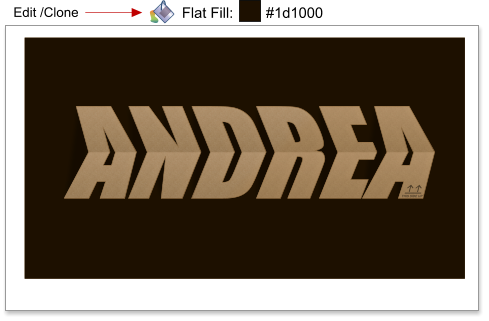
Step 24: Clone the background rectangle (Ctrl+K). Change the fill type to flat, and set the color to #1d1000. Send to back the two rectangles (Ctrl+B).
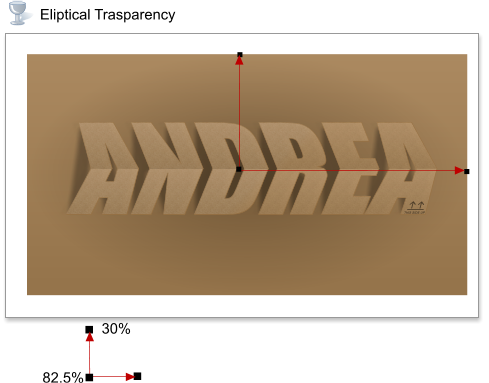
Step 25: And finally, add an elliptical transparency to the background rectangle, this is to make it darker in the center area, and create a soft shadow.
This tutorial was created by José Campoy of Blueberry Design
Step 18: Next we’re going to add two arrows with a “this side up” legend. To make one arrow create two squares and one rectangle using the Rectangle
tool, as shown in the image below. To make the rhomboids hold down the Ctrl+Shift keys. Then align the 3 shapes to the center.
Step 19: Select the two rhomboids and subtract them, using Arrange > Combine shapes > Subtract Shapes, or the shortcut Ctrl+2.
Step 20: Next merge the two shapes to finish the arrow, using Arrange > Combine shapes > Add Shapes, or Ctrl+1.
Step 21: Clone the arrow (Ctrl+K), add a new rectangle at the bottom, and add the “This side up” legend. Group the objects (Ctrl+G).
Step 22: Set the fill color to # 4d3d29.
Step 23: Scale and place the arrows group in the carton text.
Step 24: Skew the arrows group by 15 degrees (see step 5 if you are unsure how to skew).
Step 24: Clone the background rectangle (Ctrl+K). Change the fill type to flat, and set the color to #1d1000. Send to back the two rectangles (Ctrl+B).
Step 25: And finally, add an elliptical transparency to the background rectangle, this is to make it darker in the center area, and create a soft shadow.
This tutorial was created by José Campoy of Blueberry Design


 © José Campoy