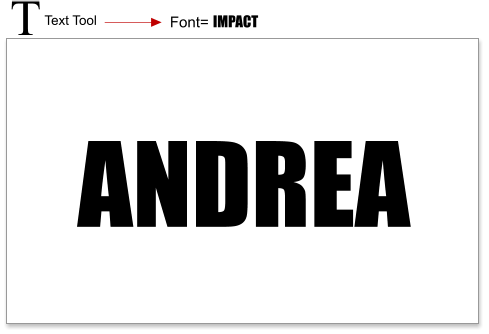
 Step 1: In this tutorial I'm using the Impact font, because I wanted a heavy font. The font size used here is 81.38 points.
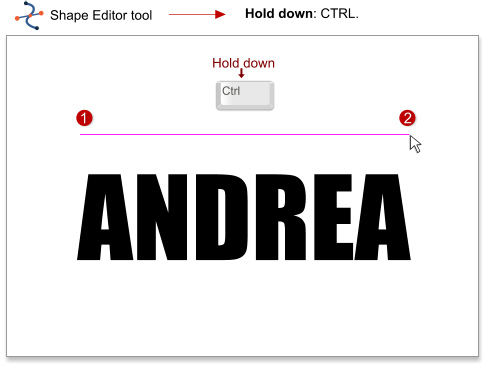
Step 2: Draw a line with the shape editor tool (F4); hold down the Ctrl key to create a straight line.
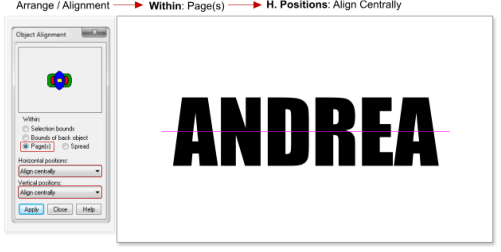
Step 3: Select the line and the text, choose Arrange > Alignment or use the shortcut Ctrl+Shift+L. In the object alignment dialog select Within Page(s),
and align centrally in both the horizontal and vertical positions.
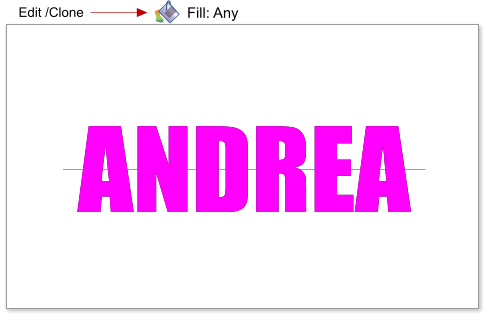
Step 4: Select the text and the line, then choose Edit > Clone or use the shortcut Ctrl+K. Then change the fill of the cloned text to some other color.
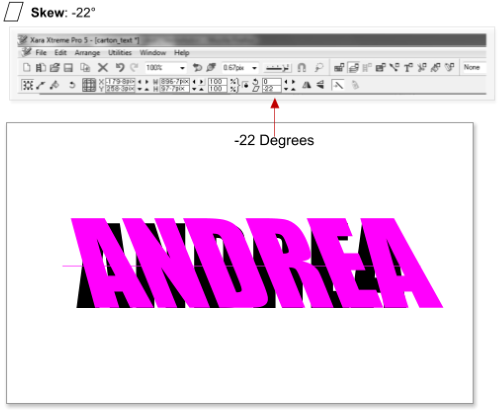
Step 5: Select the cloned text, and enter a skew angle of -22 degrees in the ‘skew-angle of selection’ field in the InfoBar (you must be in the Selector
tool to see this InfoBar).
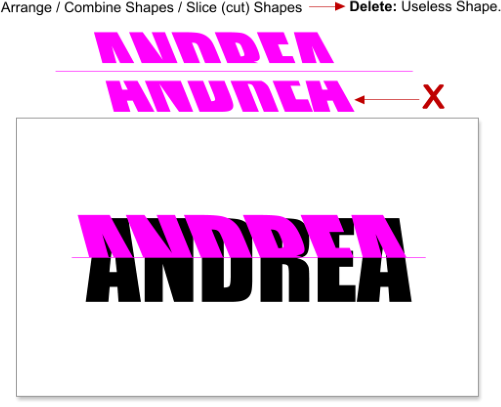
Step 6: Next we are going to slice the cloned text (that’s why we added the line).
You need the line in front because the object to be sliced should be at the back, so select the line and choose Arrange > Bring to Front, or use the
shortcut Ctrl+F, select the line and the skewed text then choose Arrange > Combine Shapes > Slice (cut) shapes, or press Ctrl+4. Delete the unwanted
bottom half of the text.
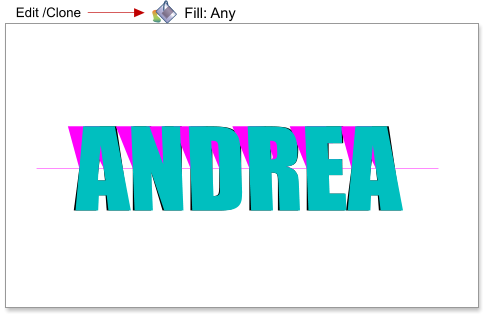
Step 7: Once again clone the original text (not the line this time) and change the color of the cloned text.
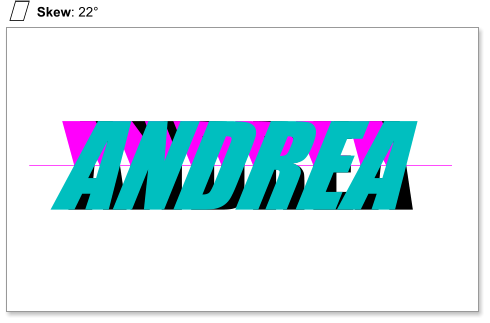
Step 8: Skew the cloned text 22 degrees. Slice the text and the shape as you did in the step 6 (remember to bring the line to front). Delete the
unwanted text again, this time the top half.
Step 9: Align the original black text as shown in the image below ie move the black text left.
Step 1: In this tutorial I'm using the Impact font, because I wanted a heavy font. The font size used here is 81.38 points.
Step 2: Draw a line with the shape editor tool (F4); hold down the Ctrl key to create a straight line.
Step 3: Select the line and the text, choose Arrange > Alignment or use the shortcut Ctrl+Shift+L. In the object alignment dialog select Within Page(s),
and align centrally in both the horizontal and vertical positions.
Step 4: Select the text and the line, then choose Edit > Clone or use the shortcut Ctrl+K. Then change the fill of the cloned text to some other color.
Step 5: Select the cloned text, and enter a skew angle of -22 degrees in the ‘skew-angle of selection’ field in the InfoBar (you must be in the Selector
tool to see this InfoBar).
Step 6: Next we are going to slice the cloned text (that’s why we added the line).
You need the line in front because the object to be sliced should be at the back, so select the line and choose Arrange > Bring to Front, or use the
shortcut Ctrl+F, select the line and the skewed text then choose Arrange > Combine Shapes > Slice (cut) shapes, or press Ctrl+4. Delete the unwanted
bottom half of the text.
Step 7: Once again clone the original text (not the line this time) and change the color of the cloned text.
Step 8: Skew the cloned text 22 degrees. Slice the text and the shape as you did in the step 6 (remember to bring the line to front). Delete the
unwanted text again, this time the top half.
Step 9: Align the original black text as shown in the image below ie move the black text left.


 © José Campoy