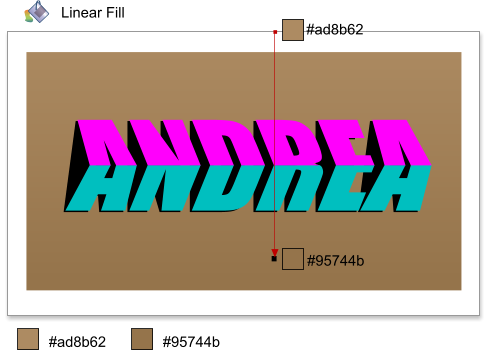


 Step 10: Create a rectangle, apply a linear fill from #ad8b62 to #95744b. With the rectangle still selected choose Arrange > Put to Back, or use the
shortcut Ctrl+B.
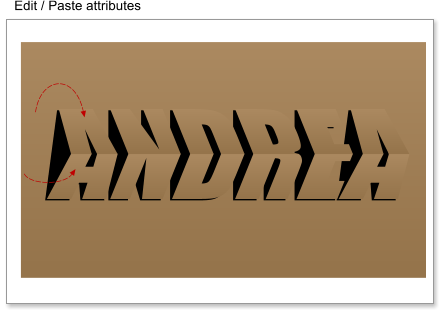
Step 11: We will use the same fill for the text, for which you need to use copy and paste attributes. So select the background and copy it to the
clipboard (Ctrl+C), now select one of the text shapes and choose Edit >Paste Attributes, or use the shortcut Ctrl+Shift+A. Do the same for the other text
shape. Group the two text shapes, either by selecting the two shapes and choosing Arrange > Group, or with the shortcut Ctrl+G.
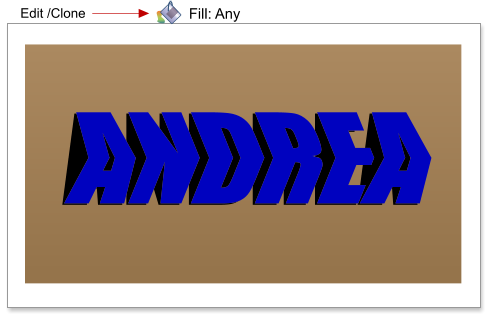
Step 12: Clone the grouped text (Ctrl+K). Fill it with any color.
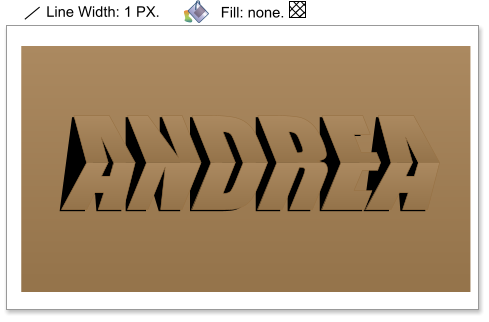
Step 13: We are going to use the cloned text to make a contour. Select the cloned text and remove the fill color by clicking the ‘no color’ square in the
color line. Set the line width to 1 pixel in the InfoBar (or use you own value, it depends of the font size), and the line color to #977143.
Step 14: Clone the grouped text (yes, again!), set the fill color to #ffe3c1.
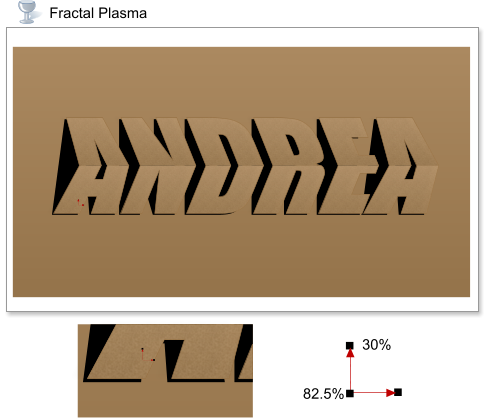
Step 15: We going to use the cloned text to make our texture, apply a fractal plasma transparency of 30% & 82.5% (center).
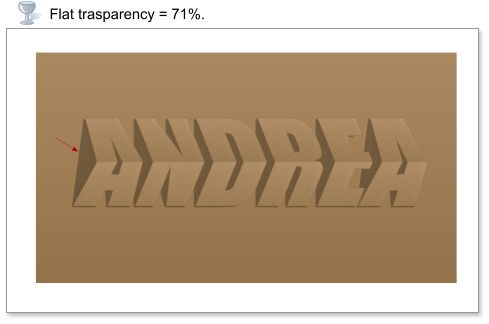
Step 16: Apply a flat transparency of 71.0% to the original text.
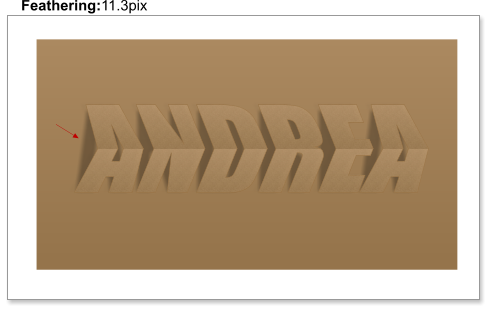
Step 17: With the original text still selected, apply a feathering of 11.3pix. This is the shadow.
Step 10: Create a rectangle, apply a linear fill from #ad8b62 to #95744b. With the rectangle still selected choose Arrange > Put to Back, or use the
shortcut Ctrl+B.
Step 11: We will use the same fill for the text, for which you need to use copy and paste attributes. So select the background and copy it to the
clipboard (Ctrl+C), now select one of the text shapes and choose Edit >Paste Attributes, or use the shortcut Ctrl+Shift+A. Do the same for the other text
shape. Group the two text shapes, either by selecting the two shapes and choosing Arrange > Group, or with the shortcut Ctrl+G.
Step 12: Clone the grouped text (Ctrl+K). Fill it with any color.
Step 13: We are going to use the cloned text to make a contour. Select the cloned text and remove the fill color by clicking the ‘no color’ square in the
color line. Set the line width to 1 pixel in the InfoBar (or use you own value, it depends of the font size), and the line color to #977143.
Step 14: Clone the grouped text (yes, again!), set the fill color to #ffe3c1.
Step 15: We going to use the cloned text to make our texture, apply a fractal plasma transparency of 30% & 82.5% (center).
Step 16: Apply a flat transparency of 71.0% to the original text.
Step 17: With the original text still selected, apply a feathering of 11.3pix. This is the shadow.


 © José Campoy