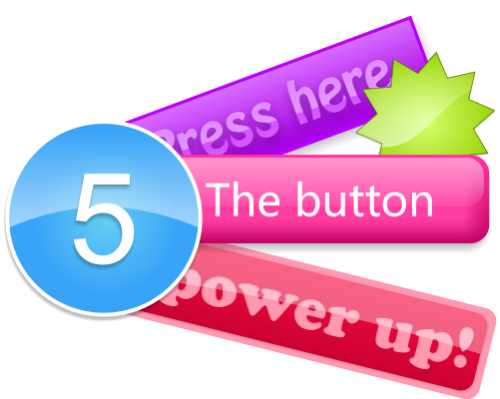
 Button 1
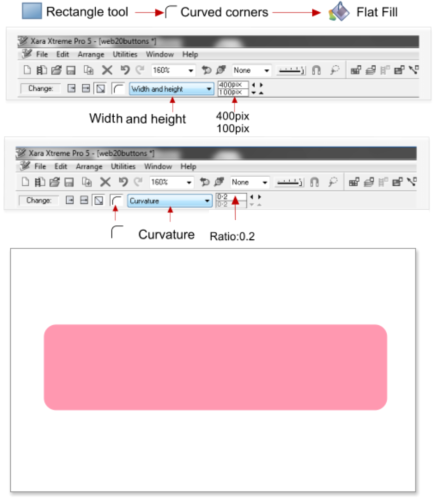
Step 1: Create a 400 X 100 pixel rectangle with rounded corners (curvature ratio set to 0.2). Fill the rectangle with a flat #ff98b0 color.
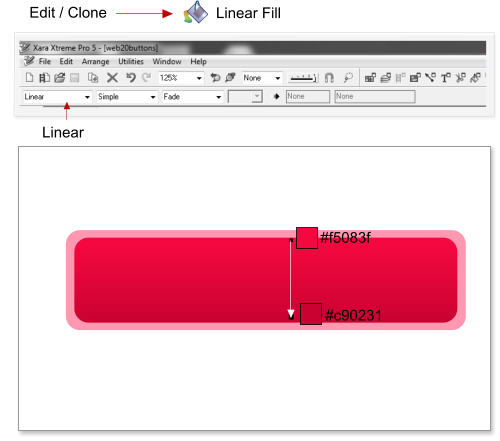
Step 2: Select the rectangle and choose Edit > Clone rounded rectangle, or use the shortcut Ctrl+K, then change the new rectangle size to 385 by 85
pixels (NB: disable the aspect ratio to achieve the exact W & H mentioned). As you can see we have reduced the width and height of the rectangle by
15 pixels, you can make it bigger or smaller as you choose. Apply a linear color fill to the new rectangle vertically from #f5083f to #c90231.
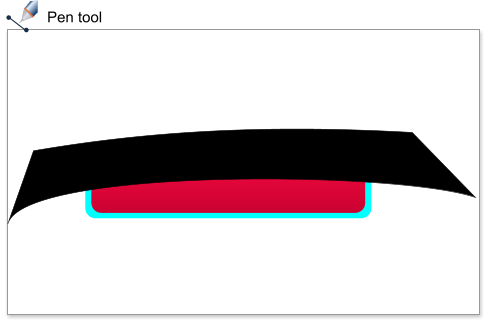
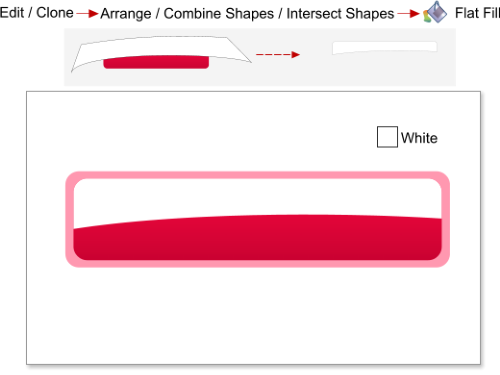
Step 3: Using the Pen tool draw a curved blacked shape over the rectangle, we need this shape for the glossy effect.
Step 4: Clone the inner rectangle using the shortcut Ctrl+K. Select the cloned rectangle and the curved shape then choose Arrange > Combine Shapes >
Intersect Shapes, or use the shortcut Ctrl+3. Give the resulting shape a white fill.
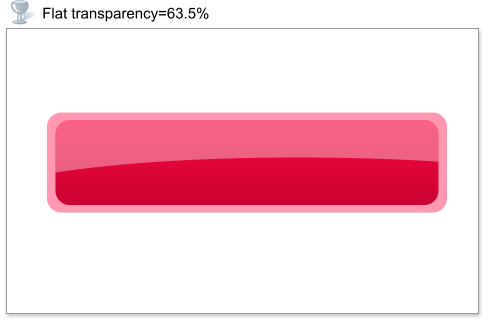
Step 5: Apply a linear transparency of 63.5% to the curved shape, to make the glossy effect.
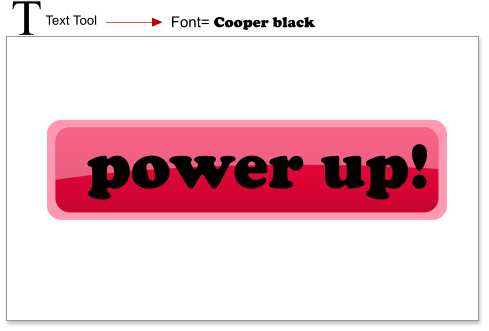
Step 6: Enter the button text. I have used the Cooper Black font at 49.65 points.
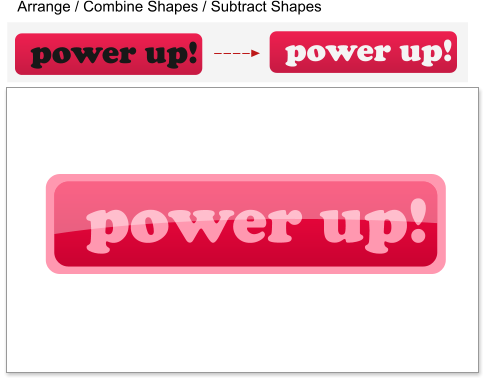
Step 7: Subtract the text from the small rectangle (to subtract shapes choose Arrange > Combine shapes > Subtract shapes).
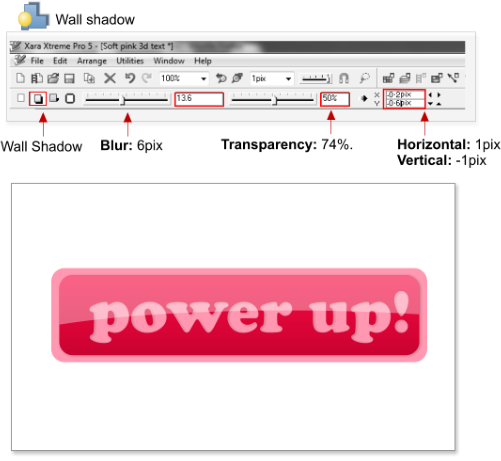
Step 8: To finish, add a wall shadow to the inner rectangle. Shadow blur=13.6 pixels, transparency=50%, horizontal and vertical positions=1 pixel.
Button 1
Step 1: Create a 400 X 100 pixel rectangle with rounded corners (curvature ratio set to 0.2). Fill the rectangle with a flat #ff98b0 color.
Step 2: Select the rectangle and choose Edit > Clone rounded rectangle, or use the shortcut Ctrl+K, then change the new rectangle size to 385 by 85
pixels (NB: disable the aspect ratio to achieve the exact W & H mentioned). As you can see we have reduced the width and height of the rectangle by
15 pixels, you can make it bigger or smaller as you choose. Apply a linear color fill to the new rectangle vertically from #f5083f to #c90231.
Step 3: Using the Pen tool draw a curved blacked shape over the rectangle, we need this shape for the glossy effect.
Step 4: Clone the inner rectangle using the shortcut Ctrl+K. Select the cloned rectangle and the curved shape then choose Arrange > Combine Shapes >
Intersect Shapes, or use the shortcut Ctrl+3. Give the resulting shape a white fill.
Step 5: Apply a linear transparency of 63.5% to the curved shape, to make the glossy effect.
Step 6: Enter the button text. I have used the Cooper Black font at 49.65 points.
Step 7: Subtract the text from the small rectangle (to subtract shapes choose Arrange > Combine shapes > Subtract shapes).
Step 8: To finish, add a wall shadow to the inner rectangle. Shadow blur=13.6 pixels, transparency=50%, horizontal and vertical positions=1 pixel.


 © José Campoy