thinking outside the box
Photo Pop-ups & Galleries For Your Website


XARA TUTORIAL
Text here...


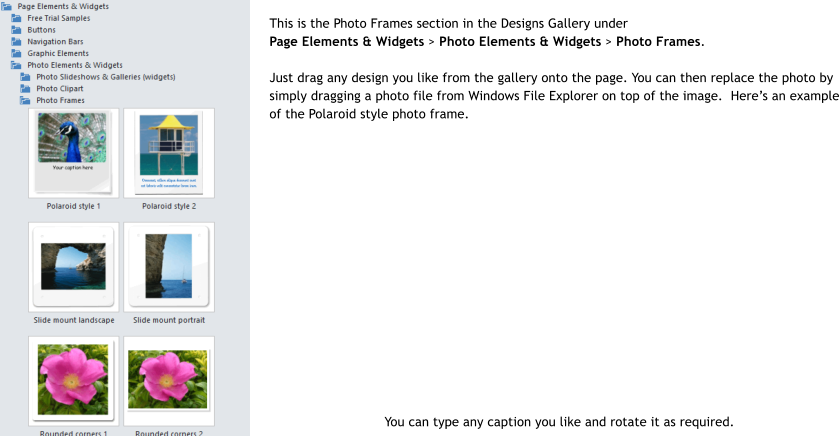
An Aside - Photo Frames
The Designs Gallery also contains a number of ready-made picture frames, which can be an attractive way to display your photo.
Custom-made Galleries
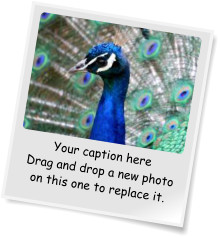
A more flexible and powerful method to create a photo gallery is to do it yourself, placing and sizing each image individually. But this can take more time than the Gallery Widget described previously, especially if you have many images. Here’s a simple example of three overlapping images as thumbnails that you can click to enlarge any one of them. The power of a custom gallery is that you can not only arrange the images exactly as you want, but you can have them different sizes, you can alter their appearance (in this example, with a soft shadow), give them each a title and/or caption. You also have more control over the pop-up features, with the ability to adjust the size and effects of the pop-up. It takes just a few seconds to create something like this: 1. Drag each image onto the page 2. Position and resize as required, they can even overlap as above. I’ve used the Shadow Tool to apply a soft shadow that lifts them off the background a bit 3. Select each, or ‘lasso select’ to select all of them, and open the Web Properties dialog by right clicking on an image or Ctrl+Shift+W. Select the Image tab and check the Pop-up photos option. That’s it. If you now preview the web page, you’ll have an effective, functional pop-up gallery with these three images. To explore more of the Pop-Up options available to you, click the Options... button in the Image tab.
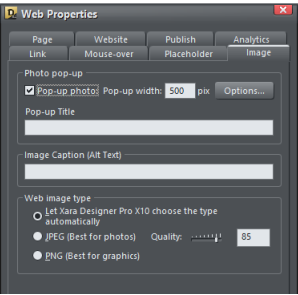
The Image tab of the Web Properties dialog where you can control the pop-up size and other effects
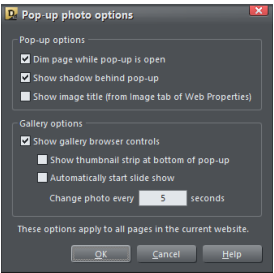
This is the Pop-up Options dialog:
I suggest you experiment with the various options that control the style of the pop-up image to see what they do. Remember to see the gallery
‘live’ you must preview the web page.
In the above example, I’ve set it so that the whole page dims when I click on a thumbnail, the pop-up has a shadow and there are gallery
browser controls allowing me to do a Next & Previous or to just auto-play as a slideshow through the images.
It’s important to understand that all images on your page will be part of this same gallery if they have the pop-up option applied to them, no
matter where they are.
A good time saver is that you can select multiple images at once and apply the same options to the whole selection. For example, to set all the
pop-up sizes to be the same 800 pixels wide, just select all the images with the Selector Tool, bring up the Image tab of the Web Properties,
and set the pop-up width value to be 800pix and click Apply.
Another useful time saver is using the Apply button, instead of the OK button, because this keeps the dialog on screen, and you can select a
different image, or group of images, and adjust their values without having to keep bringing up the dialog each time. In fact, you can select a
different image in the Selector Tool, and the dialog will update its settings to reflect the values of that image.