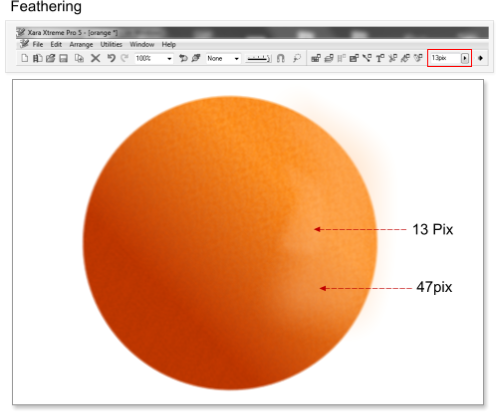
 Step 10: Apply feathering to both shapes, use a feathering of 13 pixels for the small shape and a feathering of 47 pixels for the big one.
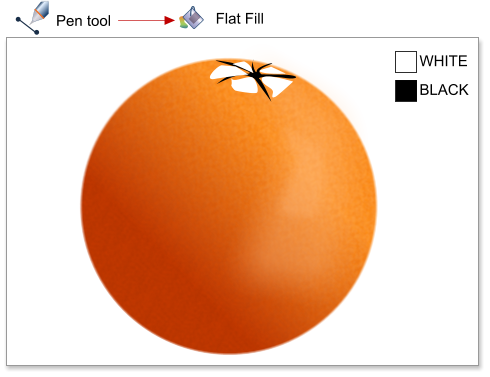
Step 11: Using the Pen tool create some shapes and fill them with black/white, as shown below.
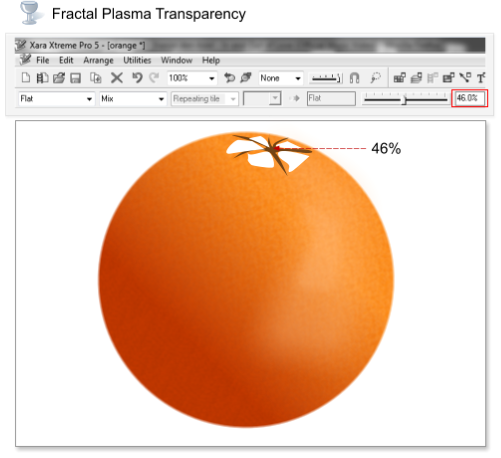
Step 12: Select the shape in the center and apply a transparency of 46%.
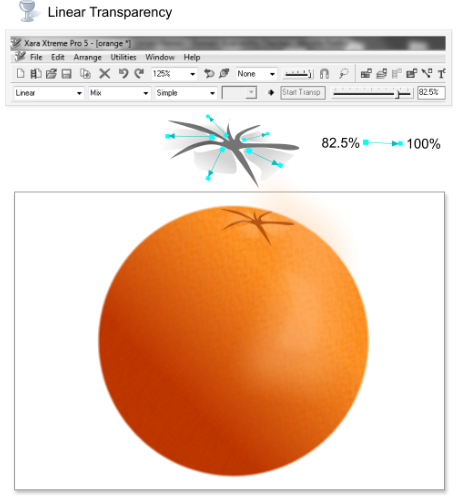
Step 13: Apply a linear transparency to the white shapes from 82.5% to 100%; see the transparency direction in the image below.
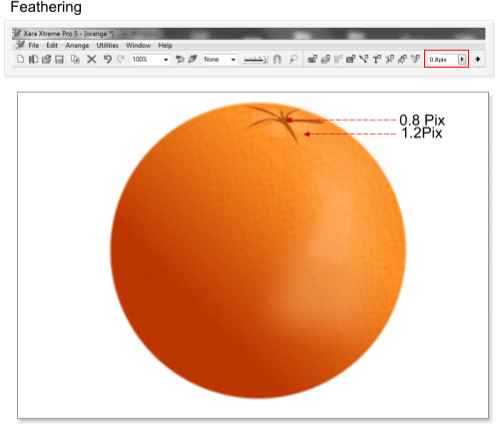
Step 14: Apply a feathering of 0.8 pixels to the shape in the middle, and 1.2 pixels to the rest of the shapes created in the step 11.
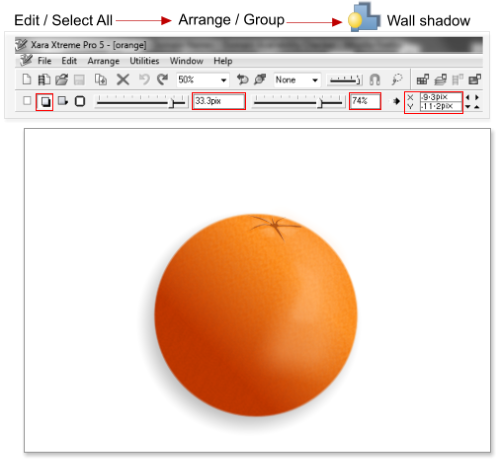
Step 15: Select all the shapes and make a new group, choose Arrange > Group or use the shortcut Ctrl+G. Add a wall shadow with the values: Blur = 25.3
pixels, transparency = 74%, position: X = -7.1 pixels, Y = 8.5 pixels.
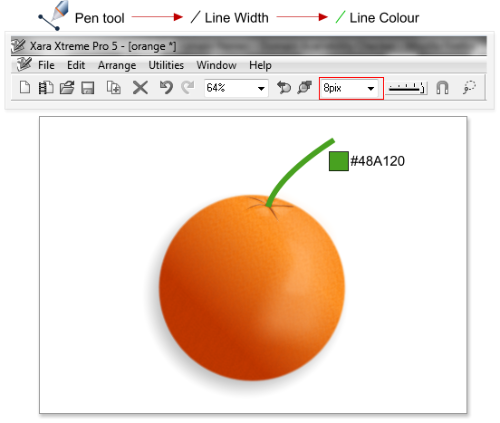
Step 16: Next I need a stalk. Using the Pen Tool create a new line, change the line width to 6 pixels and the line color to #48A120.
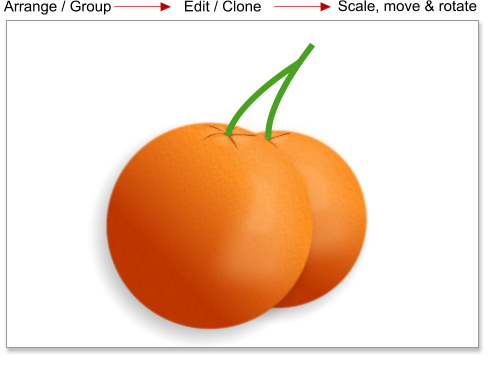
Step 17: Select all the shapes and make a new group using the shortcut Ctrl+G, then clone the group using the shortcut Ctrl+K. Scale, move and rotate
the oranges as shown below. Now we have the oranges finished we will create the leaves.
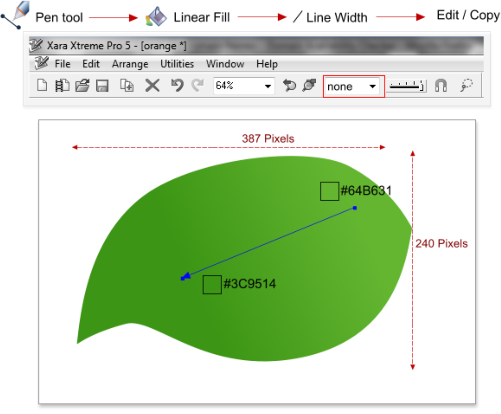
Step 18: Using the Pen tool create a new shape (around 387 X 240 pixels) and apply a linear color fill from #64B631 to #3C9514. Select the leaf shape
and copy it to clipboard using the shortcut Ctrl+C.
Step 10: Apply feathering to both shapes, use a feathering of 13 pixels for the small shape and a feathering of 47 pixels for the big one.
Step 11: Using the Pen tool create some shapes and fill them with black/white, as shown below.
Step 12: Select the shape in the center and apply a transparency of 46%.
Step 13: Apply a linear transparency to the white shapes from 82.5% to 100%; see the transparency direction in the image below.
Step 14: Apply a feathering of 0.8 pixels to the shape in the middle, and 1.2 pixels to the rest of the shapes created in the step 11.
Step 15: Select all the shapes and make a new group, choose Arrange > Group or use the shortcut Ctrl+G. Add a wall shadow with the values: Blur = 25.3
pixels, transparency = 74%, position: X = -7.1 pixels, Y = 8.5 pixels.
Step 16: Next I need a stalk. Using the Pen Tool create a new line, change the line width to 6 pixels and the line color to #48A120.
Step 17: Select all the shapes and make a new group using the shortcut Ctrl+G, then clone the group using the shortcut Ctrl+K. Scale, move and rotate
the oranges as shown below. Now we have the oranges finished we will create the leaves.
Step 18: Using the Pen tool create a new shape (around 387 X 240 pixels) and apply a linear color fill from #64B631 to #3C9514. Select the leaf shape
and copy it to clipboard using the shortcut Ctrl+C.

 © José Campoy