


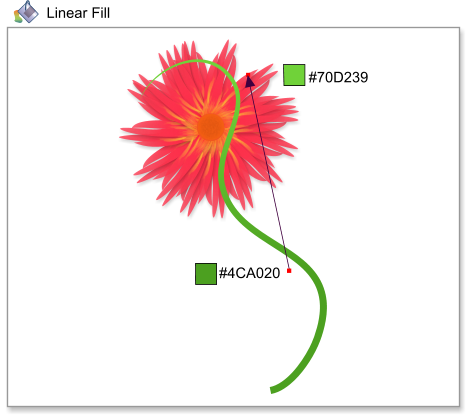
 Step 31: Apply a linear color fill to the line, from #4CA020 to #70D239.
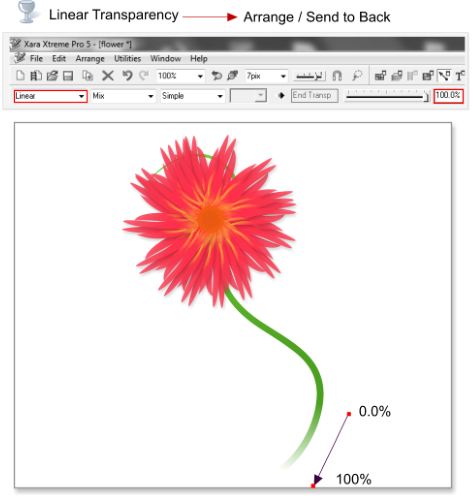
Step 32: With the same shape still selected apply a linear transparency from 100% to 0.0%, like the image below, and choose Arrange > Send to Back or
use the shortcut Ctrl+B.
Step 33: With the same shape still selected, add a feathering of 3.5 pixels
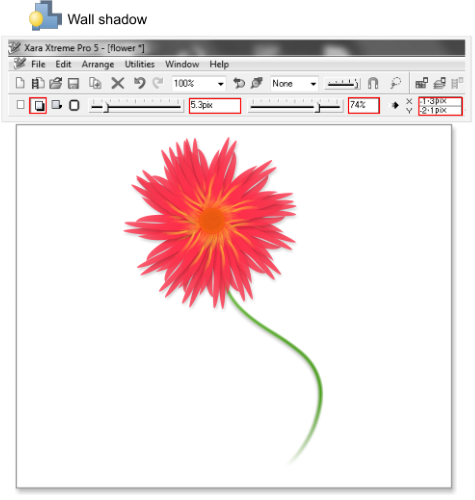
Step 34: With the same shape still selected add a wall shadow with these values: Blur = 5.3 pixels, Transparency = 74%, Position X = -1.3, Y = -2.1.
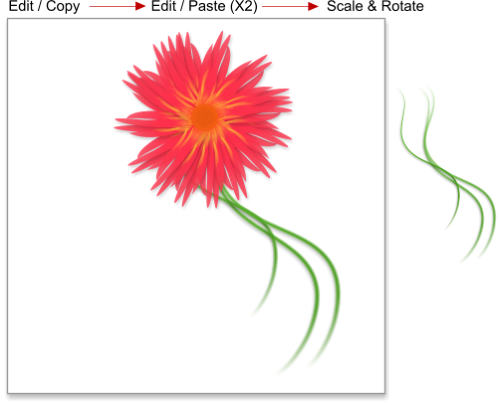
Step 35: Copy the modified line to the clipboard using the shortcut Ctrl+C, and paste the line using the shortcut Ctrl+V, then scale and rotate the
pasted shape. Paste as many shapes as you want.
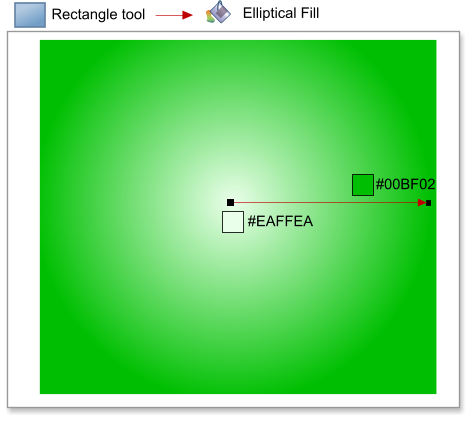
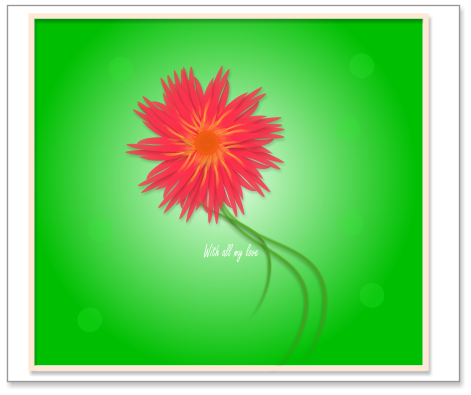
Step 36: Create a new rectangle and add a circular fill from #EAFFEA to #00BF02, and then send the rectangle to the back using the shortcut Ctrl+B.
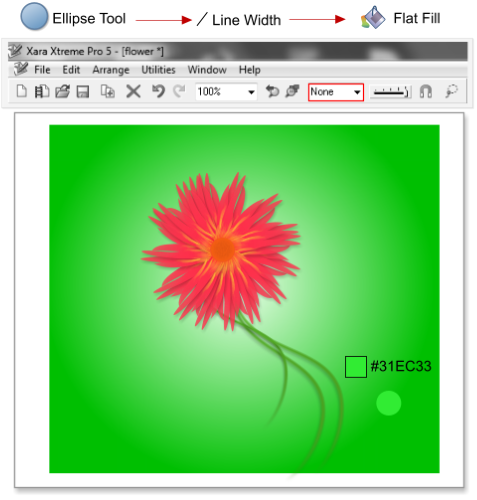
Step 37: Create a circle, or another shape if you wish. Remove the line of the new shape and fill it with the color #31EC33.
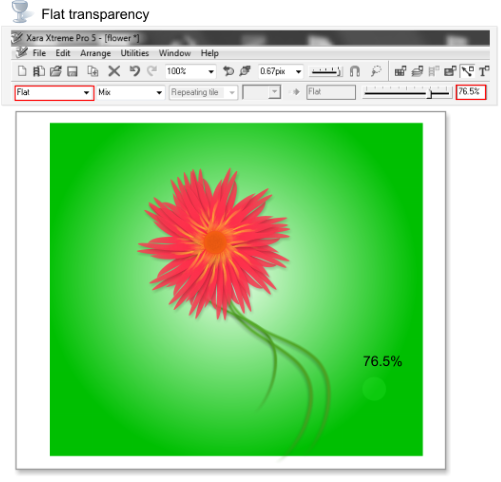
Step 38: Select the circle or the shape created in the step 37 and apply a flat transparency of 76.5%.
Step 39: Make copies of the circle around the flowers using the right click copy method mentioned above.
Step 40: You can add more elements to the illustration if you want; for example I added some text and a frame.
Conclusion: In this tutorial we used the right click copy technique. Hopefully you noticed that this method of copying is very useful. Try to make more
flowers using the same technique, this is fast and easy to do.
This flower has a lot of shapes with shadows and transparencies. Thanks to Xara Xtreme we can create this quickly. The best part of Xara Xtreme is the
performance and its ability to handle lots of shapes - it's like handling silk!
This tutorial was created by José Campoy of Blueberry Design
Step 31: Apply a linear color fill to the line, from #4CA020 to #70D239.
Step 32: With the same shape still selected apply a linear transparency from 100% to 0.0%, like the image below, and choose Arrange > Send to Back or
use the shortcut Ctrl+B.
Step 33: With the same shape still selected, add a feathering of 3.5 pixels
Step 34: With the same shape still selected add a wall shadow with these values: Blur = 5.3 pixels, Transparency = 74%, Position X = -1.3, Y = -2.1.
Step 35: Copy the modified line to the clipboard using the shortcut Ctrl+C, and paste the line using the shortcut Ctrl+V, then scale and rotate the
pasted shape. Paste as many shapes as you want.
Step 36: Create a new rectangle and add a circular fill from #EAFFEA to #00BF02, and then send the rectangle to the back using the shortcut Ctrl+B.
Step 37: Create a circle, or another shape if you wish. Remove the line of the new shape and fill it with the color #31EC33.
Step 38: Select the circle or the shape created in the step 37 and apply a flat transparency of 76.5%.
Step 39: Make copies of the circle around the flowers using the right click copy method mentioned above.
Step 40: You can add more elements to the illustration if you want; for example I added some text and a frame.
Conclusion: In this tutorial we used the right click copy technique. Hopefully you noticed that this method of copying is very useful. Try to make more
flowers using the same technique, this is fast and easy to do.
This flower has a lot of shapes with shadows and transparencies. Thanks to Xara Xtreme we can create this quickly. The best part of Xara Xtreme is the
performance and its ability to handle lots of shapes - it's like handling silk!
This tutorial was created by José Campoy of Blueberry Design

 © José Campoy
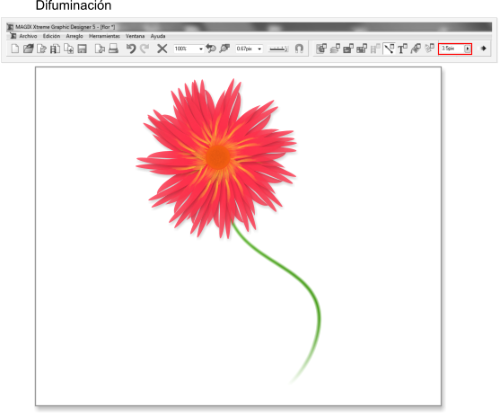


 Feathering


