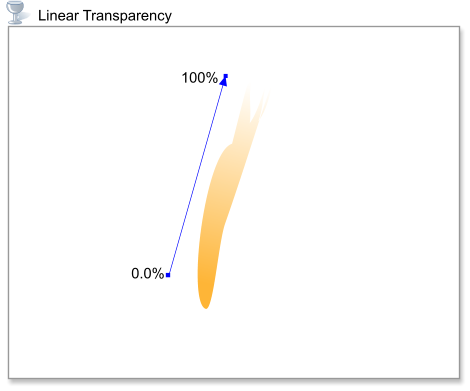
 Step 11: Add a linear transparency from 0.0% to 100% to the shape created in the step 9, as shown in the image below.
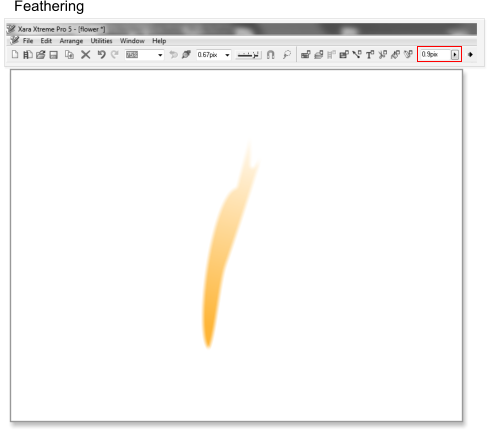
Step 12: With the same shape still selected apply a feathering of 0.9 pixels.
Step 13: Arrange the shapes as shown below.
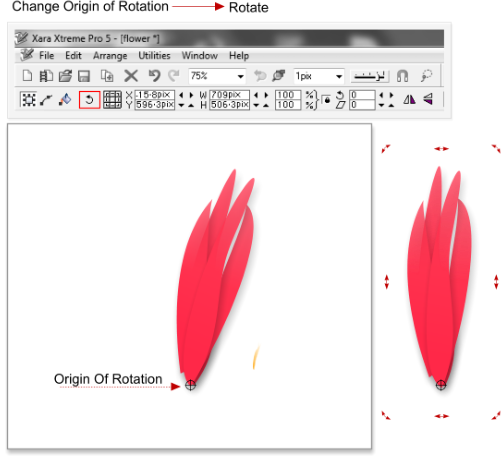
Step 14: Select all the shapes except the little orange shape, and select the ‘show rotation handles’ button in the Selector tool InfoBar (or click again
on your image), now you should see the rotation handles (arrows). Drag the origin of the rotation point to the bottom of the petals, and then rotate the
petals by dragging the rotation arrow in the top right corner. You can do it by eye, no need to enter values - the petals in the image were rotated by
about 13 degrees.
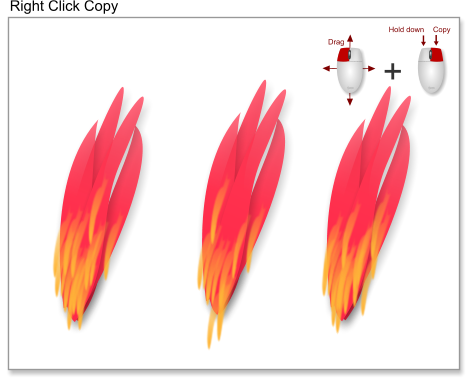
Step 15: Make copies of the small orange shape and place the new shapes over the petals. TIP: the easiest way to make copies is the right click method
ie select the shape and then drag the shape and while holding down the left button click the right button to drop a copy. Make as many copies as you
want. You can see three examples in the image below; I chose the one in the middle for my flower.
Step 16: Select all the shapes and choose Edit > Group or use the shortcut Ctrl+G
Step 17: With the group still selected click the ‘show rotation handles’ in the InfoBar again. Drag the origin of rotation point to the bottom of the
groups of petals, and then rotate the group by dragging the arrow in the top right corner, and holding down the mouse left button press the right button
to make a copy. Multiply the petals as many times as you want, the image below shows 3 examples. I chose the first one for my flower.
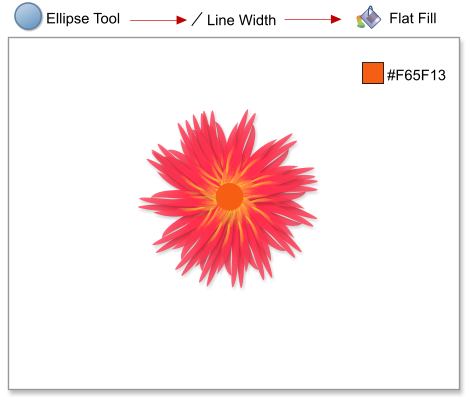
Step 18: Using the Ellipse tool create a 28 x 28 pixel ellipse in the center of the flower. Change the line width to 0 and the fill color to #F65F13.
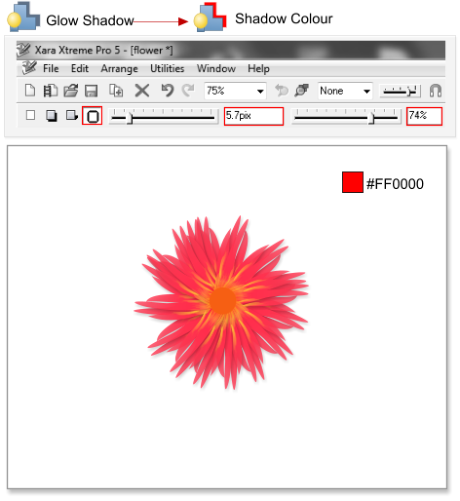
Step 19: Select the circle created in step 18 and add a glow shadow with a blur of 5.7 pixels and a transparency of 74%, and then change the shadow
color to #FF0000. To change the shadow color just drag and drop a color from the Color Line on to the shadow - in this case I’ve chosen red.
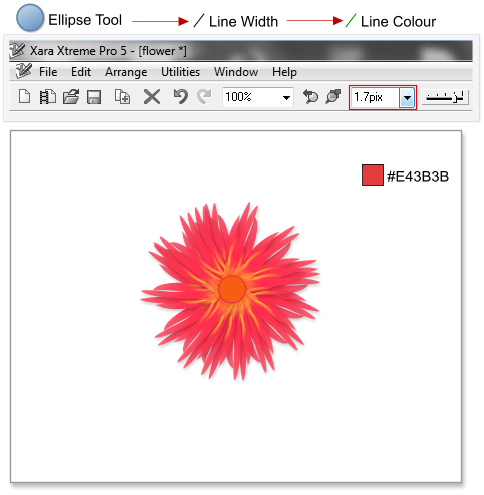
Step 20: With the Ellipse tool create a new circle over the central button of the flower; change the line width to 1.7 pixels and the line color to
#E43B3B. Remove the fill color.
Step 11: Add a linear transparency from 0.0% to 100% to the shape created in the step 9, as shown in the image below.
Step 12: With the same shape still selected apply a feathering of 0.9 pixels.
Step 13: Arrange the shapes as shown below.
Step 14: Select all the shapes except the little orange shape, and select the ‘show rotation handles’ button in the Selector tool InfoBar (or click again
on your image), now you should see the rotation handles (arrows). Drag the origin of the rotation point to the bottom of the petals, and then rotate the
petals by dragging the rotation arrow in the top right corner. You can do it by eye, no need to enter values - the petals in the image were rotated by
about 13 degrees.
Step 15: Make copies of the small orange shape and place the new shapes over the petals. TIP: the easiest way to make copies is the right click method
ie select the shape and then drag the shape and while holding down the left button click the right button to drop a copy. Make as many copies as you
want. You can see three examples in the image below; I chose the one in the middle for my flower.
Step 16: Select all the shapes and choose Edit > Group or use the shortcut Ctrl+G
Step 17: With the group still selected click the ‘show rotation handles’ in the InfoBar again. Drag the origin of rotation point to the bottom of the
groups of petals, and then rotate the group by dragging the arrow in the top right corner, and holding down the mouse left button press the right button
to make a copy. Multiply the petals as many times as you want, the image below shows 3 examples. I chose the first one for my flower.
Step 18: Using the Ellipse tool create a 28 x 28 pixel ellipse in the center of the flower. Change the line width to 0 and the fill color to #F65F13.
Step 19: Select the circle created in step 18 and add a glow shadow with a blur of 5.7 pixels and a transparency of 74%, and then change the shadow
color to #FF0000. To change the shadow color just drag and drop a color from the Color Line on to the shadow - in this case I’ve chosen red.
Step 20: With the Ellipse tool create a new circle over the central button of the flower; change the line width to 1.7 pixels and the line color to
#E43B3B. Remove the fill color.

 © José Campoy