thinking outside the box

XARA TUTORIAL


Color Select & Erase


Making changes to the selected area
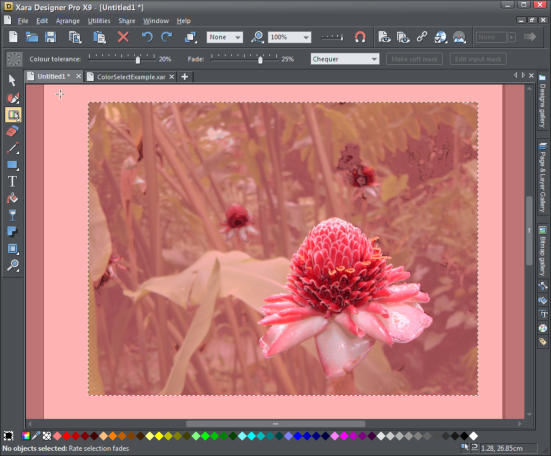
Now return to the Color select & erase tool and select the 'Make soft mask' button on the InfoBar to go into Mask mode which will display all the
non-selected/erased parts of the photo in pink - these are the masked parts that will not be affected by subsequent photo changes. Note that the 'Make
soft mask' operation is a one-way operation. Once the mask has been created the color selection points are lost, so ensure that you are happy with your
selection before taking this step. Of course you can Undo to get back to the color select mode to make any changes.
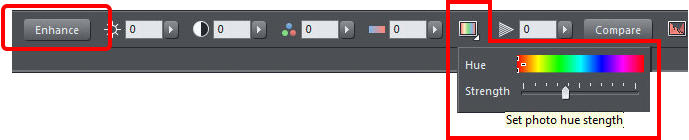
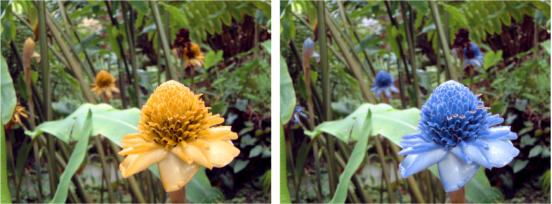
Now go into the Photo tool and select the Enhance control. I want to change the color of the flower so I select the Hue control then select the
color and then adjust its strength value. You can also adjust the brightness, contrast, saturation, etc.
The first time you make a change to any enhance slider the mask mode is cleared so you can better see the whole photo (but the mask remains
operative) - all subsequent changes of the Enhance controls will now only apply to the non-masked areas.
Notice that the color of the other flowers has also changed to match the new color and that the color balance has been retained throughout.
The wide range of shades of the flower color, from light to dark, have been re-colored, but the green leaves have not changed.
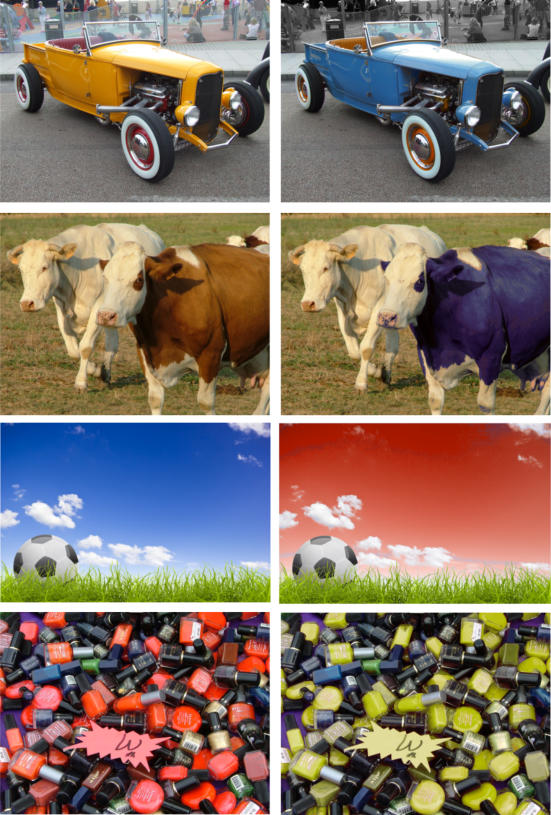
Below are a variety of examples of color changes using the same simple technique:
1. Using the Color Select & Erase tool, place your markers
2. Select the 'Make soft mask'
3. Use the Photo enhance tools to adjust the selected colors on your image.
This simple technique of erasing colors and using that area as a selection can be used to enhance parts of photos such as to brighten or add more
contrast.
Finally, in my example I wanted to change all the red flowers in the photo to be another color, but you may want to restrict the color selection to just a
portion of the image. This is easy. Just make sure that before you start the color select, that you mask the part of the image that you do not want to
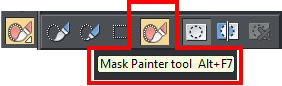
affect. You can do this using the Region Select or Mask Painter tools (This is the Mask Painter tool)
Here are some more examples of the color select in action. In all cases, after I've selected the color I've used the Hue Adjust control to change the hue
of the selected regions.
Xara Photo & Graphic Designer is the most flexible and time-saving all-in-one creative tool that provides a range of photo, graphic design and DTP
functions. At an unbeatable value for money cost, it's ideal for private and professional use: at home, in clubs, in academic institutions, and at work.
For more tutorials by Xara and third parties, check out our Resource index, which offers a searchable and browsable list of movies and tutorials created
by Xara and third parties.