thinking outside the box


XARA TUTORIAL
Text here...


Stretchy objects
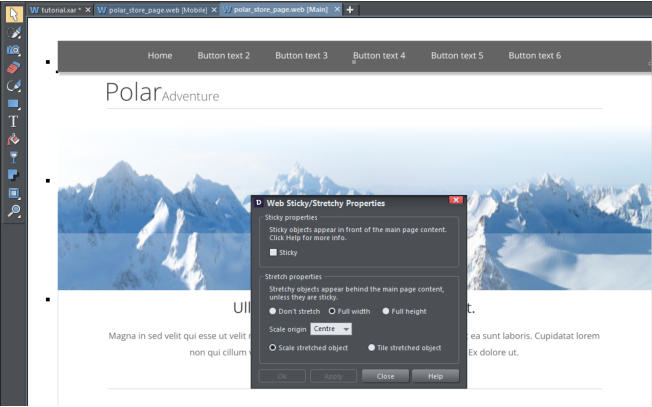
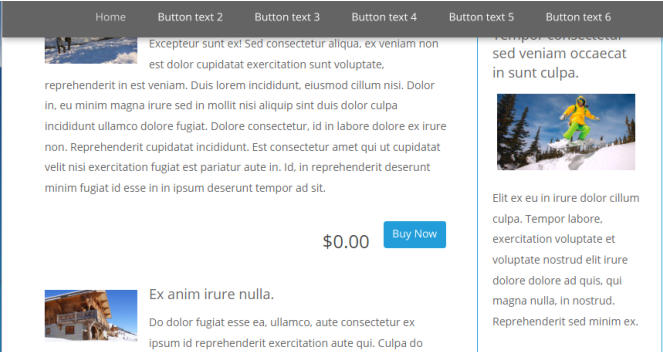
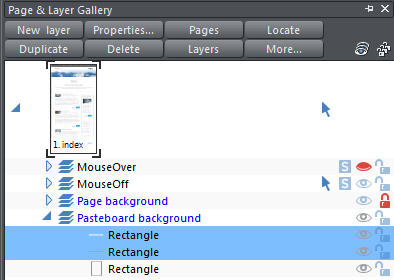
Stretchy objects are used to create 'pageless' designs where there is no obvious page boundary, ie. where page backgrounds cover the entire browser window and stretch to fill the browser width. This is only really effective for a web page that has the same color page background and pasteboard background. If the pasteboard background is a different color then the stretched object can look out of place. You can make any rectangle, line or image stretch to fill the browser window, either horizontally or vertically. I shall stretch the mountain image and the navigation bar but first, I will enlarge the mountain image downwards to make it much taller - this is the trend (large stretchy images) and ideal on this type of design. Select the image and drag on the center handle to enlarge it – this stretches the image but, for this particular photo, I‘m happy with that. (To maintain the proportions of an image, drag on the corner handle and then crop the sides of the photo to fit the width.) With the image selected right click on the mouse and choose Web Sticky/Stretchy from the menu, or select the image and go to Utilities> Web Sticky/Stretchy. Select ‘Full width’ and the scale point to be ‘center’. Keep the ‘Scale stretched object’ selected and then press ‘Apply’ (not Close). This will leave the Web Sticky/Stretchy Properties dialog open, ready for further use. Tip: The Web Properties and Web Sticky/Stretchy Properties dialogs are non-modal. This means you can keep them on screen, select the object you want to change, set your values and click Apply (not OK.) This saves a LOT of time because you do not need to keep bringing up the dialog for every time you want to make a change. Web Sticky / Stretchy Properties dialog being used to stretch the top image To see the change select the preview page option on the top InfoBar . Adjust the size of your preview window to see how the image stretches as you widen it. These stretchy objects are normally intended as page backgrounds and so they appear behind everything else on the page and often they are placed on the background layer. You may also want a sticky object to be full width or full height, for example, a sticky header or navigation bar across the top of your web page, and in this case stretchy, sticky objects automatically appear in front of your main page content. This Polar template was produced using old techniques before the new stretchy feature so, before I stretch the navigation bar, I shall remove the rectangle stripes that are now being made redundant with the new stretched top image and navigation bar. In the Page & Layer Gallery click on the triangle to the left of the page thumbnail to show the components of the page. Click on the triangle next to Pasteboard background to open up that layer and click on the red lock to unlock the layer. Select the first two horizontal rectangles and delete them (or select them in the editor to delete them). Now select the lock again to lock the Pasteboard background (the lock should now be red again). The navigation bar is in two sections – a solid rectangle and the components of the navigation buttons. To see this, select the rectangular bar by clicking near one end and drag it up, away from the navigation buttons. Now drag it back and note how it clicks back into position (this is because ‘Snap to objects’ is enabled. Click on the solid rectangle and in the Web Sticky/Stretchy Properties dialog select ‘Full width’, keep the ‘Scale stretched object’ selected and the scale origin can be ‘Center’. Then click ‘Apply’. Keep the Web Sticky/Stretchy Properties open as we shall continue to use it. (There is no need to stretch the NavBar – it will automatically stretch as you add more pages to the site.) Now stretch the thin line under the Polar heading. (I also applied a soft shadow to the NavBar background rectangle to make it appear to float above the page - 10px blur, set vertically below the rectangle.) I have applied a semi-transparent white, stretchy bar behind the word ‘Store’ as a contrast so that ‘Store’ will always be legible, even on the dark parts of the image. (To do that, select the Rectangle Tool and drag your mouse across and down to draw a horizontal rectangle across the width of the image, behind the word ‘Store’. With the rectangle still selected, drag the white color from the bottom color line and drop it onto the rectangle. This will make the rectangle white so now choose the Transparency Tool and move the transparency slider to the required value – I set mine around 75%.) Now select Arrange > Move backwards so the panel is behind the text. See the Rectangles tutorial. Now make the white, semi transparent bar stretchy. Preview the page and adjust the width of the browser so you can see the objects stretch. Stretchy navigation bar and image, with stretchy panel behind the store page titleSticky objects
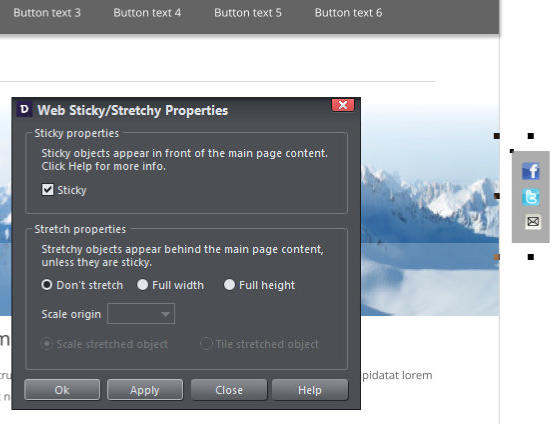
Some websites have objects on the page that stick on screen and float over the page that scrolls below. These are often navigation controls or social network icons. They tend to be stuck to the top edge of the browser window, or sometimes to the left or right edge, and can't be scrolled out of view. So you can, for example, have direct access to page navigation without having to scroll up the page. You can make any object "sticky" whether it's a graphic, a bitmap (photo) or a text object. I shall make the navigation bar and social media buttons ‘sticky’. I select the bar that I have just made stretchy and then select the option in the Web Sticky/Stretchy Properties dialog to make it ‘sticky’ and then ‘Apply’. Temporarily, move the stretchy bar up and out of the way, then select the NavBar, make it ‘sticky’ and ‘Apply’. Now select the stretchy/sticky bar and move it back into place. Preview the page and scroll down – you will see that the NavBar remains in full view at the top as you scroll. My sticky NavBar remains at the top of the page Now for the social media buttons. I could make them sticky in their current position but it is far better to make them sticky vertically outside of the main page area so they stick to the right edge of the browser as the screen is resized. Select each of the social media buttons in turn and position them vertically outside of the right margin, centered alongside the mountain image. Being off the right side of the page means it sticks to the right edge of the browser. The vertical height determines the vertical position. Guidelines will help you position them in line but you may wish to increase your zoom view to be larger so you can ensure that they are exactly in line. I shall encompass the social media buttons within a semi-transparent black rectangle to make them visible on the pale photo background. Select the Rectangle Tool on the main Toolbar (or Shift-F3). Click and drag the mouse over the 3 social media buttons to draw a vertical rectangle larger than the overall size of the 3 buttons. The previous rectangle was white which has now become the default color, so drag the black color from the color line onto the rectangle. With the rectangle still selected, select the Transparency Tool and use the slider on its InfoBar to make it about 70% transparent. Select Arrange > Put to back (on the top Tool bar). Now position and resize the rectangle, if necessary, to fit neatly around the 3 buttons. Select the Selector Tool and lasso around the background rectangle and the buttons to select them all, then from the top tool bar select Arrange > Apply soft group. Tip: ‘Soft Grouping’ objects allows the whole thing to be moved around as a group whilst retaining the layers - so you'll note the fade mouse- over effect still works. Don't ‘group’ them as that will collapse the Mouse-Over layer onto the Mouse-Off layer, which you do not want. With the group selected, click ‘sticky’ and ‘Apply’ in the Web Sticky/Stretchy Properties dialog Sticky social media icons, with a background panel, positioned alongside the top image Now close the Web Sticky/Stretchy Properties dialog a, and preview the page to see the sticky objects. Sticky items normally float on top of the rest of the page, so would normally be arranged to be at the front of all the page content. However, you can also have sticky objects behind your page content if you place them on the Pasteboard Background layer.


Stretchy, Sticky and Animated Objects on your Website