

thinking outside the box
Working with Layers


XARA TUTORIAL
Text here...


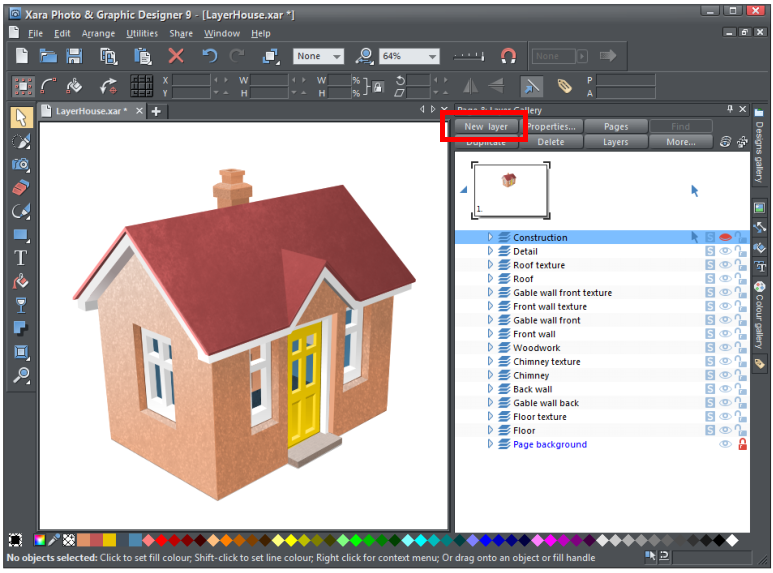
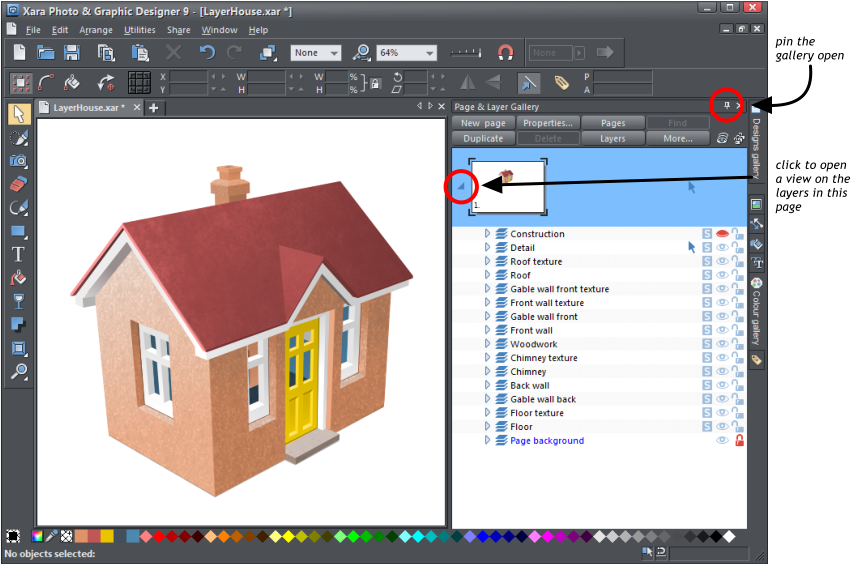
Open up Photo & Graphic Designer and drag the ‘layerhouse’ file into the editing area. Select the Page and Layout Gallery vertical tab on the right and
then select the ‘pin’ icon above it to pin it open. Click on the arrow next to the page thumbnail to display the layers that form the page.
The Page & Layer Gallery, ‘pinned’ to remain open, showing all the layers in this document
Current Layer
When you create any new object on a page, it's placed on the current active layer. The current layer is shown with a selection arrow which you will see
alongside the ‘Detail’ layer in our layerhouse (on a blank document this will be called Layer 1). You can change the current layer simply by clicking on
its row in the Layer Gallery.
You can easily create new layers with the ‘New layer’ button at the top of the Page & Layer Gallery (this option is only available if you have a layer
selected). To change the name of a layer, simply click on the name and type in its new name.
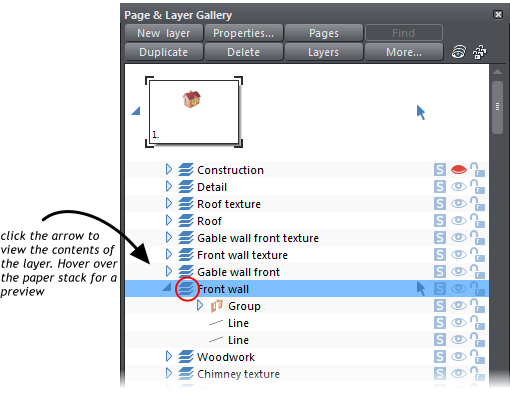
To the left of the layer’s name, click on the small arrow to view the contents in that layer. Mouse over the paper stack icon and you will see a
preview thumbnail of the content of that layer.
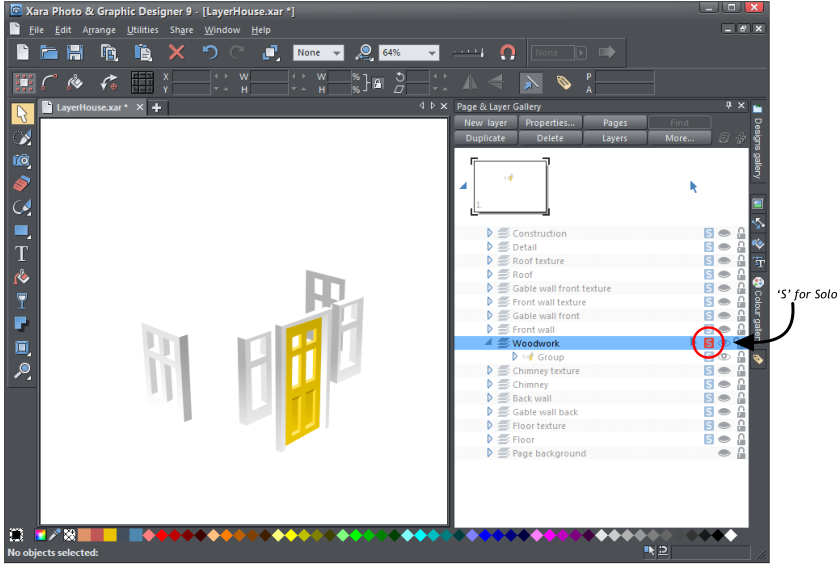
‘Solo’ a Layer
Click on the ‘S’ icon in the column next to a layer and it will ‘solo’ the layer, which means that it hides everything else, except this layer, enabling you
to work on this layer in isolation. Clicking the ‘S’ icon again will restore everything back as it was before. You can also ‘click and drag’ down the column
of ‘S’ icons to quickly browse through the individual layers.
Setting the Woodwork layer to Solo enables me to work only on that layer.
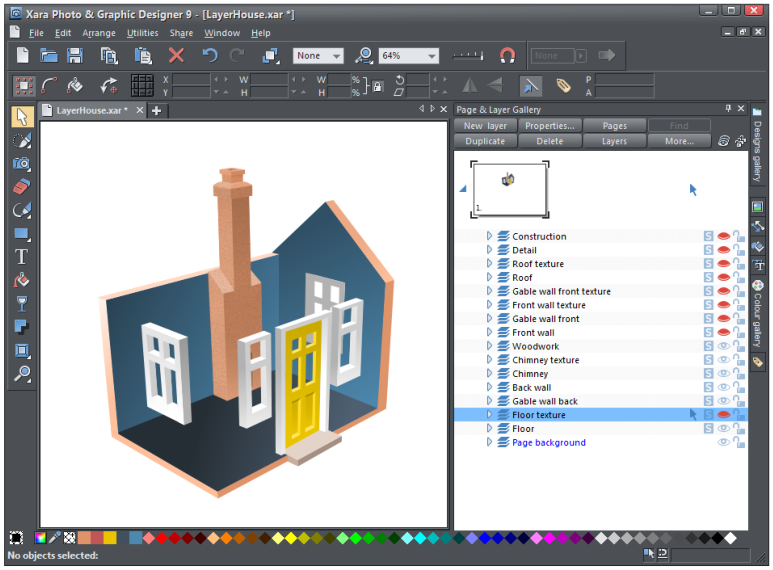
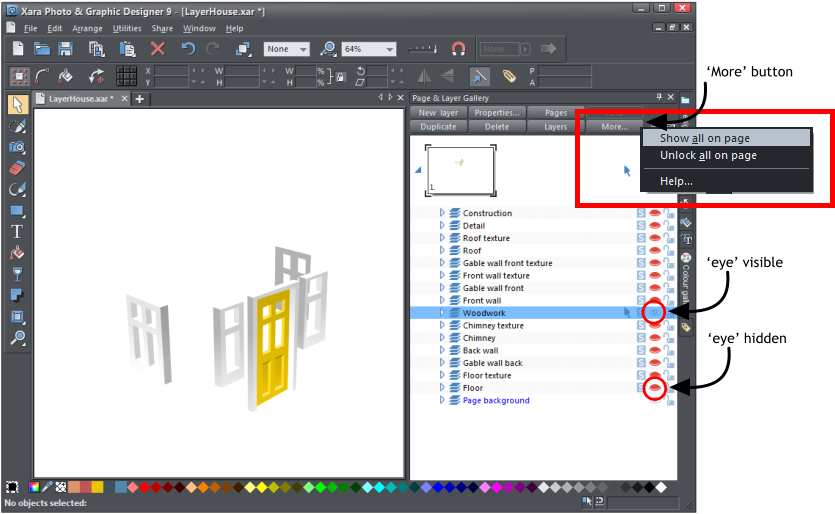
Hiding Layers and Objects
It is useful to hide layers or objects to enable you to work more closely or intricately on a particular area, for example to work on the door or interior
walls without the roof and walls getting in the way.
Clicking on the ‘eye’ icon will hide the layer or object on the page and the icon will change to a ‘closed eye’. Clicking again will make it visible.
Alternatively, you can click the ‘More…’ button and select ‘Show all on page’, which unhides all items on the current page. If you wish to hide several
layers in a block, click to select the first one and then shift click to select the last one and all those in the list in between will also be selected.
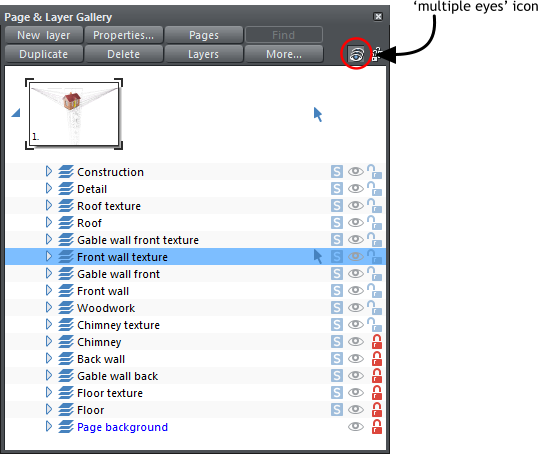
Tip: The ‘multiple eyes’ icon on the top of the Page & Layer Gallery is a short-cut to show all items on the current page.
It will temporary override all of the individual object and layer settings. Clicking the controls again will restore the previous state. So this is a quick
way of showing everything on all layers, performing some operation, and then restoring the previous state. When this button is selected (shown as
pressed in), then it's not possible to change the state of individual items. Unselect the button to enable the normal operation of the layer visibility.
Hiding the layers (shown with a red closed eye) in the foreground enables me to work on the interior,
such as experimenting with colors or textures.
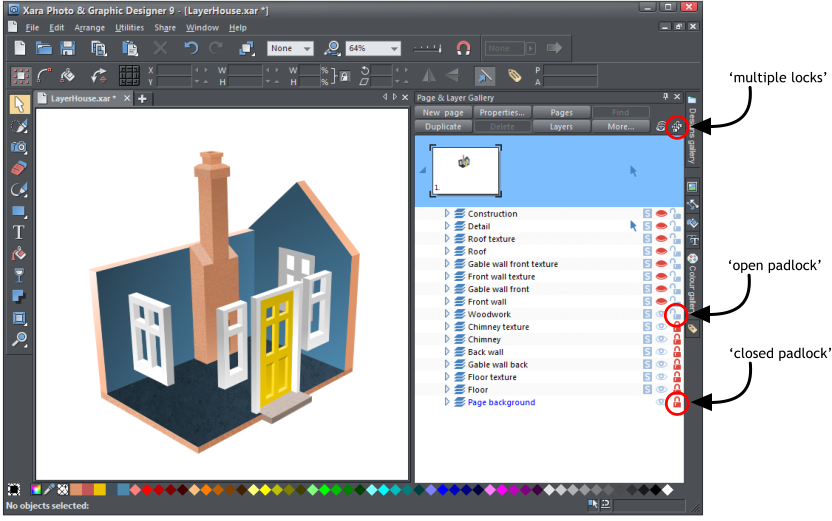
Locking Layers and Objects
If you want to work on an area where you can see other objects but you don’t want to inadvertently select or edit those objects, then you can lock the
layer or objects so you cannot select them. It’s common to set background layers to be locked in this way.
Click the ‘open padlock’ icon which will change to a ‘closed padlock’ and then any clicks on locked items will go straight through it, as if it’s not there,
to select the items underneath. Clicking again will unlock it. Alternatively, you can click the ‘More…’ button and select ‘Unlock all on page’, which
unlocks all items on the current page.
Tip – The ‘multiple locks’ icon on the top of the Page & Layer Gallery is a short-cut to unlock all items on the current page. The Unlock all button is
useful if you have a locked object on the canvas that you want to unlock, without having to first locate it in the Page & Layer Gallery. Turn on 'Unlock
all', then right click on the object on the canvas and choose the Unlock option from the context menu. Then you can turn 'Unlock all' off again (this
operates in the same way as the ‘show all’ items above).
Hidden and locked layers enable me to work on the windows in context without disturbing anything else.
In this drawing, in order to get the correct perspective, you will see our ‘construction’ layer that contains all the construction lines. This is a good use
of layers as you can turn the lines on and off, and lock the layer so things don’t get moved around. In this case the layer has been put at the top of the
list, so it remains on top of things you draw, but it’s locked so you can’t accidentally select and move the lines. If you zoom right out you can see the
vanishing points used to construct the drawing. All other elements of the drawing are on their own layer, e.g.roof, walls, floor and woodwork.
The textures are on their own editable layers to give lots of control for experimenting with transparency and fills to create the right sort of contrast (to
add the texture to the walls, floor and roof, I created a new layer for each surface texture, duplicated the wall or roof shape onto the new layer and
then applied bitmap transparency to the shape - the walls are a pebble fill from the Fills Gallery, the roof is a photo of a bit of rusty metal texture).
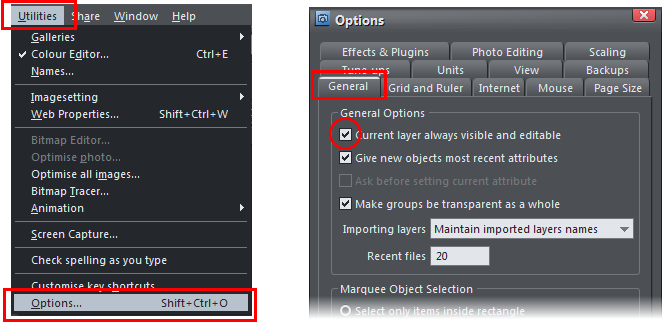
Make the current layer always visible and editable
There is a preference in the Utilities > Options > General dialog (or right click a page and choose Page Options) to make the current layers always
visible and editable (unlocked). If you select this option then whenever you select any layer in the Page & Layer Gallery it's made visible and unlocked.
Moving to another layer will restore the previous visible and locked state of the layer you just moved from.
Moving Objects between Layers
There are many ways to move objects between layers. First select the object(s) you want to move.
1. Cut the object (‘Ctrl + X’ or right click and Cut). Ensure the target layer is the current layer (shown with the arrow icon) and then right click and
choose ‘Paste’.
Or
2. Right click and choose ‘Arrange’ then ‘Move to layer in front / Move to layer behind’ to shift the selected objects one layer up or down.
Or
3. Ensure the target layer is selected as current, then find the selected item in the Page & Layer Gallery (click the ‘Locate’ button), right click and
select ‘Move to Current Layer’.
Or
4. Simply drag the object in the Layer Gallery onto another layer in the Gallery. If you just drop it on the layer it’s added to the top of the layer. If the
destination folder is open (or when dragging just pause on the layer, and it springs open for you – sometimes called ‘sping loaded layers’) and then you
can drop it at the precise location in the layer stack.
Moving Layers
You can drag the layers directly in the gallery to change the stacking order.


the current
layer


