


© Xara Group Limited


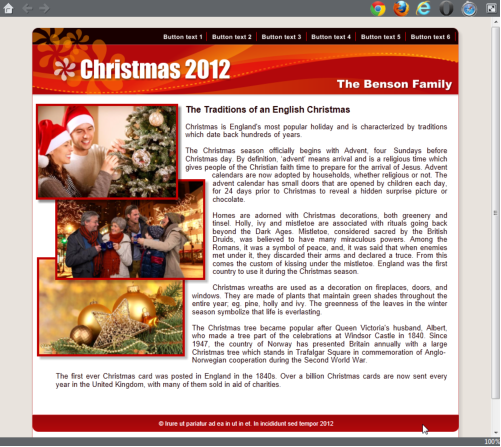
To enhance the appearance of the images on the web page you could add a border and a drop shadow to 'lift' them off the page.
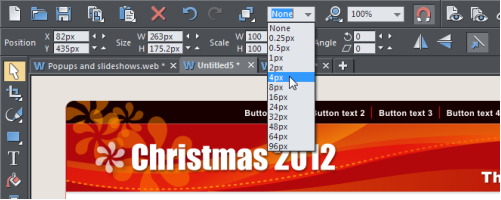
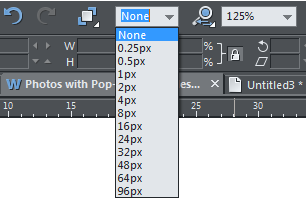
To add a border, select the image, then set the line width (I chose 4px). To change the color, right click on a color on the bottom color line and select
Set Line Color.
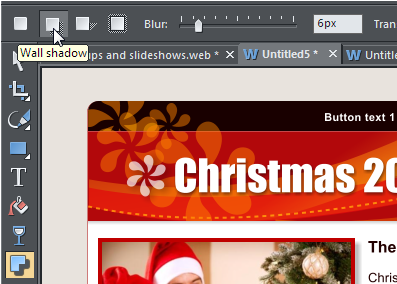
With the image still selected, select the Shadow tool and select the shadow type - I chose a Wall shadow.
Now preview the web page.
Hiding the Border and Shadow from your Pop-ups (Advanced) If you don't want the border or shadow to be part of the pop-up there is a work-around. It's a bit fiddly, but it only takes a few seconds.
First, select the image, and go to the Image tab in Web properties to unset the Pop-up photo. Now make a copy of the photo exactly on top of
the existing one (Ctrl+K). Now with this top copy selected, remove the outline by setting the Line Width back to None, and remove the shadow
by selecting the Shadow tool and selecting the No Shadow icon. Now set its Web Properties to be a pop-up.
The original image under will still have the outline and shadow - (because the outline is shown half inside and half outside when you do this it will look
as if the outline thickness has become half what you'd expect because the top copy is covering half the outline). Now when you preview your web page,
and click the pop-up, the top copy (without the outline and shadow) is shown in the pop-up window.
This works on the web page, but if you want to re-position or resize the photo on the page, you'll drag the top copy, leaving the lower copy behind. You
might think you just need to group the top and bottom copy of the photo, but unfortunately that won't work, because groups always show as one item
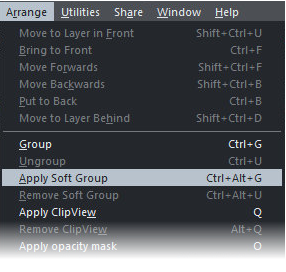
in the pop-up (so you'll get the outline and shadow in the pop-up again). There is another type of group, called a 'Soft Group', which is a more loosely
connected set of objects. Select the menu Arrange > Apply Soft Group. This acts like a normal group so that all parts move together on the page, but
for pop-ups, it uses only the top copy.
Saving and Publishing
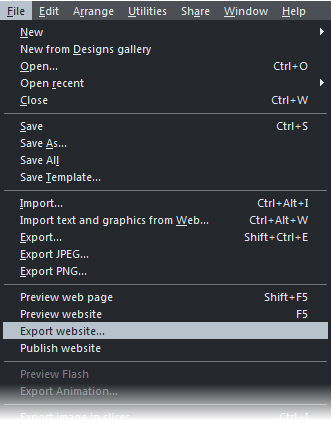
Now save the website - select File > Save which will save your website as a .web file, which is the working format for Xara Web Designer. To save the
HTML files for viewing in a browser you must choose the File > Export Website menu option. This creates one HTML file for each page of your website
and puts all the associated files into a folder next to this.
To publish your website on the web for all to see, you need to upload it to your web space (remember all copies of Web Designer come with a free
hosting deal from MAGIX Online World, which provides you with 500 megabytes of web space and a personal web address for free). The process of
transferring your website from your hard disk to the web server at your hosting company is called FTP upload (file transfer protocol). You need three
pieces of information: Your FTP host address, your username and password. Then select File -> Publish Website, and you'll be asked to enter those
details.
See the finished website
Another great way to present a large number of photos rapidly is to use one of the ready made web page templates - there are many to choose from
including various gallery and montage layouts. There are also many designs of picture frames.
If you don't want the border or shadow to be part of the pop-up there is a work-around. It's a bit fiddly, but it only takes a few seconds.
First, select the image, and go to the Image tab in Web properties to unset the Pop-up photo. Now make a copy of the photo exactly on top of
the existing one (Ctrl+K). Now with this top copy selected, remove the outline by setting the Line Width back to None, and remove the shadow
by selecting the Shadow tool and selecting the No Shadow icon. Now set its Web Properties to be a pop-up.
The original image under will still have the outline and shadow - (because the outline is shown half inside and half outside when you do this it will look
as if the outline thickness has become half what you'd expect because the top copy is covering half the outline). Now when you preview your web page,
and click the pop-up, the top copy (without the outline and shadow) is shown in the pop-up window.
This works on the web page, but if you want to re-position or resize the photo on the page, you'll drag the top copy, leaving the lower copy behind. You
might think you just need to group the top and bottom copy of the photo, but unfortunately that won't work, because groups always show as one item
in the pop-up (so you'll get the outline and shadow in the pop-up again). There is another type of group, called a 'Soft Group', which is a more loosely
connected set of objects. Select the menu Arrange > Apply Soft Group. This acts like a normal group so that all parts move together on the page, but
for pop-ups, it uses only the top copy.
Saving and Publishing
Now save the website - select File > Save which will save your website as a .web file, which is the working format for Xara Web Designer. To save the
HTML files for viewing in a browser you must choose the File > Export Website menu option. This creates one HTML file for each page of your website
and puts all the associated files into a folder next to this.
To publish your website on the web for all to see, you need to upload it to your web space (remember all copies of Web Designer come with a free
hosting deal from MAGIX Online World, which provides you with 500 megabytes of web space and a personal web address for free). The process of
transferring your website from your hard disk to the web server at your hosting company is called FTP upload (file transfer protocol). You need three
pieces of information: Your FTP host address, your username and password. Then select File -> Publish Website, and you'll be asked to enter those
details.
See the finished website
Another great way to present a large number of photos rapidly is to use one of the ready made web page templates - there are many to choose from
including various gallery and montage layouts. There are also many designs of picture frames.