 We'll now create the new animation sequence for when the 1 character is clicked, so we are going to create Frame 4. Perhaps the easiest way to do this
is to copy Frame 1 to use as a start. So Select Frame 1 in the Frame Gallery and click the Copy button on the Frame Gallery. This will create a new
Frame 4.
For the animation we’ll just move the 1 across the frame. To do this, with our new Frame 4 we'll delete all objects except the 1 (and the
background). This will be the start of the new animation sequence.
Now we'll create a new Key Frame 5. Copy the new Frame 4 (select it in the Frame Gallery and click the Copy button) to create a new Frame 5. And
then just move the 1 across to the other side of the frame like this:
Once the 1 has moved across the screen, we'll jump right back to the start of the whole animation. You should now understand how to do this, by using
the Goto command as described above (rename this frame, by double clicking the frame in the Animation Frame Gallery, to have a ; Goto Frame 1 on
the end of the name. So it should now have the full name Frame 5; Goto Frame 1).
Let's finish this example by creating the new animation sequence for the 2 text object so that it redirects to Frame 6.
We'll create a new start frame for the 2 sequence, based on Frame 1 again. So select Frame 1 in the Animation Frame Gallery and click the Copy
button. Delete everything on it, except the 2, so it looks like this:
Now create a Frame 7 by copying Frame 6 and moving the text as you require for this animation e.g. so it's like this:
We don’t need to add a GoTo Frame 1 in this case because Frame 7 is our last frame and by default it will go from the last frame to the first frame.
So now all we need to do is link clicking on the numbers 1 and 2 to our animations in Frames 4 - 7, which is where Jumping URLs comes into it...
Jumping URLs
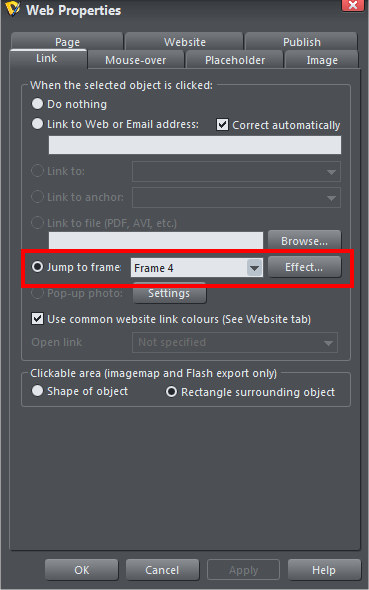
8. Return to Frame 1, and using the Selector tool select the digit 1. Open the Link Properties dialog by clicking the Link Properties icon on the
top toolbar.
In the ‘Jump To Frame’ drop down select Frame 4 and click Apply. Do the same for
the 1 in frames 2 and 3. Repeat for the number 2.
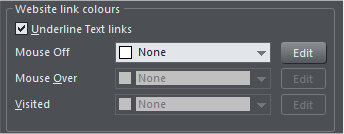
There’s one other a little problem we need to deal with while we are in the Web
Properties dialog, which is that by default Designer assumes that links should be
indicated by an underscore. We don’t want that in this case, so go to the Website
tab and uncheck ‘Underline Text Links’. Now you can click OK to close the Web
Properties dialog.
And there you have it, the completed animation.
What we have demonstrated is a continually repeating animation going through
Frames 1, 2, 3, 1, 2, 3 etc by using the Goto command at the end of Key
Frame 3. And secondly by using the ‘Jump To frame ‘control we've made it so that
clicking on the 1 or 2 objects redirects to a completely separate animation
sequence.
TIP: Although not demonstrated here, you can stop an animation sequence by simply
adding ‘stop’ to a frame name.
Summary
It's easy to redirect the flow of your animation in one of two ways:
•
To make your animation go from one key frame to another key frame, just append ; Goto Frame x on the end of the key frame name (semi-colon
separator).
•
To jump to any key frame when the viewer clicks an object, select the object, open the Link Properties dialog and use the ‘Jump to frame’ drop
down to select the appropriate frame from the drop down list.
We'll now create the new animation sequence for when the 1 character is clicked, so we are going to create Frame 4. Perhaps the easiest way to do this
is to copy Frame 1 to use as a start. So Select Frame 1 in the Frame Gallery and click the Copy button on the Frame Gallery. This will create a new
Frame 4.
For the animation we’ll just move the 1 across the frame. To do this, with our new Frame 4 we'll delete all objects except the 1 (and the
background). This will be the start of the new animation sequence.
Now we'll create a new Key Frame 5. Copy the new Frame 4 (select it in the Frame Gallery and click the Copy button) to create a new Frame 5. And
then just move the 1 across to the other side of the frame like this:
Once the 1 has moved across the screen, we'll jump right back to the start of the whole animation. You should now understand how to do this, by using
the Goto command as described above (rename this frame, by double clicking the frame in the Animation Frame Gallery, to have a ; Goto Frame 1 on
the end of the name. So it should now have the full name Frame 5; Goto Frame 1).
Let's finish this example by creating the new animation sequence for the 2 text object so that it redirects to Frame 6.
We'll create a new start frame for the 2 sequence, based on Frame 1 again. So select Frame 1 in the Animation Frame Gallery and click the Copy
button. Delete everything on it, except the 2, so it looks like this:
Now create a Frame 7 by copying Frame 6 and moving the text as you require for this animation e.g. so it's like this:
We don’t need to add a GoTo Frame 1 in this case because Frame 7 is our last frame and by default it will go from the last frame to the first frame.
So now all we need to do is link clicking on the numbers 1 and 2 to our animations in Frames 4 - 7, which is where Jumping URLs comes into it...
Jumping URLs
8. Return to Frame 1, and using the Selector tool select the digit 1. Open the Link Properties dialog by clicking the Link Properties icon on the
top toolbar.
In the ‘Jump To Frame’ drop down select Frame 4 and click Apply. Do the same for
the 1 in frames 2 and 3. Repeat for the number 2.
There’s one other a little problem we need to deal with while we are in the Web
Properties dialog, which is that by default Designer assumes that links should be
indicated by an underscore. We don’t want that in this case, so go to the Website
tab and uncheck ‘Underline Text Links’. Now you can click OK to close the Web
Properties dialog.
And there you have it, the completed animation.
What we have demonstrated is a continually repeating animation going through
Frames 1, 2, 3, 1, 2, 3 etc by using the Goto command at the end of Key
Frame 3. And secondly by using the ‘Jump To frame ‘control we've made it so that
clicking on the 1 or 2 objects redirects to a completely separate animation
sequence.
TIP: Although not demonstrated here, you can stop an animation sequence by simply
adding ‘stop’ to a frame name.
Summary
It's easy to redirect the flow of your animation in one of two ways:
•
To make your animation go from one key frame to another key frame, just append ; Goto Frame x on the end of the key frame name (semi-colon
separator).
•
To jump to any key frame when the viewer clicks an object, select the object, open the Link Properties dialog and use the ‘Jump to frame’ drop
down to select the appropriate frame from the drop down list.

 © Xara Group 2011