 1. Start a new animation by selecting File > New > Animation.
2. Create a new rectangle using the Rectangle tool. Make it exactly 468 by 60 pixels (just enter these values into the InfoBar fields once
you've created your rectangle).
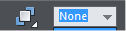
3. Select a line width of none from the drop down so that your rectangle has no additional outline and is in whole pixels.
Tip: In the Selector tool it's a good idea to ensure that the X and Y positions are also whole pixels, so that everything will remain
pixel sharp.
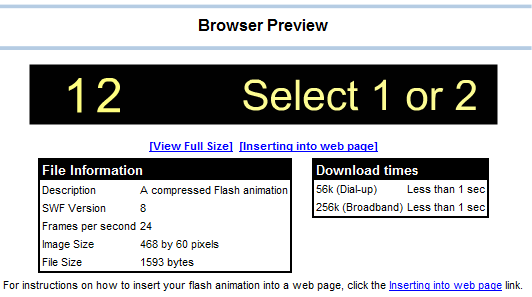
4. Create the text. In this case 3 separate text objects like this. It's important that these are three separate objects and not a single line of text.
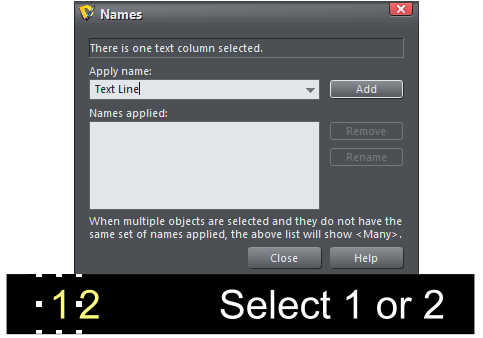
Because we're going to animate all three text objects we need to give them names. This is easy, using the Selector tool select each text object
in turn and, click the Names icon on the Selector tool InfoBar, and give them a default name. For this tutorial we’ll name them Text Line, Text
Line 1, etc. So select the number 1, open the Names dialog, enter Text Line and click Add, select the number 2, enter Text Line 2 and Add etc
5. We're going to animate the third text object (ie the words Select 1 or 2) and make it pulsate. So we need to create a new key frame by clicking the
Copy Frame button on the Animation bar. The new frame will look exactly like Frame 1.
Now let's alter the 'Select 1 or 2' text slightly. In our example we've made it slightly larger and colored it like this:
You can preview your animation by clicking the Preview Flash icon in the animation toolbar and you should see your text animate from Key Frame
1 to Key Frame 2.
1. Start a new animation by selecting File > New > Animation.
2. Create a new rectangle using the Rectangle tool. Make it exactly 468 by 60 pixels (just enter these values into the InfoBar fields once
you've created your rectangle).
3. Select a line width of none from the drop down so that your rectangle has no additional outline and is in whole pixels.
Tip: In the Selector tool it's a good idea to ensure that the X and Y positions are also whole pixels, so that everything will remain
pixel sharp.
4. Create the text. In this case 3 separate text objects like this. It's important that these are three separate objects and not a single line of text.
Because we're going to animate all three text objects we need to give them names. This is easy, using the Selector tool select each text object
in turn and, click the Names icon on the Selector tool InfoBar, and give them a default name. For this tutorial we’ll name them Text Line, Text
Line 1, etc. So select the number 1, open the Names dialog, enter Text Line and click Add, select the number 2, enter Text Line 2 and Add etc
5. We're going to animate the third text object (ie the words Select 1 or 2) and make it pulsate. So we need to create a new key frame by clicking the
Copy Frame button on the Animation bar. The new frame will look exactly like Frame 1.
Now let's alter the 'Select 1 or 2' text slightly. In our example we've made it slightly larger and colored it like this:
You can preview your animation by clicking the Preview Flash icon in the animation toolbar and you should see your text animate from Key Frame
1 to Key Frame 2.

 © Xara Group 2011