


© Xara Group Limited


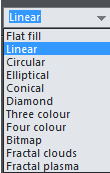
5. Now we will give the Halloween graphic a graduated fill. Select it and then ungroup it with Ctrl+U. Select the yellow shape and feather it by 3 pixels. Next select the black Halloween graphic and select the Fill tool, but this time choose a linear fill. Select the fill arrow end square,
which is in the center of the graphic, and select the Glow A color. Move the arrow tip until it is pointing down the page to adjust the direction
of the linear fill and drag either end of the fill arrow to adjust the depth of the linear fill.
6. This template has the 'snap' switched on (see on top Infobar) so you can separate and move apart the two Halloween graphics to make it
easier to work with, and they will snap back into place easily when you move them back on top of each other. Select the feathered yellow
Halloween shape again and select the Shadow tool, then select the 'Glow' button on the Shadow tool Infobar increase the blur to 32 pixels and
set the shadow transparency to 0%. Select the Halloween graphic again and zoom in on the glow shadow, then drag the Glow B color from the
color line and drop it onto the shadow to create an orange glow. Now put the two Halloween graphics together again.
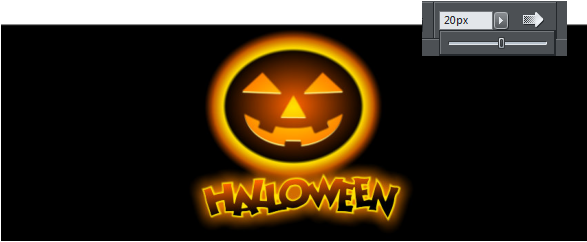
7. We will put a similar 'glow' shadow on the pumpkin. Select the yellow ellipse and, on the top Infobar, go to the 'feather' option and enter 20 pixels.
Now select the orange ellipse and then set the feather to 15 pixels.
8. We will now put a large overall glow behind the graphic to make it more eerie, as though it were in the evening fog. Select the black background,
then using the Fill tool, select the Elliptical type, click on the central square and then click on the Glow A color. You can drag the arrow points if you
wish to adjust the size or angle of the fill.
9. Finally, we will increase the intensity of the glow behind the Halloween text. Select the Freehand & Brush tool and draw a shape that is
roughly oblong on top of the text. Then select it and select the Glow C color.
Tip: As an alternative to drawing a shape you could use the Freehand & Brush Tool and select a brush width of 48pixels and then draw a short curved
line.
10. Feather the shape by 15 pixels, then select the Transparency tool and add a flat transparency type of 20% using the Infobar slider
control. Use Ctrl+B to put it behind the Halloween text.
That's it. Finished. What an achievement and you didn't need any design or graphic skills!
Xara Photo & Graphic Designer is a truly flexible and time-saving all-in-one solution for impressive graphics: Powerful image editing, astounding
illustration capabilities, professional design templates & extensive desktop publishing (DTP), all in a single intuitive program! It's ideal for private and
professional use: at home, in clubs, in academic institutions, and at work.
3 pixels. Next select the black Halloween graphic and select the Fill tool, but this time choose a linear fill. Select the fill arrow end square,
which is in the center of the graphic, and select the Glow A color. Move the arrow tip until it is pointing down the page to adjust the direction
of the linear fill and drag either end of the fill arrow to adjust the depth of the linear fill.
6. This template has the 'snap' switched on (see on top Infobar) so you can separate and move apart the two Halloween graphics to make it
easier to work with, and they will snap back into place easily when you move them back on top of each other. Select the feathered yellow
Halloween shape again and select the Shadow tool, then select the 'Glow' button on the Shadow tool Infobar increase the blur to 32 pixels and
set the shadow transparency to 0%. Select the Halloween graphic again and zoom in on the glow shadow, then drag the Glow B color from the
color line and drop it onto the shadow to create an orange glow. Now put the two Halloween graphics together again.
7. We will put a similar 'glow' shadow on the pumpkin. Select the yellow ellipse and, on the top Infobar, go to the 'feather' option and enter 20 pixels.
Now select the orange ellipse and then set the feather to 15 pixels.
8. We will now put a large overall glow behind the graphic to make it more eerie, as though it were in the evening fog. Select the black background,
then using the Fill tool, select the Elliptical type, click on the central square and then click on the Glow A color. You can drag the arrow points if you
wish to adjust the size or angle of the fill.
9. Finally, we will increase the intensity of the glow behind the Halloween text. Select the Freehand & Brush tool and draw a shape that is
roughly oblong on top of the text. Then select it and select the Glow C color.
Tip: As an alternative to drawing a shape you could use the Freehand & Brush Tool and select a brush width of 48pixels and then draw a short curved
line.
10. Feather the shape by 15 pixels, then select the Transparency tool and add a flat transparency type of 20% using the Infobar slider
control. Use Ctrl+B to put it behind the Halloween text.
That's it. Finished. What an achievement and you didn't need any design or graphic skills!
Xara Photo & Graphic Designer is a truly flexible and time-saving all-in-one solution for impressive graphics: Powerful image editing, astounding
illustration capabilities, professional design templates & extensive desktop publishing (DTP), all in a single intuitive program! It's ideal for private and
professional use: at home, in clubs, in academic institutions, and at work.