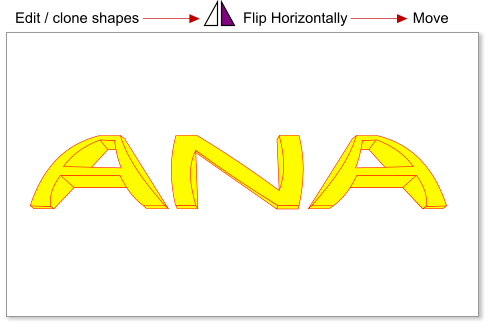
 Step 19: Clone and mirror the letter A, then move the mirrored letter to the right side, to complete the name ANA. To mirror the A letter, select the
‘Flip horizontally’ button on the InfoBar.
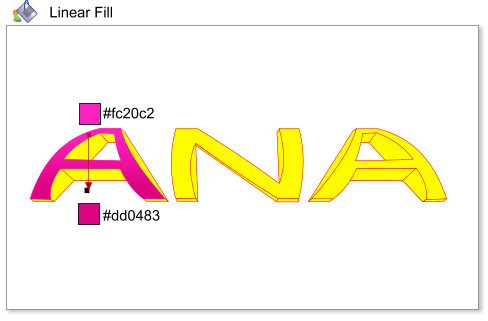
Step 20: Select the main shape in the A letter (ie the biggest), and add a linear color fill from #fc20c2 to #dd0483.
Step 21: We will add the same fill to all the shapes. Select the shape filled in step 20, choose Edit > Copy or use the shortcut Ctrl+C, then choose Edit >
Select All or use the shortcut Ctrl+A. You have the attributes on the clipboard, so to paste the attributes choose Edit > Paste Attributes, or use the
shortcut Shift+Ctrl+A.
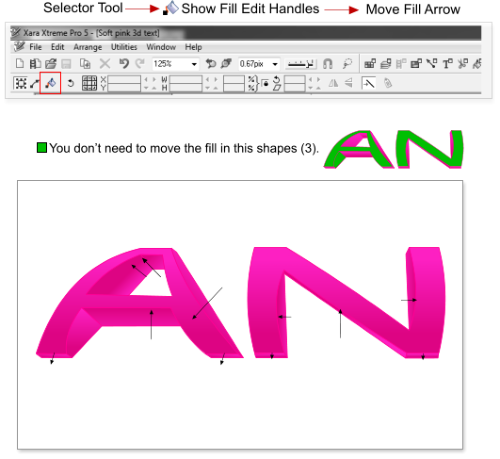
Step 22: We need to change the linear fill direction, so enable ‘show fill edit handles’ in the InfoBar (note, to see this InfoBar you must have the
Selector Tool selected).
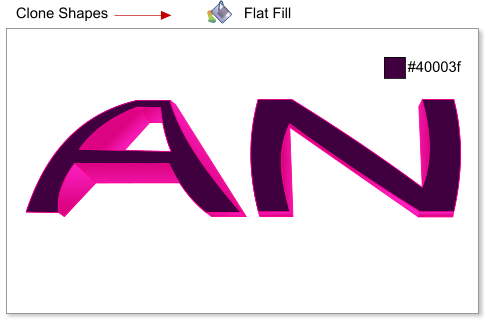
Step 23: Select the main shapes in the A and N letters and clone them using the shortcut Ctrl+K, then change the fill type to flat and set the color to
#40003f.
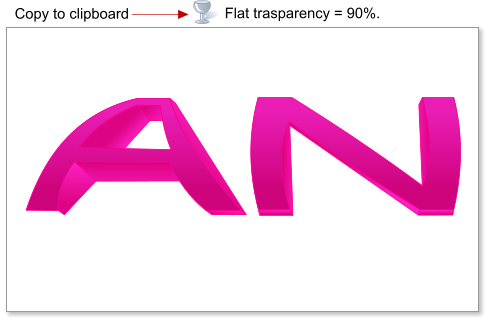
Step 24: Copy the cloned shapes to the clipboard (Ctrl+C), then apply a flat transparency of 90%.
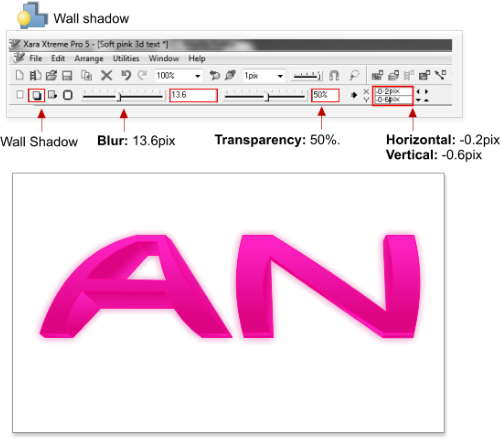
Step 25: Group all the shapes in the letter A using the shortcut Ctrl+G, then add a wall shadow. Shadow blur: 13.6 pixels. Shadow transparency: 50%.
horizontal position: -0.2 pixels, vertical position: -0.6px.
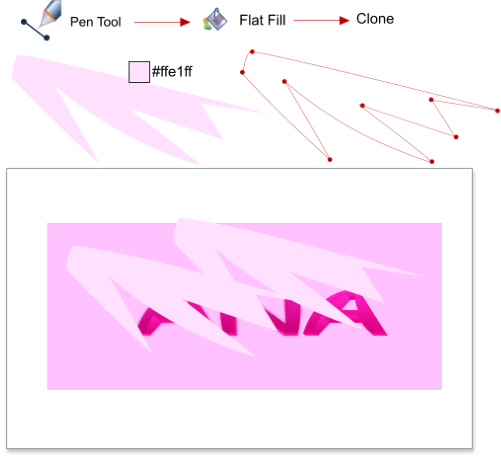
Step 26: Using the Pen Tool create an abstract shape, like the one shown below. Add a flat color fill of #ffe1ff, clone and move the shape, nb to clone
use the shortcut Ctrl+K, do not use copy and paste (remember we have 2 shapes on the clipboard from step 24).
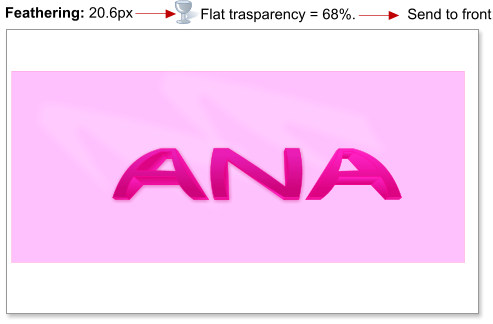
Step 27: Select the two new shapes, and apply 20.6 pixels feathering and a flat transparency of 68%, then select the “ANA” shapes and send them to
front using the shortcut Ctrl+F. These new shapes are used as light source reflections.
Step 19: Clone and mirror the letter A, then move the mirrored letter to the right side, to complete the name ANA. To mirror the A letter, select the
‘Flip horizontally’ button on the InfoBar.
Step 20: Select the main shape in the A letter (ie the biggest), and add a linear color fill from #fc20c2 to #dd0483.
Step 21: We will add the same fill to all the shapes. Select the shape filled in step 20, choose Edit > Copy or use the shortcut Ctrl+C, then choose Edit >
Select All or use the shortcut Ctrl+A. You have the attributes on the clipboard, so to paste the attributes choose Edit > Paste Attributes, or use the
shortcut Shift+Ctrl+A.
Step 22: We need to change the linear fill direction, so enable ‘show fill edit handles’ in the InfoBar (note, to see this InfoBar you must have the
Selector Tool selected).
Step 23: Select the main shapes in the A and N letters and clone them using the shortcut Ctrl+K, then change the fill type to flat and set the color to
#40003f.
Step 24: Copy the cloned shapes to the clipboard (Ctrl+C), then apply a flat transparency of 90%.
Step 25: Group all the shapes in the letter A using the shortcut Ctrl+G, then add a wall shadow. Shadow blur: 13.6 pixels. Shadow transparency: 50%.
horizontal position: -0.2 pixels, vertical position: -0.6px.
Step 26: Using the Pen Tool create an abstract shape, like the one shown below. Add a flat color fill of #ffe1ff, clone and move the shape, nb to clone
use the shortcut Ctrl+K, do not use copy and paste (remember we have 2 shapes on the clipboard from step 24).
Step 27: Select the two new shapes, and apply 20.6 pixels feathering and a flat transparency of 68%, then select the “ANA” shapes and send them to
front using the shortcut Ctrl+F. These new shapes are used as light source reflections.

 © José Campoy