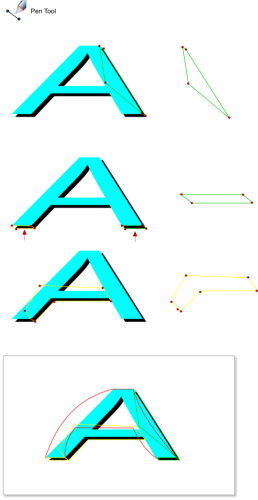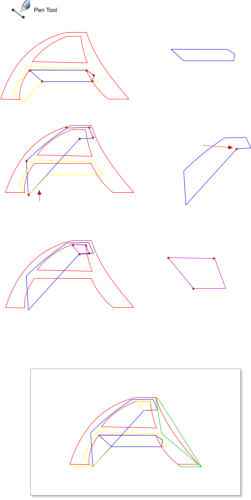
 Step 10: Select the Pen tool and create more shapes for the A letter as shown below. Use the back and middle texts for your reference for these shapes,
this part is the base.
Step 11: We need more shapes for the A letter, at this step you can hide the text, but do not delete it yet (just put it on a new layer, or move it).
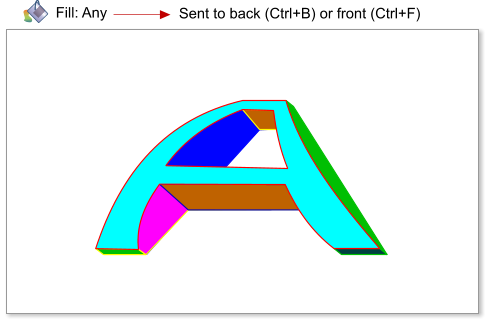
Step 12: Fill the shapes with different colors. Now it’s time to order the different parts, see the image below to see the right order - just use the
shortcuts Ctrl+B & Ctrl+F.
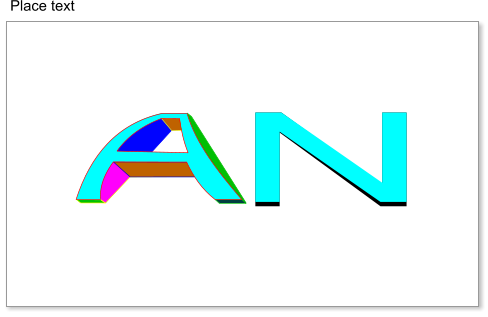
Step 13: We’ve finished the perspective for the A letter, now we will start with the N letter, which is much is easier. Enter the text, then align the text
as shown below.
Step 14: Select the middle text (the aqua), and convert it to editable shapes. To convert the text to shapes choose Arrange > Convert to editable
Shapes, or use the shortcut Ctrl+Shift+S. Now ungroup the text, choose Arrange > Ungroup, or use the shortcut Ctrl+U so you can see the handles.
Step 15: Use the Shape Editor Tool to convert the straight lines to curves. The N letter is in the center, so the perspective is different compared to the
side letters.
Step 16: Now we will add the rest of the shapes for the N letter, using the Pen Tool.
Step 17: Add a color fill to the new shapes, and order the shapes using the shortcuts Ctrl+F to send to front and Ctrl+B to send to back, so it looks like
this.
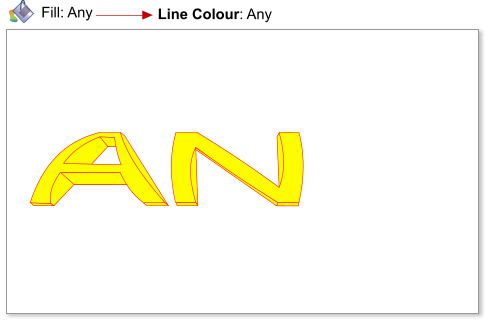
Step 18: Select all the shapes and set a line and a fill color (any color).
Step 10: Select the Pen tool and create more shapes for the A letter as shown below. Use the back and middle texts for your reference for these shapes,
this part is the base.
Step 11: We need more shapes for the A letter, at this step you can hide the text, but do not delete it yet (just put it on a new layer, or move it).
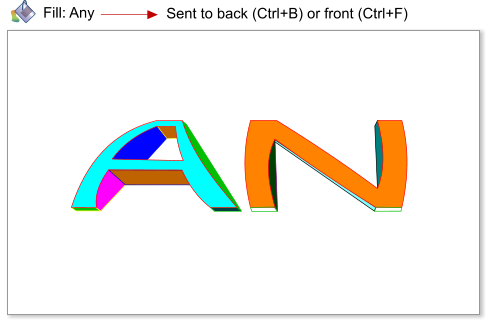
Step 12: Fill the shapes with different colors. Now it’s time to order the different parts, see the image below to see the right order - just use the
shortcuts Ctrl+B & Ctrl+F.
Step 13: We’ve finished the perspective for the A letter, now we will start with the N letter, which is much is easier. Enter the text, then align the text
as shown below.
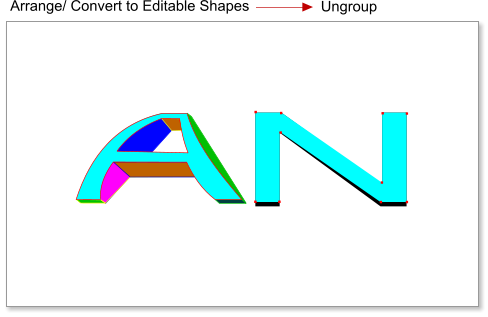
Step 14: Select the middle text (the aqua), and convert it to editable shapes. To convert the text to shapes choose Arrange > Convert to editable
Shapes, or use the shortcut Ctrl+Shift+S. Now ungroup the text, choose Arrange > Ungroup, or use the shortcut Ctrl+U so you can see the handles.
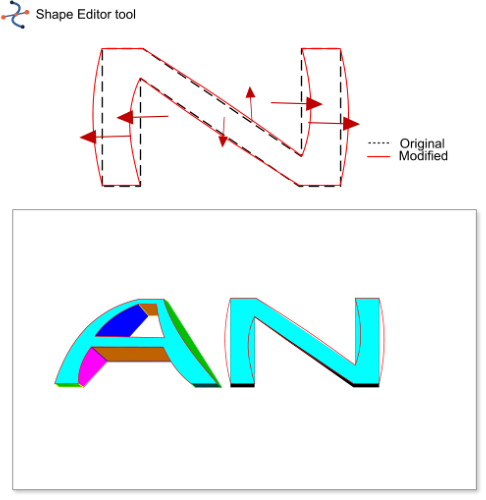
Step 15: Use the Shape Editor Tool to convert the straight lines to curves. The N letter is in the center, so the perspective is different compared to the
side letters.
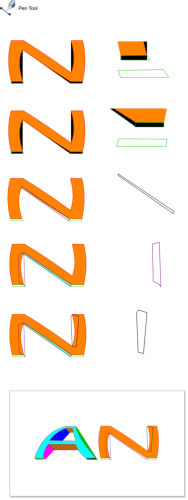
Step 16: Now we will add the rest of the shapes for the N letter, using the Pen Tool.
Step 17: Add a color fill to the new shapes, and order the shapes using the shortcuts Ctrl+F to send to front and Ctrl+B to send to back, so it looks like
this.
Step 18: Select all the shapes and set a line and a fill color (any color).

 © José Campoy