thinking outside the box
Creative Photo Displays with Pop-Ups for your Website


XARA TUTORIAL
Text here...


4. Creating the pop-up layer
To create a pop-up you need to place the content of the pop-up onto a new layer. First, copy the photo frame you want to place on the new layer using
CTRL-C (or Edit > Copy group). Now, to create the new layer open the Page and Layer Gallery by selecting it from the right hand labels, and select the
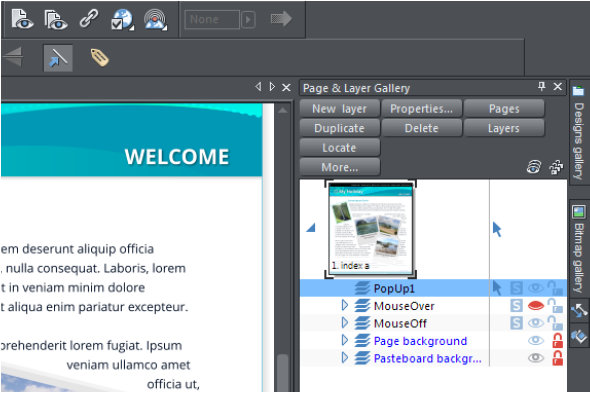
pin at the top to pin it open. Select ‘New Layer’ and name it PopUp1.
Adding a new Layer called PopUp1
Click CTRL-V (or Edit > Paste) to copy the photo frame to the new PopUp1 layer.
Adjust the size and angle of the photo frame as you wish to see it on the pop-up. I would suggest that you make it larger and horizontal, ensuring that
it does not block your other photos, otherwise your visitors won’t be able to mouse-over the other photos to see their pop-ups!
Right click on the photo frame and select to turn off ‘Repel text under’, as you want your pop-up to appear over the content of your page without
adjusting the original content.
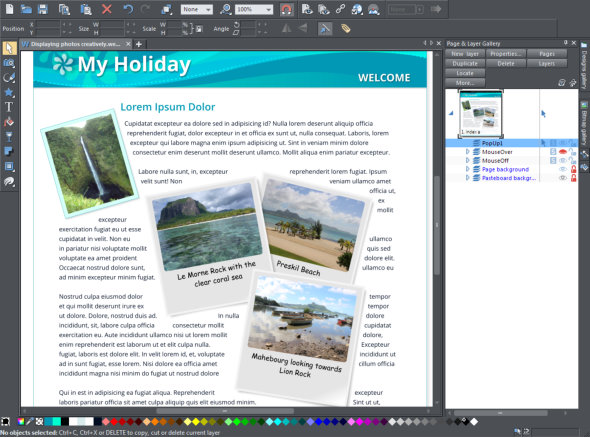
You can add further content to this pop-up layer if you wish. I have added a star shape with some text on the star.
Adding the content to the PopUp1 layer
5. Linking the pop-up layer
Select the PopUp1 layer and then click on the ‘eye’ to turn off the visibility of this layer – the eye will change to be red. Select the ‘MouseOff’ layer to
return to the main layer. (You will notice an arrow on the currently selected layer).
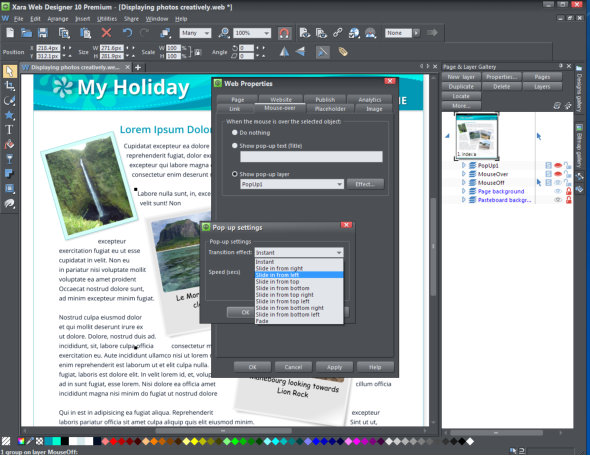
Now, you need to link the pop-up to the photo frame on your web page. Select the original photo frame and select the Link icon and then select
the ‘mouseover’ tab. Select ‘Show pop-up layer’ and then select your PopUp1 layer from the drop down menu. Select ‘Effect’ to add a transition
effect for the pop-up and choose from the drop down menu (we chose Fade). Ensure that the option to ‘Close pop-up automatically’ remains
checked so that your pop-up will close when you mouse-off the photo frame on your web page.
The transition options
6. Preview your web page
We recommend you preview your web page before you repeat this process for the other 2 pop-ups.
Select the preview icon on the top bar or File > Preview web page to preview the current page, (or Preview website for a complete website). It’s
useful to preview your website periodically and I always preview it before saving the final version.
7. Adding the other 2 pop-ups
Add the other 2 pop up layers naming them PopUp2 and PopUp3.
8. Save
When you select File > Save this saves your website as a Web Designer .web file. This is the working format for Web Designer. To save the HTML files for
viewing in a browser you must choose the File > Export Website menu option. This creates one HTML file for each page of your website and puts all the
associated files into a folder next to this.
9. Publishing
To put your website on the web for all to see, you need to upload it to your web space. Select the Publish icon (or select File>Publish). If you’re using
MAGIX Online World, which is the default, simply enter your account username and password – you don’t need to know anything about FTP, nor do you
have to enter any FTP details. (You can register for a free MAGIX Online World account - 500 megabytes of web space and a personal web address - by
clicking on the Register For Free option in the Publish dialog).
If you have an alternative web host then select ‘Publish to an alternative web host’ in the Publish dialog, and enter your FTP settings for your website.
You will need your FTP host address, your username and password.
That’s it! You’ve created a great way to display photos on your website in just a few minutes. If you don’t already own Web Designer then you can find
out more about it on our Xara Web Designer website.
For more tutorials by Xara and third parties, check out our Resource index, which offers a searchable and browsable list of movies and tutorials created
by Xara and third parties.