


The Object Gallery
The Object Gallery in Xtreme 5 and Xtreme Pro 5 replaces the Layer Gallery and adds considerably to its power and ease of use.
The new Object Gallery lists all the pages and layers in your document (and in Pro 5 all the objects as well) and provides an easy way to manage them,
offering the following controls:
Pages
• display a list of pages
• add new pages, duplicate or delete pages
• re-arrange the page order by dragging
• rename pages
Layers
• display a list of all layers on each page, from the bottom (usually background) to the top
• create new layers, delete, re-order and rename layers
• hide or show layers
• lock any layer so it becomes non editable
Objects (Pro only)
• display a list of all objects on the page in the stacking order they appear on the page
• hide or show any item
• move objects up and down the stack
• lock any object so it becomes non editable (while remaining visible).
Pages
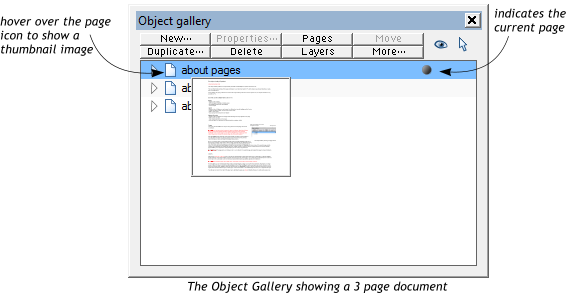
This is an essential addition for anyone using Xtreme for multi-page documents or websites.
Click the Pages button at the top of the Object Gallery to display only the pages in your document, no layers or objects (clicking it again will revert to
the previous view including any layers and objects that were being shown).
Now it is a simple matter to re-arrange the page order by simply dragging a page up or down the list of pages. Single click to select a page (it should
then be highlighted in blue) then click New to add a new page to your document below the selected page and the same size as the selected page,
Delete to delete the selected page and Duplicate to make a copy of the selected page and its contents. It’s a lot easier and quicker than the Edit >
Pages controls in previous versions! A slow second click on the selected page will allow you to (re)name it, pretty handy if you have a very long
document.
Doubleclicking on the page name or clicking on the icon to the left of a selected page will expand the page to show all its layers.
Layers
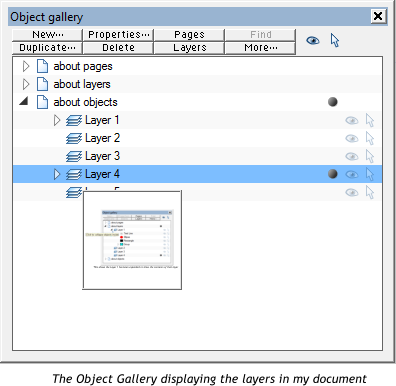
Click on the icon to the left of a selected page to show a list of the layers on that page, or click the Layers button at the top of the Object Gallery
to display all the layers in the current page. The current layer is indicated by the round blob to the right - the current layer is the one that any newly
created objects (or pasted objects) will be added to.
As with pages you can re-arrange the layer order by simply dragging a layer up or down the list of layers. Single click on a layer name to select that
layer (it should then be highlighted in blue) then click New to add a new blank layer to your document at the top of the stacking order, Delete to
delete the selected layer and Duplicate to make a copy of the selected layer and its contents, again at the top of the stack of layers on that page. A
slow second click on the selected page will allow you to (re)name the layer.
You will see two icons to the right of the layer name, by default a pale eye indicating the layer is visible and a pale arrow indicating it is
editable. Clicking the pale eye will change it to a closed eye which indicates that the layer is now invisible, that is it won’t appear in your
document at all, revealing the layers underneath. Clicking the pale arrow will change it to a darker padlock which indicates that the layer is now
locked and can’t be edited, you won’t be able to select any objects on that layer. There is one to exception note however, which is if you have objects
on your layer that are part of a Soft Group; Soft Groups are collections of objects that can be on different layers, if you move or transform one item in
a Soft Group then the change is made to all the items in the Soft Group, even if they are locked or on a locked layer.


© Xara 2009