


© Xara Group Limited


Adding a Step
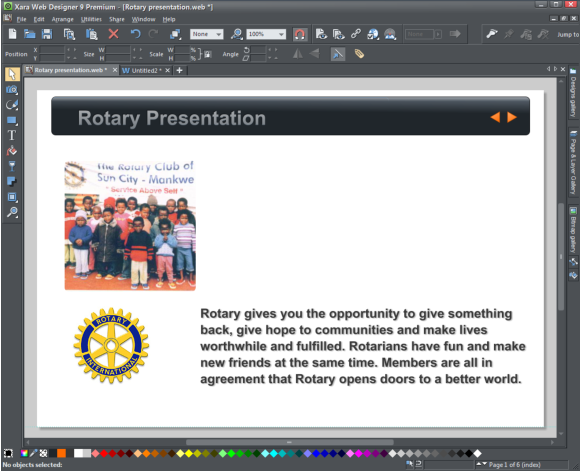
We shall add another object to the page and make that a new step. I dragged a graphic logo from my computer files onto the page and positioned it in
the bottom left. Web Designer has placed it in presentation step 4 because I am currently viewing step 4 on my page. Using the Selector Tool select the
graphic and then click the ‘Make new step’ icon which will add a new step 5 at the end of the sequence. Once the new step has been added, this
becomes the new ‘current step’ and anything you add to the page will be on this new step. (If you don’t want the new step to be at the end, then you
can drag re-order as described below).
Merging Steps
I now want to merge steps 3 (left-hand photo) and 4 (text) so the easiest way is to ‘select’ the photo and perform a ‘cut’ (Ctrl+X), then go to the ‘Jump
to’ drop down menu on the Presentation Toolbar and select step 3 and ‘paste-in-place’ (SHIFT+Ctrl+V). Now they are both on step 3 and step 4 is empty.
Note: If you leave a layer empty, it will automatically be deleted (and steps re-numbered) when you Preview or Save the document.
Re-ordering Steps
I will now move step 5 to become step 1 and step 3 to become step 2. The order of the steps can be seen in the Page and Layer Gallery so click on the
tab to open it, then click on the small arrow to the left of the page thumbnail to expand the view to show all the layers.
To re-order the steps, simply drag step 5 into the desired position below step 1 and drag step 3 into position at step 2.Note that the step numbers are
re-numbered so step 1 has now become step 3 and so on.
The presentation showing steps 1 and 2 only
Deleting a Step
Using the Selector Tool, just select any object on the step you want to delete and click the ‘Delete step’ icon: This will delete the whole step
(and thus all objects on that step).
Bullet and Number Lists
Page 2 of our example presentation has a bullet list – these are a bit special because each step of the bullet list appears as a separate step in the
presentation even though they are all one single layer. This makes it very easy to edit your list – just use the normal text editing controls to add or
delete bullet items. e.g. pressing Enter will add a new bullet step.
You can change from a bullet to a numbered list using the usual text controls on the InfoBar.
Tip: Pressing Shift+Enter starts a new line, but it’s not a new step, so doesn’t have a bullet or number.
If you don’t want each bullet point to appear as a separate step, in the Text Tool, right click in the list then select ‘Presentation > Present by
paragraph’ and deselect the option. Now when you export and preview your presentation the list is no longer split into separate steps.
Step Transitions
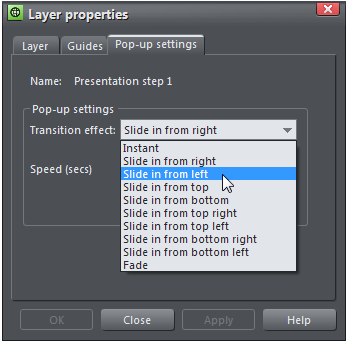
When you create a new step it takes the transition style from the last step. But it’s easy to change the animation style of any step. Just select any
items on the step you want to change and click the Transition control icon which will display a drop-down list of animation styles and speeds.
Step Transition Controls
Page Transitions
Each presentation page can be given its own transition style. To add or change a transition for the current page, right click on the document page and
select ‘Web page properties’. On the dialog there’s a Page transition effect drop down menu along with a speed control.
You can also set the page transition for multiple pages at once. Just select the pages you want to change in the Page & Layer Gallery (use Shift+click
and Ctrl+click to extend the selection), right click and select Web page Properties…then change the transition on the Page tab, as above.
Page transition controls
Save & Publish
Now save your website presentation – select ‘File’ then ‘Save’, which will save your website as a .web file, which is the working format for Xara Web
Designer. (If you want to save the HTML files for viewing in a browser you must choose the ‘File’ > ‘Export Website’ menu option. This creates one HTML
file for each page of your website presentation and puts all the associated files into a folder next to this.)
To publish your presentation on the web for all to see, you need to upload it to your web space (hosting with MAGIX Online World is included for free).
Select the menu File > Publish website. If you’re using MAGIX Online World, which is the default, simply enter the username and password of your
account – you don’t need to know anything about FTP, nor do you have to enter any FTP details.
If you have an alternative web host then, in the Publish dialog select ‘Publish to an alternative web host’ and enter your FTP settings for your website.
Xara Web Designer is probably the most flexible, powerful web design program that requires no knowledge of HTML. If you’re a creative designer your
options are unlimited with Web Designer! If you’re less creative, or simply do not have the time, then just customize the templates as we’ve done here.
In a future tutorial I will show you how to create a presentation from scratch, and also how to use remote control so you can control the steps of a
presentation being viewed by others on the web.
For more tutorials by Xara and third parties, check out our Resource index, which offers a searchable and browsable list of movies and tutorials created
by Xara and third parties.