


 © Xara Group Limited


 After you have imported all your photos you may need to adjust some of them for brightness or color saturation so they tone better with each
other. To do that select the Photo tool and then use the auto-enhance or individual photo enhancing tools on the editor.
Repeat this for all of your photos.
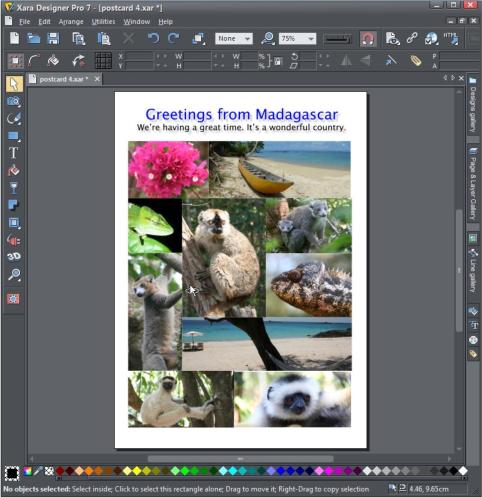
At this stage I think that the postcard is looking very crowded and it would be much better with a white edge around all the photos to give them
some individual space.
Using the Selector tool, Lasso select around the whole group of photos but not the heading. In this example, the status line at the
bottom of the page says that 10 photos are selected.
On the top toolbar select a line width, such as 4pt or 6pt (you have to type this). That will apply a black outline around your photos, however, I
think this postcard would be better with a white outline so right click on the white color patch on the color line and select ‘set line color'.
In order to see the white outlines on a white page you will need to change the page background color to be a color such as pale grey. To do this
just drag a pale grey color patch from the color line onto the page background.
Wow, that looks good and was so easy to do!
Here's how to save it and send it to your family and friends. Ensure that nothing is selected. Then go to File > Export (choosing this option
rather than 'Export JPG' will allow you to define the export properties), choose JPEG as the file type, give your file a name and select Export.
In the Bitmap size tab select to export the Page, the size in this case will be 507 wide, which is fine. (If you are embedding the jpg in an email
then the maximum should be 800 pixels wide). Then select Export. Simply drag the JPG into your email content if your email client allows. If
that's not possible then use something like picturepaste.com or attach it to your email as the JPG file.
Your family and friends will be most impressed!
Having created your holiday card you can, of course, include it on your web page as a pop-up gallery if you are using Xara Web Designer or Xara
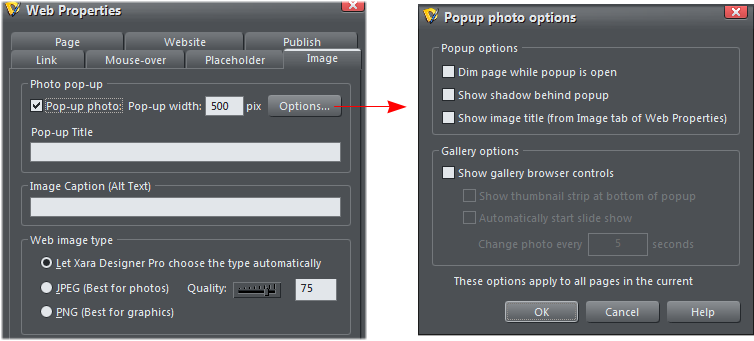
Designer Pro. If you are, select all the photos, open the Web Properties dialog using Ctrl+Shift+W and on the image tab select the check box
‘Pop-up Photo’ and click OK. All your photos are now clickable with thumbnails and pop ups!
When making web-pop-ups you can select a number of options such as dimming the page, adding shadows, and showing browser controls on the
photos, so viewers can start an automatic slideshow, do a Next or Previous, etc. Click on the Options button in Web Properties.
Once you’re done you can preview your web page and try your pop ups by clicking the preview icon on the top toolbar.
That's it! It's so quick and simple. I hope you enjoy using creating your own postcards.
After you have imported all your photos you may need to adjust some of them for brightness or color saturation so they tone better with each
other. To do that select the Photo tool and then use the auto-enhance or individual photo enhancing tools on the editor.
Repeat this for all of your photos.
At this stage I think that the postcard is looking very crowded and it would be much better with a white edge around all the photos to give them
some individual space.
Using the Selector tool, Lasso select around the whole group of photos but not the heading. In this example, the status line at the
bottom of the page says that 10 photos are selected.
On the top toolbar select a line width, such as 4pt or 6pt (you have to type this). That will apply a black outline around your photos, however, I
think this postcard would be better with a white outline so right click on the white color patch on the color line and select ‘set line color'.
In order to see the white outlines on a white page you will need to change the page background color to be a color such as pale grey. To do this
just drag a pale grey color patch from the color line onto the page background.
Wow, that looks good and was so easy to do!
Here's how to save it and send it to your family and friends. Ensure that nothing is selected. Then go to File > Export (choosing this option
rather than 'Export JPG' will allow you to define the export properties), choose JPEG as the file type, give your file a name and select Export.
In the Bitmap size tab select to export the Page, the size in this case will be 507 wide, which is fine. (If you are embedding the jpg in an email
then the maximum should be 800 pixels wide). Then select Export. Simply drag the JPG into your email content if your email client allows. If
that's not possible then use something like picturepaste.com or attach it to your email as the JPG file.
Your family and friends will be most impressed!
Having created your holiday card you can, of course, include it on your web page as a pop-up gallery if you are using Xara Web Designer or Xara
Designer Pro. If you are, select all the photos, open the Web Properties dialog using Ctrl+Shift+W and on the image tab select the check box
‘Pop-up Photo’ and click OK. All your photos are now clickable with thumbnails and pop ups!
When making web-pop-ups you can select a number of options such as dimming the page, adding shadows, and showing browser controls on the
photos, so viewers can start an automatic slideshow, do a Next or Previous, etc. Click on the Options button in Web Properties.
Once you’re done you can preview your web page and try your pop ups by clicking the preview icon on the top toolbar.
That's it! It's so quick and simple. I hope you enjoy using creating your own postcards.
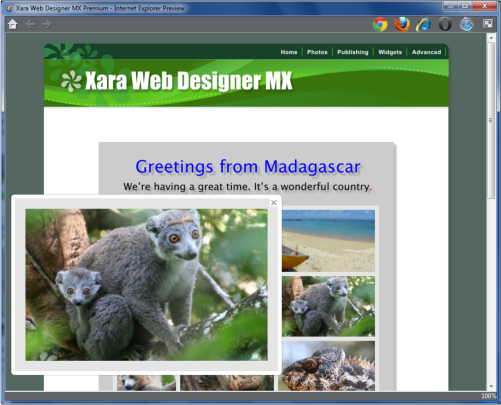


 My postcard as a web page with pop-up photos


