

© Xara Group Limited


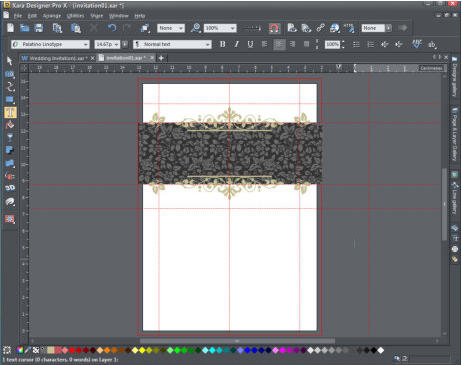
Now we'll mirror the top graphics onto the bottom of the patterned rectangle. Click above the first graphic in the top left and then drag to create a marker rectangle around all three graphics. Click Ctrl+G, to group them. Click Ctrl+K to make the clone and then drag it off so it is near to where you
 want it. Now flip the group horizontally using the flip button on the InfoBar at the top, and put it in position by dragging or using the keyboard arrow
 keys. (Alternatively, you could select the group and create a copy by pressing the right mouse button and dragging the copy into position - known as
 right-mouse-button-drag). To ungroup the graphics select the group and use Ctrl+U.
Floral tiled background with top and bottom graphics
Adding the text
Now that the decorative elements of the design are in place, it's time to add some text.
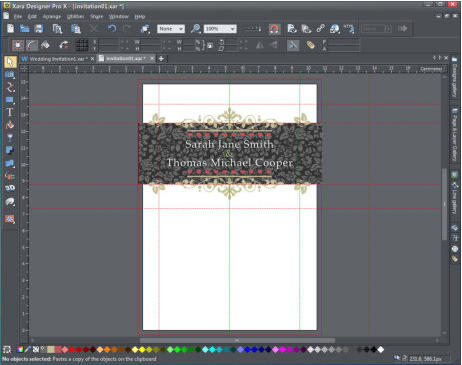
 Firstly, we will add the names of the bride and groom:
 Select the Text tool and drag out a line between the vertical side guidelines (this creates a text column of the required width). With the text
 tool still selected, select center justify on the Text tool InfoBar at the top to center the text, click on the white diamond on the color selector
for white text, select the type font and size, then type away. (I have used white Palatino Linotype 24px with the line spacing reduced to 65%).
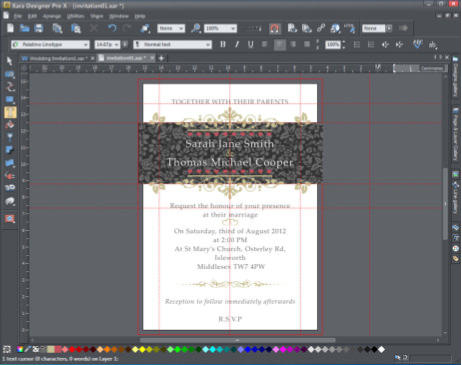
At this stage I decided a little extra color would be nice, so, from the Design Gallery drag the row of hearts onto the page and position centrally above
 the text, clone it for under the text and nudge the hearts and text into position using the keyboard arrow keys.
Addition of the rows of hearts and the text
Add more text and embedded graphics
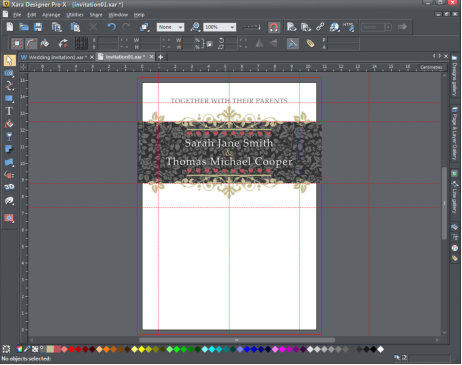
 Now we will add the text at the top. As previously, select the Text tool, drag out a line between the vertical side guidelines, select
 center justify, select a grey color, select the font and size then enter the text. (I used Palatino Linotype 20px, and a 70% black color).
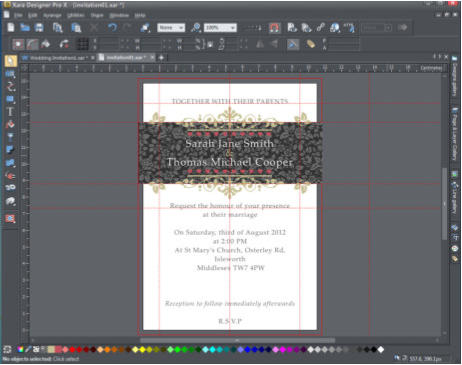
Create another text column for the bottom text. (I used Palatino Linotype 14px, 100% line spacing and a 70% black color).
 To embed the divider graphics:
From the Designs Gallery, drag the pair of hearts graphic onto the background, off the invite. Select it and use Ctrl+X to copy it to your clipboard.
 Select the Text tool, insert the cursor after the word 'marriage', on your keyboard, hit Enter to create a blank line space and then Ctrl+V to paste the
 graphic. The graphic is now embedded within the text column so they are now one object which is very useful for repositioning.
Use the same technique for the bottom divider - adding a blank line space above and below it will create a bit of 'air'.
  That's it - finished!
  Now export your wedding invitation as a PDF and send it to your printer. To do that, select file and export then enter a file name and select PDF from
 the drop down list. You are given a selection of choice of PDF quality levels depending on whether you want to print it or email it.
So that you can experiment with you creativity we have provided some alternative components in the clipart file. Have fun!
 Xara Photo & Graphic Designer is the most flexible and time-saving all-in-one solution for impressive graphics: Powerful image editing, astounding
 illustration capabilities, professional design templates & extensive desktop publishing (DTP), all in a single intuitive program! It's ideal for private and
 professional use: at home, in clubs, in academic institutions, and at work. We hope that you have enjoyed using it.
 marker rectangle around all three graphics. Click Ctrl+G, to group them. Click Ctrl+K to make the clone and then drag it off so it is near to where you
 want it. Now flip the group horizontally using the flip button on the InfoBar at the top, and put it in position by dragging or using the keyboard arrow
 keys. (Alternatively, you could select the group and create a copy by pressing the right mouse button and dragging the copy into position - known as
 right-mouse-button-drag). To ungroup the graphics select the group and use Ctrl+U.
Floral tiled background with top and bottom graphics
Adding the text
Now that the decorative elements of the design are in place, it's time to add some text.
 Firstly, we will add the names of the bride and groom:
 Select the Text tool and drag out a line between the vertical side guidelines (this creates a text column of the required width). With the text
 tool still selected, select center justify on the Text tool InfoBar at the top to center the text, click on the white diamond on the color selector
for white text, select the type font and size, then type away. (I have used white Palatino Linotype 24px with the line spacing reduced to 65%).
At this stage I decided a little extra color would be nice, so, from the Design Gallery drag the row of hearts onto the page and position centrally above
 the text, clone it for under the text and nudge the hearts and text into position using the keyboard arrow keys.
Addition of the rows of hearts and the text
Add more text and embedded graphics
 Now we will add the text at the top. As previously, select the Text tool, drag out a line between the vertical side guidelines, select
 center justify, select a grey color, select the font and size then enter the text. (I used Palatino Linotype 20px, and a 70% black color).
Create another text column for the bottom text. (I used Palatino Linotype 14px, 100% line spacing and a 70% black color).
 To embed the divider graphics:
From the Designs Gallery, drag the pair of hearts graphic onto the background, off the invite. Select it and use Ctrl+X to copy it to your clipboard.
 Select the Text tool, insert the cursor after the word 'marriage', on your keyboard, hit Enter to create a blank line space and then Ctrl+V to paste the
 graphic. The graphic is now embedded within the text column so they are now one object which is very useful for repositioning.
Use the same technique for the bottom divider - adding a blank line space above and below it will create a bit of 'air'.
  That's it - finished!
  Now export your wedding invitation as a PDF and send it to your printer. To do that, select file and export then enter a file name and select PDF from
 the drop down list. You are given a selection of choice of PDF quality levels depending on whether you want to print it or email it.
So that you can experiment with you creativity we have provided some alternative components in the clipart file. Have fun!
 Xara Photo & Graphic Designer is the most flexible and time-saving all-in-one solution for impressive graphics: Powerful image editing, astounding
 illustration capabilities, professional design templates & extensive desktop publishing (DTP), all in a single intuitive program! It's ideal for private and
 professional use: at home, in clubs, in academic institutions, and at work. We hope that you have enjoyed using it.


