


 © Xara Group Limited


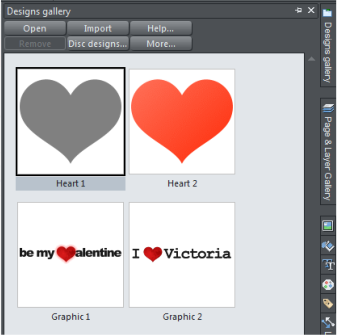
 Adding the heart shapes
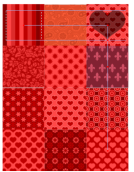
From the Designs Gallery, drag Heart1 onto the first texture. Use Snap to Objects to align the heart centrally over your first texture. You will
see a red center marker to help with the alignment.
Now we need to duplicate the heart shape on all the other textures. Select the heart then select Ctrl+K to clone the object on top of the original and
then drag the top clone to the right, using the blue lines to position it. For exact positioning you could, alternatively, select the heart, hold down the
control key on the keyboard, (this constrains movement to either horizontal or vertical) and drag the heart horizontally to the right, the blue lines will
show you when the heart is aligned with the next texture) then right click on the mouse to drop the cloned heart in place. Repeat this step until you
have all 12 hearts.
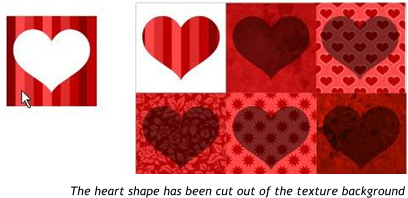
Cutting the hearts out of the patterns/textures
This may be likened to using a cookie cutter to cut a shape out of a sheet of pastry. Select your first texture, then on your keyboard hold down the shift
key and select the heart shape that is on top of the texture. This means that both objects are selected and you will notice in the status bar in the
bottom left of your window it says - 2 objects on layer 1.
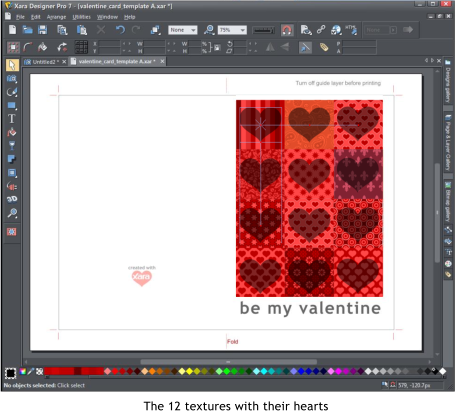
With your texture and heart still selected go to the Arrange menu, choose Combine Shapes and then Slice (cut) shapes. The shape on top will cut a
heart shape out of your texture, you can just drag the unwanted bit of texture out of the way and delete it. Alternatively, use the quick keyboard
shortcut to do the cut out by selecting both objects then Ctrl+4 (note that this doesn't work using the number keypad).
Color editing
You could finish your card here, but let’s have some fun and experiment with a few colors. On the color line at the bottom of the window, hover your
pointer over the white square on the left and you will see that the label, ‘background color’, pop up. Move your pointer to the right over the other
squares and you will see the name labels of all the patterns and textures that were used on the hearts on the card.
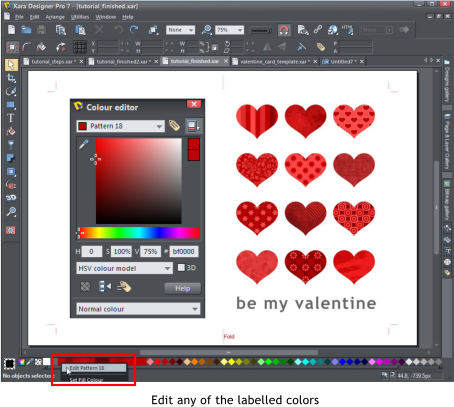
To edit any of the labelled colors, open the color editor by hovering over the color square and click on the right mouse button. Then select the top
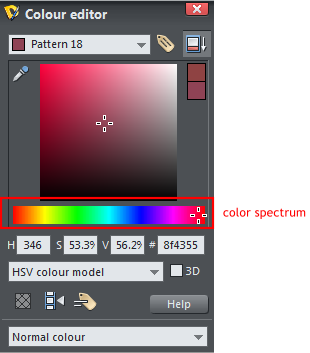
option to edit the color. Move the slider along the color spectrum to see other colors and then click on the tone that you want. As you select a color
you will see the color change in real time. There is no need to exit the color editor to change the next heart, simply drag the labelled color square from
the color line onto the color editor.
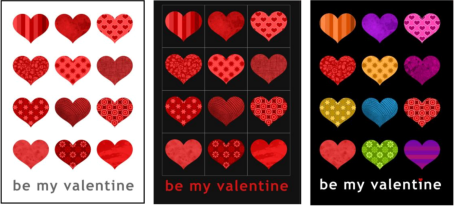
Example 2
I have changed the background color to black and the text to red.
Example 3
I have changed the background color to black, the text to white and the colors of the pattern and texture hearts. I couldn't resist substituting the dot
on top of the 'i' in valentine with a heart. (Copy one of the hearts into an empty area of the card, then drag the corner handle to reduce it to a tiny size
and position it over the dot of the letter i).
That's it! Three variations of the card created quickly and easily.
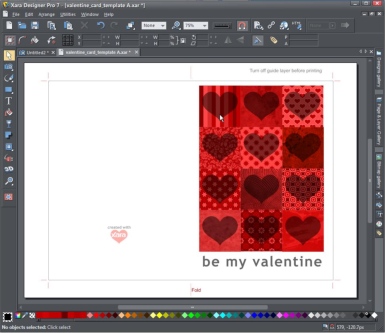
To save your creation, go to File and Save As - name and save your card as a .xar file so that you can return to it and edit it in the future. The last step
is to remove the guidelines from the card. Go to the Guide layer in the Page and Layer Gallery and click on the eye icon next to the guide layer
to toggle the visibility off.
Now you can just print out your card (File > Print), fold and cut it using the trim lines. If instead you wish to email your card without the blank
left side (which is the back of the card if you print and fold it) and edges then you could export it as a jpg (File > Export JPG), then open it up
again in Xara Photo & Graphic Designer and crop it to just the front of the card - to do that, select the image and go to the Photo tool then
simply drag on any of the 8 control handles around the outside to adjust the edges of the cropped area to the front of the card. Then select it again and
export as a jpg which you can send as an attachment.
Xara Photo & Graphic Designer and Designer Pro 7 offer powerful image editing tools, astounding illustration capabilities, professional design
templates & extensive desktop publishing (DTP), all in a single intuitive program! Find out more on our website www.xara.com/designer.
Adding the heart shapes
From the Designs Gallery, drag Heart1 onto the first texture. Use Snap to Objects to align the heart centrally over your first texture. You will
see a red center marker to help with the alignment.
Now we need to duplicate the heart shape on all the other textures. Select the heart then select Ctrl+K to clone the object on top of the original and
then drag the top clone to the right, using the blue lines to position it. For exact positioning you could, alternatively, select the heart, hold down the
control key on the keyboard, (this constrains movement to either horizontal or vertical) and drag the heart horizontally to the right, the blue lines will
show you when the heart is aligned with the next texture) then right click on the mouse to drop the cloned heart in place. Repeat this step until you
have all 12 hearts.
Cutting the hearts out of the patterns/textures
This may be likened to using a cookie cutter to cut a shape out of a sheet of pastry. Select your first texture, then on your keyboard hold down the shift
key and select the heart shape that is on top of the texture. This means that both objects are selected and you will notice in the status bar in the
bottom left of your window it says - 2 objects on layer 1.
With your texture and heart still selected go to the Arrange menu, choose Combine Shapes and then Slice (cut) shapes. The shape on top will cut a
heart shape out of your texture, you can just drag the unwanted bit of texture out of the way and delete it. Alternatively, use the quick keyboard
shortcut to do the cut out by selecting both objects then Ctrl+4 (note that this doesn't work using the number keypad).
Color editing
You could finish your card here, but let’s have some fun and experiment with a few colors. On the color line at the bottom of the window, hover your
pointer over the white square on the left and you will see that the label, ‘background color’, pop up. Move your pointer to the right over the other
squares and you will see the name labels of all the patterns and textures that were used on the hearts on the card.
To edit any of the labelled colors, open the color editor by hovering over the color square and click on the right mouse button. Then select the top
option to edit the color. Move the slider along the color spectrum to see other colors and then click on the tone that you want. As you select a color
you will see the color change in real time. There is no need to exit the color editor to change the next heart, simply drag the labelled color square from
the color line onto the color editor.
Example 2
I have changed the background color to black and the text to red.
Example 3
I have changed the background color to black, the text to white and the colors of the pattern and texture hearts. I couldn't resist substituting the dot
on top of the 'i' in valentine with a heart. (Copy one of the hearts into an empty area of the card, then drag the corner handle to reduce it to a tiny size
and position it over the dot of the letter i).
That's it! Three variations of the card created quickly and easily.
To save your creation, go to File and Save As - name and save your card as a .xar file so that you can return to it and edit it in the future. The last step
is to remove the guidelines from the card. Go to the Guide layer in the Page and Layer Gallery and click on the eye icon next to the guide layer
to toggle the visibility off.
Now you can just print out your card (File > Print), fold and cut it using the trim lines. If instead you wish to email your card without the blank
left side (which is the back of the card if you print and fold it) and edges then you could export it as a jpg (File > Export JPG), then open it up
again in Xara Photo & Graphic Designer and crop it to just the front of the card - to do that, select the image and go to the Photo tool then
simply drag on any of the 8 control handles around the outside to adjust the edges of the cropped area to the front of the card. Then select it again and
export as a jpg which you can send as an attachment.
Xara Photo & Graphic Designer and Designer Pro 7 offer powerful image editing tools, astounding illustration capabilities, professional design
templates & extensive desktop publishing (DTP), all in a single intuitive program! Find out more on our website www.xara.com/designer.

 Use Snap to Objects to align the heart centrally over your first texture


 Drag the unwanted
texture out of the
way and delete it
Drag the unwanted
texture out of the
way and delete it


