


© Xara Group Limited


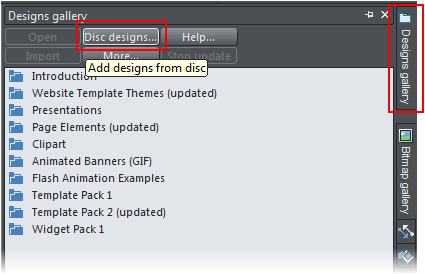


Open Xara Web Designer and the first thing we need to do is add the new designs into the Designs Gallery. On the right you will see the vertical tab – Designs Gallery. Select it and it will fly out to reveal several folders of designs. In the Designs Gallery select Disc designs then browse to the folder on
your computer that contains the unzipped files (you will see only a Xarainfo file), select it and then select to add it to the index. Click on the folder
and you will see that it contains a collection of page elements and the finished website.
Step 1. Creating the pages and site navigation
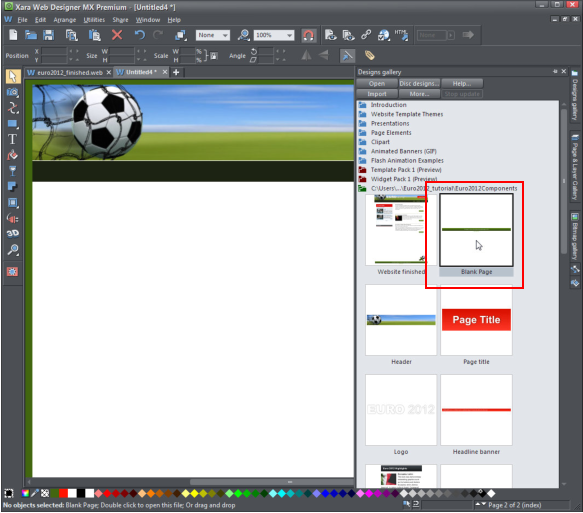
In the Designs Gallery, double click on the blank page that we have provided. The page contains the header and footer elements which have been
placed on the page background layer so that when we create a new blank page the header will be present on all new pages. The footer is a repeating
object so will also appear on all new pages.
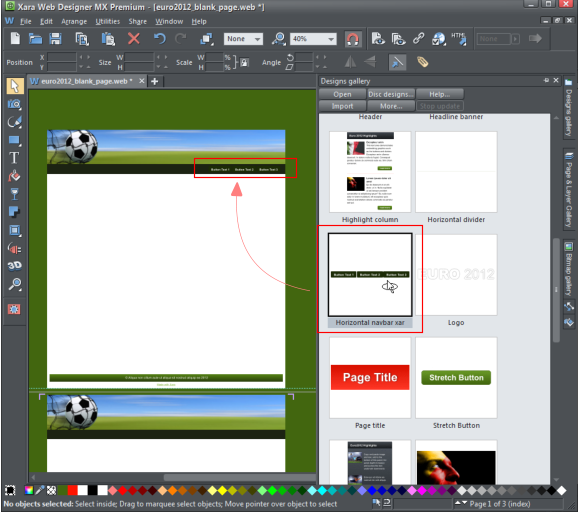
Add the site navigation by dragging the horizontal navbar from the Designs Gallery and dropping it onto the black bar beneath the header image. The
navbar is set to expand to the left when new buttons are added, so position it to the right-hand side of the page.
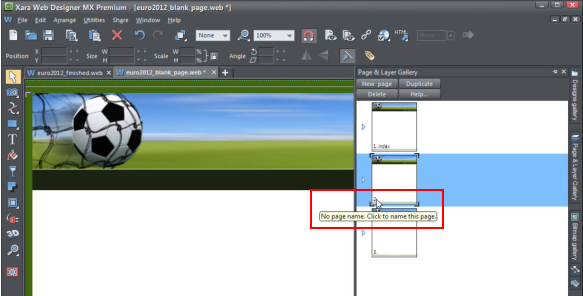
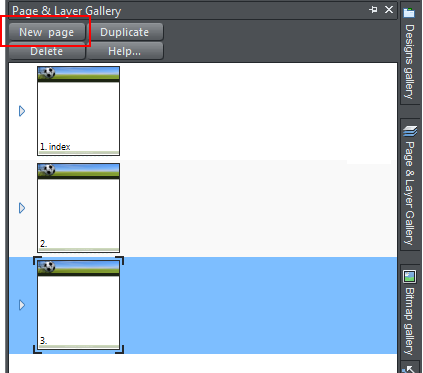
Now we can create the other two pages: With the Page & Layer gallery open click the New Page button twice to create the second and third pages. You
will now see all three pages in the Page & Layer gallery. By default the pages will just be numbered so now is a good time to give the pages meaningful
names. The page names will also become the HTML names when the site is exported and published, therefore page naming should follow HTML naming
convention - the home page should be called ‘index’ and all other page names should have no blank spaces; if you need to use more than one word then
separate them using an underscore. Click on the number to open the editor - I have named my pages index, news and video.
Step 2. Linking your pages
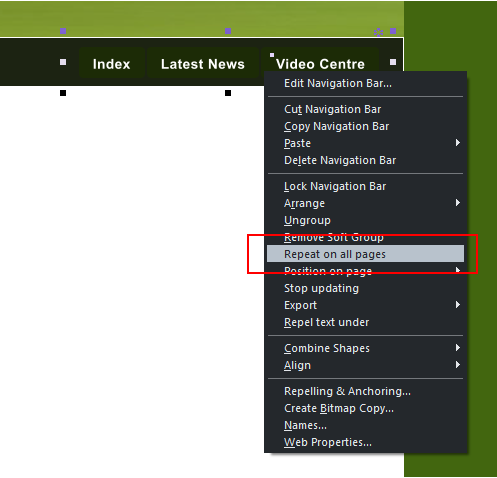
Right click on the navbar and select ‘Repeat on all pages’. You will see a small floral like symbol appear above the navbar, which signifies that the
navbar is now a repeating object, and will appear on all the pages in this website. Any changes and additions will be updated instantly across all pages.
Tip: you can move between the pages by clicking on the thumbnails in the Page & Layer gallery or you can right click somewhere on the page background
and select Multiple page view, which will allow you to scroll between pages in the site.
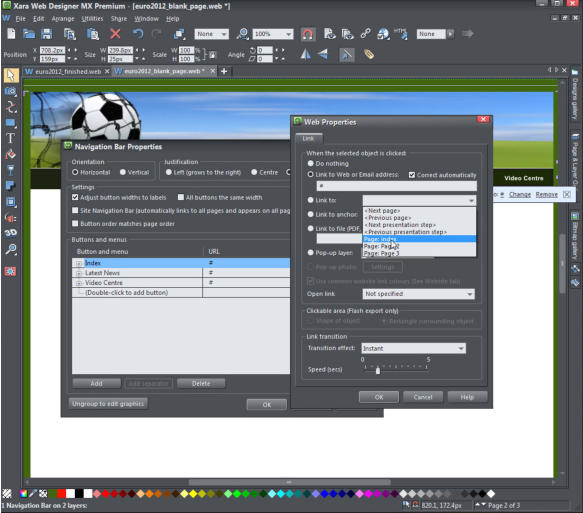
Now to set the links; double click on the navbar to open the Navigation Bar Properties dialog. Edit the button labels to read: Home, Latest News and
Video Centre. Now double click in the URL field of a button to open the Web Properties dialog. Expand the dropdown in the Link To: field, select the
relevant page and click OK. Do that for all three buttons then select OK to close the dialog.
The site navigation is now complete. You can check that the pages are all linked correctly by clicking the Preview website button on the
top control bar, to launch a browser preview.
Designs Gallery. Select it and it will fly out to reveal several folders of designs. In the Designs Gallery select Disc designs then browse to the folder on
your computer that contains the unzipped files (you will see only a Xarainfo file), select it and then select to add it to the index. Click on the folder
and you will see that it contains a collection of page elements and the finished website.
Step 1. Creating the pages and site navigation
In the Designs Gallery, double click on the blank page that we have provided. The page contains the header and footer elements which have been
placed on the page background layer so that when we create a new blank page the header will be present on all new pages. The footer is a repeating
object so will also appear on all new pages.
Add the site navigation by dragging the horizontal navbar from the Designs Gallery and dropping it onto the black bar beneath the header image. The
navbar is set to expand to the left when new buttons are added, so position it to the right-hand side of the page.
Now we can create the other two pages: With the Page & Layer gallery open click the New Page button twice to create the second and third pages. You
will now see all three pages in the Page & Layer gallery. By default the pages will just be numbered so now is a good time to give the pages meaningful
names. The page names will also become the HTML names when the site is exported and published, therefore page naming should follow HTML naming
convention - the home page should be called ‘index’ and all other page names should have no blank spaces; if you need to use more than one word then
separate them using an underscore. Click on the number to open the editor - I have named my pages index, news and video.
Step 2. Linking your pages
Right click on the navbar and select ‘Repeat on all pages’. You will see a small floral like symbol appear above the navbar, which signifies that the
navbar is now a repeating object, and will appear on all the pages in this website. Any changes and additions will be updated instantly across all pages.
Tip: you can move between the pages by clicking on the thumbnails in the Page & Layer gallery or you can right click somewhere on the page background
and select Multiple page view, which will allow you to scroll between pages in the site.
Now to set the links; double click on the navbar to open the Navigation Bar Properties dialog. Edit the button labels to read: Home, Latest News and
Video Centre. Now double click in the URL field of a button to open the Web Properties dialog. Expand the dropdown in the Link To: field, select the
relevant page and click OK. Do that for all three buttons then select OK to close the dialog.
The site navigation is now complete. You can check that the pages are all linked correctly by clicking the Preview website button on the
top control bar, to launch a browser preview.


