thinking outside the box


XARA TUTORIAL
Text here...


Animating objects to reveal on the page
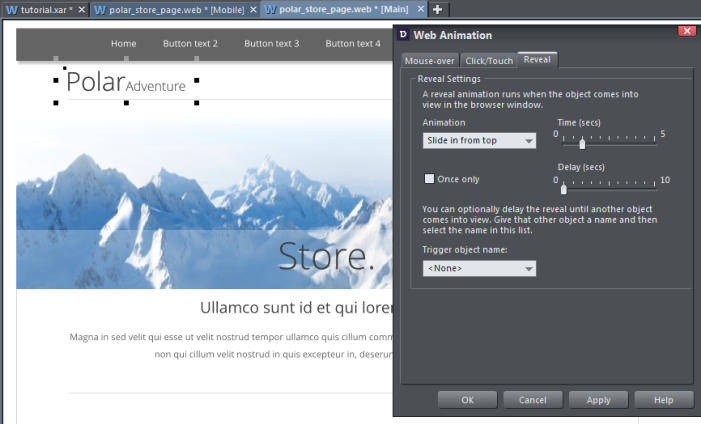
Web animations are a great way to achieve eye-catching visual content on your web pages. Any object on a web page can be quickly animated in response to an event like a mouse-over, a mouse-click or a screen touch. For example, objects can fade in when first displayed, they can wobble as you mouse-over it, and have a different animation when you click on it. You can also trigger pop-up text or pop-up layers and you can have objects reveal themselves as you scroll down a page. To animate an object, simply right-click on it and choose Web Animation from the drop down menu, or go to Utilities > Web Animation. First, I will make the header title slide in from the top, so I select the header, right click on it and select ‘Web Animation’. I select the ‘Reveal’ tab, then in the drop down menu select ‘Slide in from top’ and tick the ‘once only’ box., then click ‘Apply’. Leave the dialog open for further use. Select to preview the page and see that the heading title slides onto the web page and remains there when the page is scrolled – it will not slide in each time that it comes into view. Tip: On the Reveal animation you can set it to be one-off, or to animate every time the item is revealed - so it animates repeatedly as you scroll up and down and reveal the item. Setting the Heading Title to slide in from the top when the web page is displayed I will also make the social media buttons animate to draw attention to these after the page has loaded. Select the ‘soft grouped’ object (see above) and set the Reveal animation to ‘Slide in from right’ after 4 seconds with a 2 second delay, so it only appears later, and slides in slowly. These buttons are now sticky with reveal animation. Tip: If you want the animations to slide in from the very outside edge of the browser window (instead from the edge of the page area) you need to remove the page clip option. This is on Website Properties dialog > Website tab, bottom - uncheck 'clip to page edges'. I will animate the small thumbnail images similarly so that they slide in from the left and right and I will make them ‘reveal’ each time they come into sight. Select the top image on the left side of the page and in the ‘Reveal’ tab select ‘Slide in from left’ but this time don’t select the ‘Once only’ option, then select ‘Apply’. Also do this for the three other images on the page. Note – when you preview the page, the photos have already been set to be ‘pop-ups’ so, when clicked, they will open as a larger version.Making objects animate on mouseover
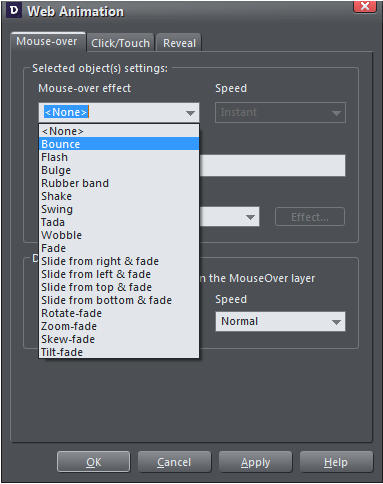
Now add some mouse-over animation to the Buy Now buttons. Select one of the buttons and then select the mouse-over tab on the Web Animation dialog. Select one of the animation types in the drop down ‘Mouse-over’ menu. Do this for all of the Buy Now buttons. I have set a different style on each button so you can see some of the example animation types available when you view my finished page. I have used wobble, bounce, bulge, rubber band and swing mouse-over effects. Mouse-over animation effects You can also enter some pop-up text which will appear when the object is moused-over, or you can set it to trigger a pop-up layer, which could also be animated. Experiment with the various animated effects. I have also applied a mouse-over 'swing' animation with a fast setting to the NavBar object. This applies the effect to each of the individual buttons in the NavBar. (When previewing the web page note that this is a one page website so these buttons won't actually go anywhere. The Click/Touch tab enables you to choose an animation that will play when the object is clicked (or on a touch device, touched). As with the Mouse-over tab you can choose the animation effect and speed and can setup a default effect that will apply to all your buttons that have a mouse-over graphic.

Stretchy, Sticky and Animated Objects on your Website