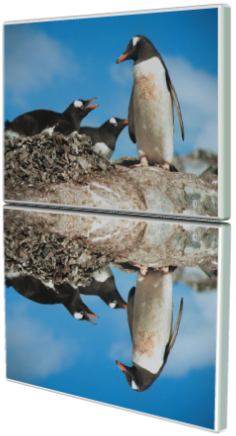


 5. Now drag on the face of the lower image, but this time holding down the Shift key, and drag slightly downwards, so that the reflection is now at
the right angle. Or if you want to use the exact values I've used here, then select Angle 1 from the InfoBar, and a value of 11 degrees. Then put the
lower object to the back (Ctrl+B) and drag it back up so the top and bottom edges align. It should now look like this:
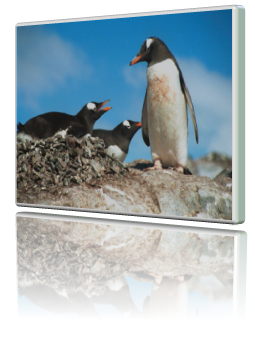
6. You might want to make tiny manual adjustments to the angle or size to better align the top and reflected image. Then just select the
Transparency tool and select the lower image, and drag downwards from about the middle of the top image to create the faded reflection effect.
In this case I've moved them apart slightly so it looks as if it's floating off the surface.
7. Finally if you want the ‘on a table’ look shown in the image at the start of this tutorial, draw a rectangle behind both images, and give it a
graduated background - in this case it's a three stage fill from pale blue, to grey, to black.
5. Now drag on the face of the lower image, but this time holding down the Shift key, and drag slightly downwards, so that the reflection is now at
the right angle. Or if you want to use the exact values I've used here, then select Angle 1 from the InfoBar, and a value of 11 degrees. Then put the
lower object to the back (Ctrl+B) and drag it back up so the top and bottom edges align. It should now look like this:
6. You might want to make tiny manual adjustments to the angle or size to better align the top and reflected image. Then just select the
Transparency tool and select the lower image, and drag downwards from about the middle of the top image to create the faded reflection effect.
In this case I've moved them apart slightly so it looks as if it's floating off the surface.
7. Finally if you want the ‘on a table’ look shown in the image at the start of this tutorial, draw a rectangle behind both images, and give it a
graduated background - in this case it's a three stage fill from pale blue, to grey, to black.


 © Xara Group 2011